Month: September 2024 Page 1 of 3

hpi baja 5b flux manual

Welcome to the HPI Baja 5B Flux manual! This guide provides comprehensive instructions for setup, operation, and maintenance, ensuring optimal performance and longevity of your RC model․

1․1 Overview of the Manual Structure

The HPI Baja 5B Flux manual is organized into clear sections for easy navigation․ It includes an introduction, key components overview, assembly instructions, maintenance tips, and troubleshooting guides․ The manual also features exploded views for part identification and setup․ Designed to be user-friendly, it covers everything from initial setup to advanced customization, ensuring a comprehensive understanding of your RC model․

1․2 Importance of Reading the Manual

Reading the HPI Baja 5B Flux manual is crucial for proper assembly, maintenance, and operation․ It provides essential safety guidelines, troubleshooting tips, and performance optimization strategies․ Understanding the manual ensures you maximize your RC model’s potential while minimizing risks of damage or injury․ It serves as a comprehensive guide to help you enjoy a smooth and rewarding experience with your Baja 5B Flux․

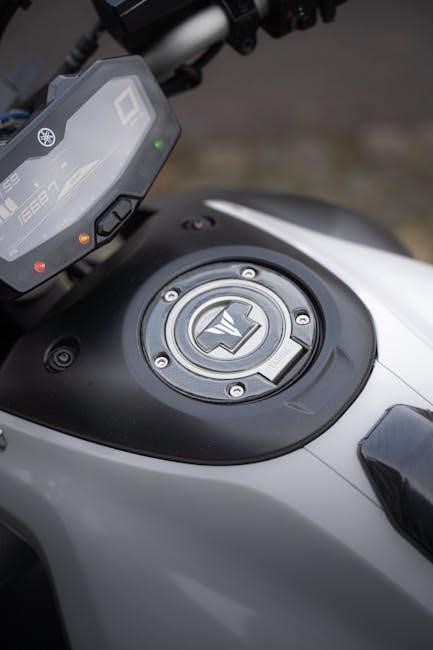
Key Components of the HPI Baja 5B Flux

The HPI Baja 5B Flux features a powerful brushless motor system, advanced 2․4 GHz radio control, and durable chassis design, ensuring exceptional performance and reliability for enthusiasts․

2․1 Understanding the Flux Brushless System

The Flux Brushless System in the HPI Baja 5B Flux is a high-performance, water-resistant motor and ESC combination designed for maximum efficiency and power delivery․ This system eliminates brush wear, reducing maintenance and extending lifespan․ It provides smooth acceleration, consistent power output, and improved thermal management, making it ideal for high-speed and off-road applications․ The brushless motor’s advanced design ensures higher torque and speed, enhancing overall vehicle performance and durability․

2․2 Radio Control System Overview

The HPI Baja 5B Flux features a reliable 2․4 GHz radio control system, ensuring interference-free operation and precise control․ The system includes a high-quality transmitter and receiver, providing smooth throttle and steering response․ Designed for durability and performance, this system supports advanced features like adjustable endpoints and failsafe settings, making it ideal for both beginners and experienced RC enthusiasts to enjoy seamless driving experiences․

Assembly and Initial Setup

This section guides you through assembling the HPI Baja 5B Flux, ensuring proper installation of components and initial setup for optimal performance and safety․

3․1 Required Tools and Safety Precautions

Required tools include screwdrivers, pliers, and wrenches․ Safety precautions involve working in a well-ventilated area, avoiding flammable materials, and ensuring proper handling of electrical components․ Always wear protective gear and follow the manual’s guidelines to prevent accidents and ensure a safe assembly process․

3․2 Step-by-Step Assembly Instructions

The manual provides a detailed step-by-step guide for assembling the HPI Baja 5B Flux․ Each part is clearly identified, and instructions are easy to follow․ Diagrams and exploded views assist in understanding component placement․ Start with the chassis, then add suspension, steering, and electrical systems․ Ensure all bolts are tightened properly and double-check connections before powering up the model․

3․3 Initial Calibration and Setup

After assembly, calibrate the radio control system by binding the transmitter to the receiver․ Adjust the steering and throttle settings to ensure proper alignment․ Set the neutral position for the throttle and brake; Check all electrical connections and ensure the battery is securely installed․ Refer to the manual for precise calibration steps to ensure smooth operation and optimal performance of your HPI Baja 5B Flux․

Maintenance and Repair

Regular maintenance is crucial for optimal performance․ Inspect the engine, drivetrain, and electrical systems․ Clean and lubricate moving parts․ Refer to the manual for detailed guidance․

4․1 Regular Maintenance Schedule

Regular maintenance ensures optimal performance and longevity․ Clean the air filter after each use and lubricate moving parts monthly․ Check tire pressure and tighten all screws regularly․ Inspect the battery and electrical connections for wear․ Clean the chassis and drivetrain thoroughly after each session․ Refer to the manual for a detailed schedule and procedures to maintain your HPI Baja 5B Flux in top condition․

4․2 Common Repairs and Troubleshooting

Common repairs include replacing worn-out parts like bearings, gears, and suspension components․ Troubleshoot issues like lack of power by checking battery connections and the ESC․ Address broken axles or damaged diffs promptly․ Refer to exploded views for part identification․ Regularly inspect and clean electrical components to prevent malfunctions․ Always consult the manual for detailed repair procedures and use genuine HPI parts for reliability․

Exploded Views and Part Identification

Exploded views provide detailed diagrams of components, aiding in disassembly and reassembly․ Use these views to identify parts, ensuring accurate repairs and upgrades for your Baja 5B Flux․

5․1 Identifying Key Components

Identify key components of the HPI Baja 5B Flux using detailed exploded views and part numbers․ The manual highlights essential parts like the Flux brushless system, radio control components, engine, transmission, and chassis․ Familiarize yourself with these elements to ensure proper assembly, maintenance, and upgrades․ Use the diagrams to locate and identify each part accurately, cross-referencing with the provided parts list for clarity․

5․2 Using Exploded Views for Assembly

Exploded views in the HPI Baja 5B Flux manual provide detailed visual breakdowns of the model, showing how components fit together․ Use these diagrams to identify parts during assembly, ensuring correct placement and orientation․ Each view is accompanied by part numbers and descriptions, making it easier to cross-reference and verify compatibility․ This feature is invaluable for both initial assembly and future upgrades or repairs, helping you understand how each section integrates into the overall design․

Safety Guidelines and Precautions

Always follow safety guidelines to ensure safe operation of your HPI Baja 5B Flux․ Proper handling of batteries and electrical components is crucial to prevent hazards and damage․

6․1 Operating Safety Tips

Ensure a safe operating environment by wearing protective gear and keeping bystanders at a distance․ Avoid operating near water or in extreme weather conditions․ Always use the correct battery type and follow charging guidelines to prevent damage or fire hazards․ Regularly inspect the model for wear and tear, and ensure all parts are securely fastened before use․ Adhere to local regulations and never operate in restricted areas․

6․2 Battery and Electrical Safety

  • Always use high-quality, compatible batteries designed for the HPI Baja 5B Flux to prevent damage or fire risks․
  • Charge batteries in a well-ventilated area, away from flammable materials, and follow the recommended charging procedure․
  • Never over-discharge or overcharge the battery, as this can lead to permanent damage or safety hazards․
  • Inspect electrical components regularly for signs of wear or damage and replace them if necessary․
  • Avoid exposing electrical parts to water or moisture, as this can cause malfunctions or electrical failure․

Performance Optimization

Adjust settings and fine-tune your HPI Baja 5B Flux for optimal performance, ensuring top speed and control․ Regular maintenance and upgrades can enhance its overall functionality and durability․

7․1 Adjusting Settings for Better Performance

Optimize your HPI Baja 5B Flux by adjusting gear ratios, suspension settings, and electronic speed controls․ Fine-tune the radio system for precise control and ensure proper tire selection for varying terrains․ Regularly maintain and upgrade components like bearings and shocks to enhance performance․ Refer to the manual for detailed calibration instructions and explore advanced settings using the Flux brushless system for maximum efficiency and speed․

7․2 Upgrading and Customizing Your Baja 5B

Enhance your HPI Baja 5B Flux by upgrading to aluminum parts for improved durability․ Install high-performance tires for better grip and customize the body with unique designs․ Add LED lights for enhanced visibility and style․ Explore aftermarket upgrades like programmable ESCs and high-torque servos․ Use the Flux brushless system’s programmable features to fine-tune performance․ Personalize your model to suit your driving style and terrain preferences for optimal results․

Troubleshooting Common Issues

Identify common issues like electrical malfunctions or mechanical faults․ Check connections, battery levels, and motor performance․ Refer to the manual for detailed diagnostic steps and solutions․

8․1 Diagnosing Electrical Problems

Identify electrical issues by checking power delivery, connections, and component functionality․ Look for symptoms like intermittent operation or complete system shutdown․ Inspect wires for damage or corrosion, and ensure all connections are secure․ Use a multimeter to test battery voltage and motor resistance․ Consult the manual for specific troubleshooting steps and solutions to resolve electrical faults efficiently․

8․2 Solving Mechanical Issues

Address mechanical problems by inspecting worn or damaged parts․ Check suspension components, drivetrain, and chassis for alignment issues․ Lubricate moving parts regularly and tighten loose connections․ Replace faulty bearings or gears promptly․ Use tools like Allen wrenches and hex keys for adjustments․ Refer to exploded views in the manual for part identification and assembly guidance to ensure proper repair and maintenance of your Baja 5B Flux․

Warranty and Support Information

Understand your warranty coverage and explore support options․ Contact HPI directly for assistance or visit their website for resources, ensuring your Baja 5B Flux remains in optimal condition․

9․1 Understanding Your Warranty

Your HPI Baja 5B Flux warranty provides coverage for manufacturing defects, ensuring peace of mind․ Review the terms to understand duration, covered components, and any applicable limitations․ Proper registration and maintenance are often required to validate the warranty․ Refer to the manual or HPI’s official website for detailed information and conditions․

9․2 Contacting HPI Support

For assistance, contact HPI Support through their official website, email, or phone․ Visit the HPI Racing website for contact details and support resources․ Online forums and communities also offer valuable troubleshooting tips and user experiences․ Ensure to have your model details ready for efficient support․ HPI’s customer service is known for being responsive and helpful, addressing warranty claims and technical inquiries effectively․

Additional Resources

Explore online forums, video tutorials, and guides for tips, troubleshooting, and customizations․ Visit the HPI website for official resources and community support to enhance your Baja 5B experience․

10․1 Online Forums and Communities

Engage with online forums and communities like RC Scrapyard, HPI Racing forums, and Facebook groups dedicated to the Baja 5B Flux․ These platforms offer valuable resources, troubleshooting tips, and user experiences․ Connect with enthusiasts to share modifications, ask questions, and gain insights for optimizing your model․ Such communities are excellent for staying updated and learning from experienced users․

10․2 Video Tutorials and Guides

Video tutorials and guides are excellent resources for visual learners․ Platforms like YouTube offer step-by-step instructions for assembling, maintaining, and upgrading your Baja 5B Flux․ Official HPI Racing channels and community creators provide detailed walkthroughs, covering topics from basic setup to advanced modifications․ These videos are invaluable for troubleshooting and gaining hands-on experience with your RC model․

11․1 Summary of Key Points

The HPI Baja 5B Flux manual provides essential guidance for assembly, maintenance, and operation․ It covers key components, safety tips, and troubleshooting․ Regular maintenance ensures longevity, while performance optimization enhances driving experience․ Exploded views aid in part identification, and warranty details offer support․ By following this manual, users can maximize their RC model’s potential and enjoy a seamless, high-performance driving experience․

overland park tv guide

Welcome to the Overland Park TV Guide, your comprehensive source for local TV listings, popular shows, and service provider options. Easily navigate schedules, plan your viewing, and stay entertained with our detailed guide.

Local TV Listings by Zip Code

Explore TV listings tailored to your area with our zip code-specific guide. Viewers in zip codes 66212, 66213, 66214, and 66223 can find channels and schedules for their exact location in Overland Park, Kansas.

66212

For residents of the 66212 zip code in Overland Park, Kansas, the TV guide provides a detailed schedule of local channels and programs. Channels include Kansas City PBS 19.1, 19.2, 19.3, and 19.4, offering a variety of educational, entertainment, and kids’ content. Popular shows such as “Whose Line Is It Anyway?” and “Sid Roth ─ Es Sobrenatural!” are featured, along with local programming. Viewers can also access over-the-air broadcasts, ensuring a wide range of options for all interests. The listings are updated daily, making it easy to plan your viewing experience. Whether you’re looking for live sports, news, or family-friendly shows, the 66212 TV guide has something for everyone. Stay entertained with the most accurate and up-to-date information tailored to your area.

66213

The 66213 zip code in Overland Park, Kansas, offers an extensive range of TV listings tailored to local viewers. With service providers like Spectrum and AT&T U-Verse, residents can enjoy a diverse selection of channels. Popular shows such as “Whose Line Is It Anyway?” and “Let’s Go Luna!” are frequently featured, catering to a wide audience. The TV guide for 66213 provides detailed schedules, including broadcast, cable, and satellite listings, making it easy to find your favorite programs. Whether you’re interested in live sports, news updates, or family-friendly content, the listings for 66213 ensure there’s always something to watch. Stay informed and entertained with the most up-to-date TV guide specifically designed for the Overland Park community in the 66213 area.

66214

The 66214 zip code in Overland Park, Kansas, offers a diverse range of TV listings, ensuring residents stay entertained and informed. This area is served by top providers like Spectrum and AT&T U-Verse, providing access to a wide array of channels. Local broadcasts include popular shows such as “Sid Roth ─ Es Sobrenatural!” and family-friendly programs like “Let’s Go Luna!”. The TV guide for 66214 is designed to help viewers easily navigate schedules, whether they prefer live sports, news, or prime-time entertainment. With both cable and satellite options available, residents can choose the package that best fits their viewing preferences. The guide also includes over-the-air listings, offering free access to local networks like Kansas City PBS. Stay up-to-date with the latest programming and never miss your favorite shows with the comprehensive TV listings for Overland Park’s 66214 zip code.

66223

The 66223 zip code in Overland Park, Kansas, offers a wide variety of TV listings, catering to diverse viewer preferences. Residents in this area can access a range of channels through providers like Spectrum and AT&T U-Verse, ensuring ample entertainment options. Local TV listings for 66223 include popular shows such as “Whose Line Is It Anyway?” and family-friendly programming like “Let’s Go Luna!”. The TV guide for this zip code also features live sports, news, and educational content from channels like Kansas City PBS. With both cable and satellite services available, viewers can customize their experience. Over-the-air options provide free access to local networks, making it easy to stay connected to community events and national broadcasts. Whether you’re a fan of comedy, drama, or live events, the 66223 TV listings ensure there’s always something to watch. Stay updated with the latest schedules and enjoy seamless entertainment in Overland Park’s 66223 area.

Service Providers

Overland Park TV Guide features listings from top service providers, including cable, satellite, and over-the-air options. Providers like Spectrum, AT&T U-Verse, and DirecTV offer diverse channel lineups, ensuring accessibility and affordability for all viewers.

Cable TV Listings

Cable TV listings in Overland Park offer an extensive range of channels and programs for viewers. Providers like Spectrum, AT&T U-Verse, and others provide high-definition channels, on-demand content, and DVR capabilities. These services ensure access to popular networks such as ESPN, HBO, and local stations. Users can enjoy a mix of entertainment, sports, and news, tailored to their preferences. The listings are updated regularly to reflect current programming schedules, allowing viewers to plan their viewing experience effortlessly. Whether it’s prime-time shows or daytime series, cable TV in Overland Park delivers a diverse and engaging lineup. With customizable packages, residents can choose plans that suit their needs, making cable TV a convenient and enjoyable option for entertainment.

Satellite TV Listings

Satellite TV listings in Overland Park provide a wide range of channels and programs for residents. Providers like DirecTV offer extensive coverage, including local and national networks, sports, movies, and premium content. With satellite TV, viewers can access live events, exclusive series, and news channels from across the country. The listings are updated daily, ensuring users stay informed about upcoming shows and schedule changes. Satellite TV is particularly beneficial for those in areas with limited cable access, offering a reliable and diverse viewing experience. DirecTV’s national coverage ensures that Overland Park residents can enjoy a broad selection of programming, including regional and national broadcasts. Whether it’s live sports, movies, or news, satellite TV listings in Overland Park cater to a variety of interests, providing endless entertainment options for the whole family.

Over-the-Air TV Listings

Over-the-air (OTA) TV listings in Overland Park offer a cost-effective way to enjoy local channels and programming without a cable or satellite subscription. Residents can access broadcasts from networks like Kansas City PBS, which includes channels such as 19.1, 19.2, 19.3, and 19.4. These listings provide a schedule of shows, including educational programs, kids’ content, and local events. OTA TV is ideal for those who prefer free access to basic channels, ensuring they stay connected to community news, weather, and entertainment. By using an antenna, viewers can receive high-definition signals, offering a reliable and crystal-clear viewing experience. The Overland Park TV Guide makes it easy to browse OTA listings, helping users plan their viewing schedule and discover new shows. With OTA, residents can enjoy a variety of programming without additional costs, making it a popular choice for budget-conscious households.

Popular Shows

Discover popular shows airing in Overland Park, featuring fan favorites like Whose Line Is It Anyway? and Let’s Go Luna!. Check schedules for primetime and daytime programming to catch your favorite series.

Prime Time Shows

Prime time in Overland Park offers a diverse lineup of engaging shows, ensuring something for everyone. From comedy to drama, viewers can enjoy popular series like Whose Line Is It Anyway?, which airs on local channels. Additionally, news programs and live sports events are highlights of the evening schedule. Families can tune into educational and entertaining content, such as Let’s Go Luna!, broadcast on Kansas City PBS. With a mix of national networks and local programming, prime time provides endless options for relaxation and entertainment after a busy day. Check the Overland Park TV Guide to plan your evening viewing and catch your favorite shows.

Daytime Shows

Daytime television in Overland Park offers a variety of engaging programs tailored to different audiences. Families can enjoy educational shows like Let’s Go Luna!, which airs on Kansas City PBS, promoting learning through fun adventures. Meanwhile, viewers seeking spiritual content can tune into Sid Roth ౼ Es Sobrenatural!, a popular program focusing on faith and inspiration. Local channels also feature a mix of lifestyle, news, and entertainment shows, providing updates on community events and national stories. With options ranging from children’s programming to informative talk shows, daytime TV in Overland Park caters to diverse interests. Whether you’re looking to relax, learn, or stay informed, the TV guide ensures you never miss your favorite daytime shows.

How to Use the TV Guide

Using the Overland Park TV Guide is straightforward and designed to enhance your viewing experience. Start by selecting your television service provider, such as AT&T U-Verse, Spectrum, or DirecTV, to view listings tailored to your subscription. Next, filter the guide by time slots or specific channels to find shows airing today or tonight. You can also search for your favorite programs by name or genre. For over-the-air antenna users, the guide provides detailed schedules for local channels, including Kansas City PBS and its affiliates. To stay organized, use the guide’s features to set reminders for upcoming shows or mark favorites. Additionally, explore the guide’s sections for live sports, new releases, and special events. Whether you’re planning your day or looking for something to watch tonight, the Overland Park TV Guide offers a user-friendly way to navigate and enjoy your television experience.

The Overland Park TV Guide is an essential tool for anyone looking to make the most of their television experience. Whether you prefer cable, satellite, or over-the-air channels, the guide provides detailed listings to help you find your favorite shows, sports, and events. With options to filter by time, channel, or genre, it’s easy to plan your day or night of viewing. The guide also highlights popular programs and local broadcasts, ensuring you never miss out on what’s trending or happening in your area. By offering a user-friendly interface and comprehensive coverage, the Overland Park TV Guide simplifies entertainment planning for residents and visitors alike. Stay informed, entertained, and connected with this invaluable resource for all your TV needs.

breezeline stream tv user guide

Breezeline Stream TV is a next-generation streaming platform offering live TV, DVR, On Demand content, and popular streaming apps like Netflix and Amazon Prime.

It provides a seamless entertainment experience with intuitive navigation and advanced features like voice search and time-shifting capabilities, all powered by Android TV.

1.1 Overview of Breezeline Stream TV

Breezeline Stream TV is a cutting-edge streaming device offering a seamless entertainment experience; It integrates live TV, DVR, On Demand content, and popular streaming apps like Netflix and Amazon Prime into one intuitive platform. With advanced features like voice search, time-shifting capabilities, and personalized recommendations, it provides a user-friendly interface powered by Android TV, making it a versatile choice for modern viewers seeking convenient access to their favorite shows and movies.

1.2 Key Features and Benefits

Breezeline Stream TV offers advanced time-shifting features like Live Rewind, Start Over, and Catch Up, ensuring you never miss your favorite shows. It provides a unified platform for live TV, DVR, On Demand content, and popular streaming services. The intuitive remote with voice search enhances navigation, while personalized recommendations via the SmartBar tailor your viewing experience. Its Android TV-powered system ensures smooth performance and easy access to a wide range of entertainment options.

Setting Up Breezeline Stream TV

Setting up Breezeline Stream TV involves connecting the device via HDMI, attaching the power adapter, and completing first-time installation to activate the service and connect to WiFi.

2.1 Physical Setup: Connecting the Device

Connect the HDMI cable from the Breezeline Stream TV device to your TV’s HDMI port. Attach the power adapter to the device and plug it into an electrical outlet.

For a stable connection, use the optional Ethernet cable if WiFi is unreliable. Ensure the device is properly seated and all cables are securely connected before proceeding.

Some screen images may be simulated. The device is powered by Android TV, ensuring a smooth and intuitive entertainment experience.

2.2 First-Time Installation and Activation

During the first-time installation, you’ll see a setup screen. Press the TIVO button to start the remote pairing process.

The indicator light will blink amber/yellow while searching for the Stream TV box. Once connected, follow on-screen instructions to complete activation, including selecting your WiFi network and entering the password.

Some screen images may be simulated. Ensure the device is properly connected and powered on before starting the activation process.

2.3 Connecting to WiFi

To connect your Breezeline Stream TV to WiFi, select your network from the available options and enter the password using the on-screen keyboard.

Ensure the password is entered correctly for a stable connection. If WiFi is unavailable or weak, you can optionally use an Ethernet cable for a wired connection.

Once connected, your device will have access to streaming services, live TV, and On Demand content, ensuring a seamless entertainment experience.

Navigating the Breezeline Stream TV Remote

The standard remote offers easy navigation, guide access, and streaming buttons. The multifunction remote adds voice search, replay, and accessibility options for enhanced control.

3.1 Standard Remote: Navigation and Basic Controls

The standard remote simplifies navigation with intuitive controls. Key buttons include channel up/down, volume control, and a numeric pad for direct channel selection. Dedicated streaming buttons provide quick access to popular apps. The remote also features a navigation ring for easy menu browsing and a back button to return to previous screens. These controls ensure seamless interaction with live TV, DVR, and On Demand content, enhancing your viewing experience.

3.2 Multifunction Remote: Advanced Features

The Multifunction Remote offers enhanced control with voice search, replay/advance buttons, and accessibility options. Voice commands simplify finding content, while replay skips back and advance moves forward. Accessibility features include text-to-speech and closed captions, ensuring ease of use. These advanced features streamline your entertainment experience, making navigation and content discovery more efficient and enjoyable on Breezeline Stream TV.

3.3 Voice Search and Accessibility Options

Breezeline Stream TV’s Multifunction Remote includes voice search, enabling easy content discovery. Simply speak to find shows, movies, or apps. Accessibility features like text-to-speech and closed captions ensure inclusivity. These options enhance usability, making the platform accessible to all users while simplifying navigation and content discovery.

Home Screen and Interface

The Home Screen serves as the central hub for Breezeline Stream TV, providing easy access to live TV, On Demand content, and streaming services.

It features the SmartBar, which offers personalized recommendations, making it simple to discover new shows and movies tailored to your viewing preferences.

4.1 The Home Screen: Starting Point for Entertainment

The Home Screen is your gateway to endless entertainment options on Breezeline Stream TV. It serves as the central hub, providing quick access to live TV, On Demand content, and popular streaming services.

From here, you can explore personalized recommendations via the SmartBar, browse trending shows, and seamlessly navigate between different entertainment options, making it intuitive to find and enjoy your favorite programs.

Its user-friendly design ensures a smooth and enjoyable viewing experience, whether you’re watching live TV, catching up on recorded shows, or discovering new content.

4.2 SmartBar: Personalized Recommendations

The SmartBar on Breezeline Stream TV delivers personalized recommendations tailored to your viewing habits, making it easy to discover new content and revisit favorites.

It integrates seamlessly with live TV, On Demand, and streaming services, providing a curated selection of shows and movies based on your preferences.

This feature enhances your entertainment experience by simplifying content discovery and ensuring you never miss out on what interests you most.

Managing Streaming Services

Breezeline Stream TV allows seamless integration of popular streaming services like Netflix, Amazon Prime, and Disney+, enabling easy access to your favorite content in one platform.

5.1 Adding and Accessing Popular Streaming Apps

Breezeline Stream TV supports a wide range of streaming apps, including Netflix, Amazon Prime, Disney+, and HBO Max. Users can easily download and install these apps directly from the Stream TV app store. Once installed, apps appear on the Home Screen for quick access. Subscribers can seamlessly switch between live TV, DVR, and streaming services using the intuitive remote control, ensuring a unified entertainment experience.

5.2 Integrating Live TV, DVR, and On Demand Content

Breezeline Stream TV seamlessly integrates live TV, DVR, and On Demand content into one platform. Users can record live shows with DVR, watch missed episodes via Catch Up, or access thousands of On Demand titles. The unified interface allows for easy navigation between live broadcasts, recorded programs, and on-demand movies, enhancing the overall viewing experience with flexibility and convenience.

Using DVR and On Demand Features

Breezeline Stream TV allows users to record live shows with DVR and access a vast library of On Demand content, including movies and missed episodes, for flexible viewing.

6;1 Recording and Managing DVR Content

Breezeline Stream TV’s DVR feature lets you record live shows and manage your recordings effortlessly. Schedule recordings in advance or start recording a show you’re currently watching with just a few clicks.

Access your recorded content from the DVR menu, where you can play, delete, or sort recordings. Manage storage space by deleting old recordings or setting up automatic deletion of expired content.

6.2 Browsing and Watching On Demand Shows and Movies

Breezeline Stream TV offers access to thousands of On Demand shows and movies, many available for free. Use the On Demand menu to browse categories or search for specific titles.

Once you select a show or movie, it will begin playing immediately. You can pause, rewind, or fast-forward content, giving you full control over your viewing experience.

Customizing Your Viewing Experience

Enhance your entertainment by adjusting settings for optimal performance and enabling parental controls to restrict content, ensuring a personalized experience tailored to your preferences and needs.

7.1 Adjusting Settings for Optimal Performance

Access the settings menu to optimize your Breezeline Stream TV experience. Adjust display settings, audio configurations, and network preferences for enhanced performance. Ensure your WiFi connection is stable for uninterrupted streaming. Enable auto-update to maintain the latest features and security patches. Customize video quality settings to match your internet speed and viewing preferences, ensuring a smooth and enjoyable entertainment experience.

Explore advanced settings like display calibration and bitstream audio to fine-tune your viewing setup. These adjustments ensure your device performs optimally, delivering high-quality visuals and sound tailored to your home entertainment system.

7.2 Parental Controls and Accessibility Features

Breezeline Stream TV offers robust parental controls, allowing you to set a PIN to restrict access to certain content or channels. Customize viewing limits and ensure a safe experience for all users.

Accessibility features include voice search, closed captions, and audio descriptions. These tools enhance usability for users with disabilities, ensuring an inclusive and enjoyable entertainment experience for everyone.

Troubleshooting Common Issues

Resolve connectivity issues by restarting your device or checking WiFi settings. Ensure proper HDMI connections and update software regularly for optimal performance.

8.1 Resolving Connectivity and WiFi Problems

To resolve connectivity issues, restart your Breezeline Stream TV device and ensure it is connected to your WiFi network. Check your WiFi password and network stability. If issues persist, move the device closer to your router or use an Ethernet cable for a stable connection. Regularly update your device’s software to maintain optimal performance and avoid connectivity problems. Ensure your internet service is active and functioning properly.

8.2 Fixing App and Streaming Issues

If apps aren’t loading or streaming is interrupted, restart the Breezeline Stream TV device. Ensure your internet connection is stable and check for app updates. Clearing the app cache or reinstalling the app may resolve issues. Verify that your streaming service subscriptions are active and compatible with Breezeline Stream TV.

If problems persist, reset the device to factory settings or contact Breezeline support for assistance. Ensure all software is up to date for optimal performance.

Advanced Features and Tips

Breezeline Stream TV offers advanced time-shifting features like Live Rewind and Start Over, enhancing your viewing experience. Explore integrations with streaming services for endless entertainment options.

9.1 Using Time-Shifting Features: Live Rewind, Start Over, and Catch Up

Breezeline Stream TV offers advanced time-shifting features like Live Rewind, Start Over, and Catch Up. These tools allow you to pause, rewind, restart live TV, and access missed shows easily. Live Rewind lets you rewind live programming, while Start Over enables restarting a show from the beginning. Catch Up ensures you never miss episodes, making it simple to enjoy your favorite content on your terms.

9.2 Maximizing Your Entertainment Experience

Breezeline Stream TV enhances your viewing experience with seamless integration of live TV, DVR, and On Demand content, plus popular streaming apps like Netflix and Amazon Prime. The intuitive remote with voice search simplifies navigation, while accessibility features ensure everyone can enjoy. Personalized recommendations via the SmartBar and advanced time-shifting options like Live Rewind and Catch Up make it easy to tailor your entertainment to your preferences, ensuring endless enjoyment.

mbsaqip standards manual

The MBSAQIP Standards Manual is a comprehensive guide for accreditation‚ ensuring high-quality metabolic and bariatric surgery care through adherence to rigorous clinical and operational best practices.

Overview of MBSAQIP Accreditation

The MBSAQIP Accreditation is a rigorous process ensuring bariatric surgical centers meet strict clinical‚ operational‚ and patient care standards. It involves site visits by experienced surgeons to verify compliance with established guidelines. The program focuses on improving patient outcomes‚ reducing risks‚ and promoting continuous quality improvement. Accreditation is achieved by demonstrating adherence to evidence-based practices‚ proper data collection‚ and robust quality assurance systems. MBSAQIP-accredited centers are recognized for their commitment to delivering safe‚ high-quality care to metabolic and bariatric surgery patients‚ fostering trust and excellence in the field.

Importance of the Standards Manual

The MBSAQIP Standards Manual serves as a critical roadmap for centers seeking accreditation‚ ensuring compliance with evidence-based practices and quality care standards. It outlines essential requirements for personnel‚ data management‚ and patient protocols‚ fostering a culture of safety and excellence. By adhering to the manual‚ centers can align their practices with expert-approved guidelines‚ optimize resources‚ and maintain rigorous documentation. This ensures consistent delivery of high-quality metabolic and bariatric surgery care‚ ultimately improving patient outcomes and operational efficiency; The manual is vital for maintaining accreditation and demonstrating a commitment to continuous quality improvement.

Key Objectives of MBSAQIP

The primary objectives of MBSAQIP include enhancing patient safety‚ improving surgical outcomes‚ and promoting standardized care across all accredited centers. By establishing rigorous accreditation standards and fostering a culture of continuous quality improvement‚ MBSAQIP ensures that metabolic and bariatric surgery programs deliver evidence-based‚ high-quality care. The program emphasizes data collection‚ analysis‚ and benchmarking to identify best practices and drive progress. Additionally‚ MBSAQIP supports centers in maintaining compliance with clinical guidelines and advancing surgical excellence through ongoing education and resources.

Key Standards in the MBSAQIP Manual

The MBSAQIP Standards Manual outlines essential criteria for metabolic and bariatric surgery programs‚ focusing on patient safety‚ data accuracy‚ and continuous quality improvement initiatives.

Standard 4: Personnel and Services Resources

Standard 4 focuses on ensuring that metabolic and bariatric surgery programs maintain adequate personnel and resources to provide safe‚ high-quality care. This includes credentialing guidelines for surgeons‚ ensuring their expertise in metabolic and bariatric surgery‚ as well as requirements for surgical call coverage and staff training. The standard also emphasizes the importance of a multidisciplinary team‚ including dietitians‚ psychologists‚ and nurses‚ to support patient care. Additionally‚ it mandates that staff maintain certifications like Advanced Cardiovascular Life Support (ACLS) and ensures availability of critical care resources such as ICUs. These requirements aim to enhance patient outcomes and program efficiency.

Standard 6: Data Surveillance and Systems

Standard 6 focuses on the collection‚ analysis‚ and use of data to ensure quality care and compliance with MBSAQIP standards. It requires centers to implement robust data surveillance systems for accurate and consistent data entry‚ which is essential for benchmarking and performance improvement. The standard also mandates participation in the MBSAQIP Registry to track patient outcomes and safety metrics. Regular audits and site visits by ACS representatives ensure compliance with data standards‚ fostering transparency and accountability. This standard underscores the importance of data-driven decision-making to enhance patient care and program effectiveness.

Standard 2.8: Obesity Medicine Services

Standard 2.8 emphasizes the integration of obesity medicine services into metabolic and bariatric care. It requires centers to provide comprehensive patient evaluations‚ including nutritional‚ behavioral‚ and medical assessments. Evidence-based practices must guide treatment plans‚ ensuring individualized care. The standard also mandates access to multidisciplinary teams‚ including dietitians‚ psychologists‚ and nurses‚ to support long-term weight management. Regular follow-up care is essential to monitor progress and address comorbidities. Compliance with this standard ensures a holistic approach to obesity treatment‚ aligning with MBSAQIP’s commitment to improving patient outcomes and quality of life.

Standard 5.6: Patient Care Protocols

Standard 5.6 outlines the requirement for centers to establish and implement comprehensive patient care protocols. These protocols must cover all phases of care‚ from pre-operative assessments to post-operative management. Evidence-based practices should guide the development of these protocols‚ ensuring consistency and high-quality care. Centers must regularly review and update protocols to reflect current advancements in metabolic and bariatric surgery. Additionally‚ the protocols should address individual patient needs‚ including nutritional support‚ pain management‚ and follow-up care. Compliance with this standard ensures that patient care is standardized‚ effective‚ and aligned with MBSAQIP’s goals for optimal outcomes.

Standard 6.4: Quality Improvement Initiatives

Standard 6.4 emphasizes the importance of ongoing quality improvement (QI) initiatives to enhance patient care and outcomes. Centers must implement processes to identify‚ analyze‚ and address gaps in care. Data collection and analysis are critical components‚ enabling centers to track performance and make data-driven decisions. QI initiatives should focus on reducing complications‚ improving efficiency‚ and ensuring compliance with MBSAQIP standards. Regular staff training and multidisciplinary team involvement are essential to sustain these efforts. By fostering a culture of continuous improvement‚ centers can achieve higher patient satisfaction and better surgical outcomes‚ aligning with MBSAQIP’s mission to advance high-quality bariatric care.

Personnel Guidelines and Training Requirements

This section outlines credentialing‚ training‚ and competency requirements for personnel to ensure high-quality patient care and adherence to MBSAQIP standards through continuous professional development.

Credentialing Guidelines for Surgeons

The MBSAQIP Standards Manual requires surgeons to meet specific credentialing criteria to ensure expertise in metabolic and bariatric surgery. Standard 4.1 outlines that surgeons must demonstrate advanced training and experience‚ with verification conducted by MBSAQIP-designated reviewers. Surgeons must provide documentation of their qualifications‚ including case volume and outcomes. This ensures that only qualified professionals perform procedures‚ maintaining high standards of patient care. Compliance with these guidelines is a critical component of accreditation‚ fostering trust and confidence in the quality of surgical services provided.

Metabolic and Bariatric Surgery Call Coverage

Standard 4.3 of the MBSAQIP Standards Manual requires that metabolic and bariatric surgery call coverage be available 24/7 to ensure continuous patient care. A qualified surgeon must be on call and immediately accessible‚ either in person or via phone‚ to address emergencies. This standard ensures timely interventions and maintains high-quality patient outcomes. Compliance with this guideline is essential for accreditation‚ as it reflects the program’s commitment to patient safety and optimal care delivery. Proper call coverage arrangements must be documented and verified during site visits to confirm adherence to MBSAQIP standards.

Staff Training and Competency Development

The MBSAQIP Standards Manual emphasizes the importance of ongoing staff training and competency development to ensure high-quality patient care. Standard 4.4 requires that all staff involved in metabolic and bariatric surgery care participate in regular educational programs to maintain and enhance their skills. This includes both clinical and operational training to stay updated on best practices and protocols. Competency assessments must be conducted regularly to verify staff proficiency. Additionally‚ multidisciplinary team training fosters collaboration and ensures a unified approach to patient management. Continuous learning and skill development are critical for maintaining accreditation and delivering optimal patient outcomes.

Data Management and Compliance

The MBSAQIP Standards Manual requires accurate data entry‚ compliance with accreditation standards‚ and proper documentation retention to ensure transparency and accountability in metabolic and bariatric surgery care.

Data Entry and Accuracy Requirements

Data entry and accuracy are critical components of MBSAQIP compliance‚ ensuring reliable outcomes and quality improvement initiatives. Facilities must maintain precise records‚ adhering to standardized protocols for data submission. The MBSAQIP Quality Portal serves as a central hub for data collection‚ emphasizing the importance of timely and accurate reporting. Any discrepancies or errors in data entry can lead to compliance issues‚ potentially affecting accreditation status. Therefore‚ centers are obligated to implement robust systems for data management to uphold the integrity of the accreditation process and ensure patient care quality.

Compliance with Accreditation Standards

Compliance with MBSAQIP accreditation standards ensures that centers meet rigorous criteria for delivering high-quality metabolic and bariatric surgical care. This involves adhering to established guidelines for data collection‚ patient safety‚ and operational efficiency. Centers must undergo regular site visits by ACS representatives to verify compliance. Failure to meet these standards can result in loss of accreditation‚ impacting a center’s reputation and patient trust. Continuous compliance demonstrates a commitment to excellence and patient-centered care‚ aligning with MBSAQIP’s mission to improve surgical outcomes and maintain high standards across all accredited facilities. Compliance is non-negotiable for program participation.

Records Retention Policy for Documentation

The MBSAQIP Standards Manual emphasizes the importance of maintaining accurate and complete documentation for compliance and quality improvement. Centers must establish a records retention policy to ensure all relevant data‚ including patient records‚ surgical outcomes‚ and accreditation materials‚ are securely stored. The policy should outline retention periods‚ storage methods‚ and access procedures. While the MBSAQIP Quality Portal provides some documentation support‚ centers are ultimately responsible for retaining records. This ensures compliance with accreditation standards and facilitates audits. Proper documentation management is critical for transparency‚ accountability‚ and continuous improvement in metabolic and bariatric surgery care.

Benefits of MBSAQIP Accreditation

MBSAQIP Accreditation offers enhanced patient outcomes‚ improved operational efficiency‚ and access to quality improvement tools‚ fostering safer and more effective metabolic and bariatric surgery care.

Improved Patient Outcomes

MBSAQIP Accreditation ensures high-quality metabolic and bariatric surgery care‚ leading to improved patient outcomes. By adhering to rigorous standards‚ centers reduce complications and enhance long-term results. The program provides resources and tools to optimize patient care‚ ensuring safer surgical practices and better management of comorbidities. Accredited centers demonstrate reduced mortality rates‚ fewer post-operative issues‚ and higher patient satisfaction. The focus on standardized protocols and continuous quality improvement fosters environments where patients achieve sustainable weight loss and improved overall health. MBSAQIP’s emphasis on data collection and analysis further supports tailored treatments‚ ensuring the best possible results for patients.

Enhanced Operational Efficiency

MBSAQIP Accreditation fosters operational efficiency by streamlining processes and improving resource allocation. Centers adhering to the standards benefit from optimized workflows‚ reducing redundancy and enhancing coordination among staff. The program’s focus on data surveillance and quality improvement initiatives ensures that resources are used effectively. By aligning with MBSAQIP’s guidelines‚ centers can reduce operational inefficiencies‚ leading to better patient care and sustainable outcomes. Standardized protocols and continuous monitoring systems enable centers to maintain high performance while minimizing waste‚ ensuring a more efficient and organized approach to metabolic and bariatric surgery services. This alignment enhances overall program effectiveness.

Access to Quality Improvement Tools

MBSAQIP Accreditation provides centers with access to robust quality improvement tools‚ enabling them to enhance patient care and operational performance. These tools include data analytics‚ benchmarking capabilities‚ and best practice guidelines. By leveraging these resources‚ centers can identify areas for improvement‚ track progress‚ and implement evidence-based strategies. The program also offers educational materials and collaborative opportunities‚ fostering a culture of continuous improvement. Access to these tools empowers centers to address gaps in care‚ reduce complications‚ and optimize clinical pathways‚ ultimately leading to sustainable quality enhancement and better patient outcomes. This support is integral to achieving and maintaining accreditation standards.

The MBSAQIP Standards Manual provides a comprehensive framework for metabolic and bariatric surgery centers‚ ensuring high-quality care and continuous improvement. It helps centers achieve excellence and adapt to future advancements.

Final Thoughts on MBSAQIP Standards

Adherence to the MBSAQIP Standards Manual ensures high-quality metabolic and bariatric surgery care‚ emphasizing patient safety‚ data accuracy‚ and continuous improvement. The manual serves as a cornerstone for centers striving for excellence‚ providing clear guidelines and best practices; By aligning with these standards‚ facilities demonstrate their commitment to optimal outcomes and patient-centered care. The framework fosters accountability‚ transparency‚ and innovation‚ ultimately benefiting both patients and surgical teams. As the field evolves‚ the MBSAQIP Standards Manual remains a vital resource for advancing surgical practices and achieving accreditation.

Future Directions for Accreditation

The MBSAQIP Standards Manual will continue to evolve‚ incorporating advancements in metabolic and bariatric surgery to ensure high-quality patient care. Future updates will focus on innovative approaches‚ such as expanded data collection and enhanced quality improvement tools. The manual will also prioritize accessibility‚ making accreditation attainable for a broader range of centers while maintaining rigorous standards. By integrating emerging technologies and evidence-based practices‚ MBSAQIP will remain a leader in surgical accreditation‚ driving continuous improvement and patient safety. These updates ensure the manual stays relevant‚ addressing the dynamic needs of the healthcare landscape.

4l60e transmission troubleshooting guide

The 4L60E transmission is a widely used automatic gearbox known for its durability but prone to specific issues. This guide helps identify and diagnose common problems, such as gear failures and fluid leaks, offering practical solutions to keep your vehicle running smoothly.

Key Components of the 4L60E Transmission

The 4L60E transmission is a 4-speed, electronically controlled automatic gearbox designed for longitudinal engine applications. It features a robust design with a gross vehicle weight capacity of up to 6,000 pounds, making it suitable for a wide range of vehicles, including trucks and SUVs. Key components include:

  • Torque Converter: responsible for transferring engine power to the transmission, providing smooth acceleration and torque multiplication.
  • Planetary Gear Sets: these sets enable gear ratio changes for smooth power delivery across all driving conditions.
  • Clutches and Bands: these components engage and disengage gear sets, controlling the flow of power during shifting.
  • Valve Body: acts as the hydraulic control center, directing fluid pressure to activate clutches and bands.
  • TCC (Torque Converter Clutch): locks the torque converter in higher gears for improved fuel efficiency.
  • Sensors and Solenoids: include the Vehicle Speed Sensor (VSS), Throttle Position Sensor (TPS), and Electronic Pressure Control (EPC) solenoid, which work together to ensure precise electronic control.

These components work in harmony to provide smooth shifting, reliable performance, and efficient power delivery, making the 4L60E a popular choice for GM vehicles.

Common Problems with the 4L60E Transmission

The 4L60E transmission experiences issues like slipping, harsh shifting, and gear failures. Problems often stem from worn clutches, fluid leaks, or electronic malfunctions. Regular maintenance and early troubleshooting are crucial to prevent costly repairs and ensure optimal performance.

No Reverse or Slipping Issues

One of the most frequent issues with the 4L60E transmission is the loss of reverse gear or slipping between gears. This problem often arises due to worn-out clutches in the low and reverse gear set. Over time, the friction material on these clutches can deteriorate, leading to a lack of engagement when trying to reverse or shift into lower gears.

Another common cause is a fluid leak in the reverse apply circuit. Transmission fluid is essential for hydraulic pressure, which engages the clutches and bands. If there’s a leak, the system can’t build enough pressure, resulting in slipping or no movement in reverse. Additionally, a broken sunshell can cause catastrophic failure, preventing the transmission from engaging reverse entirely.

Symptoms include slow or delayed engagement in reverse, slipping when accelerating, or a complete loss of reverse gear. In some cases, the transmission may still function in forward gears but fail to engage when shifting into reverse.

Diagnosis typically involves checking the transmission fluid level and condition, inspecting for leaks, and examining the low and reverse clutches for wear. If the issue is caught early, adding a high-viscosity additive like Lucas Transmission Additive can sometimes restore seal integrity and improve clutch engagement. However, in severe cases, disassembling the transmission and replacing worn components is necessary to restore proper function.

No 3rd or 4th Gear

If your vehicle fails to engage 3rd or 4th gear, it’s often due to worn-out 3-4 clutches. These clutches are responsible for engaging the higher gears during acceleration. Over time, excessive heat and wear can cause them to degrade, leading to slipping or a complete loss of these gears.

The 3-4 band may also be slipping or worn out, preventing proper gear engagement. This issue can be diagnosed by monitoring the transmission’s performance during acceleration. If the vehicle hesitates or refuses to shift into higher gears, it’s a clear sign of a problem with the 3-4 clutches or band.

In some cases, electrical or hydraulic control issues may be to blame. Faulty solenoids or clogged hydraulic circuits can prevent the transmission from engaging the correct gears. Check for trouble codes using a scan tool, as they may point to specific solenoid or pressure control issues.

Symptoms include the transmission staying in 2nd gear indefinitely or refusing to upshift, even when accelerator pedal input increases. In severe cases, the vehicle may feel sluggish or lack power during acceleration. Addressing this issue promptly is crucial to avoid further damage to the transmission.

Harsh Shifting

Harsh shifting in the 4L60E transmission is often caused by issues with the Electronic Pressure Control (EPC) solenoid or the Throttle Position Sensor (TPS). A faulty EPC solenoid can lead to sudden, hard shifts, particularly when transitioning from Park or Neutral to Drive or Reverse. Similarly, a malfunctioning TPS may send erratic signals to the transmission control module, disrupting smooth gear transitions.

Another common cause is low line pressure, which can result from a leaking boost valve or a clogged EPC filter screen. This reduces the hydraulic pressure needed for smooth shifting, causing the transmission to shift abruptly. In some cases, harsh shifting may also be due to worn-out clutch packs or bands, which fail to engage gears properly.

Symptoms include abrupt jerks when shifting gears, especially when accelerating from a standstill or decelerating. If left unaddressed, harsh shifting can lead to premature wear on internal components, such as the clutch packs or bearings. Diagnosing the issue often involves checking the TPS for smooth electrical response and performing a transmission pressure test to identify pressure-related problems.

Addressing harsh shifting promptly is essential to prevent further damage and ensure smooth transmission operation. Replacing faulty solenoids, cleaning or replacing the EPC filter, or adjusting the TPS can often resolve the issue. In severe cases, a transmission rebuild may be necessary to replace worn-out components.

Transmission Overheating

Transmission overheating is a common issue in the 4L60E, often caused by low fluid levels, dirty or degraded transmission fluid, or clogged cooler lines. Overheating can lead to irreversible damage, including warped valve bodies, clutch pack failure, and premature wear on internal components. Symptoms include a temperature warning light on the dashboard, slipping gears, or erratic shifting;

Excessive towing, driving in extreme heat, or aggressive driving can also contribute to overheating. The 4L60E relies on its fluid to lubricate, cool, and transfer energy, so any compromise in fluid quality or flow can quickly elevate temperatures. A faulty transmission temperature sensor may also trigger false readings, but the root cause often lies in the cooling system.

To address overheating, check the fluid level and condition, ensuring it’s clean and at the recommended level. Flushing the transmission and replacing the fluid with a high-quality ATF can help. Inspect the cooler lines for blockages or damage and ensure the radiator and cooler are functioning properly. In severe cases, upgrading to a heavy-duty transmission cooler may be necessary to prevent future issues.

Ignoring overheating can lead to costly repairs, so immediate action is essential to protect the transmission and maintain its performance. Regular maintenance, including fluid checks and cooler inspections, is critical to preventing overheating and extending the life of the 4L60E.

Diagnostic Steps for 4L60E Transmission Issues

Diagnosing 4L60E issues involves checking fluid levels, scanning for trouble codes, and performing a transmission pressure test. These steps help identify problems like slipping gears or overheating, ensuring timely repairs and preventing further damage to the transmission system.

Checking Transmission Fluid Level

To check the transmission fluid level in your 4L60E, ensure the vehicle is on a level surface and warmed up after a short drive. Locate the transmission dipstick near the front of the engine, attached to the top of the transmission. Pull out the dipstick and wipe it clean with a lint-free cloth. Reinsert it into the transmission, then pull it out again to get an accurate reading. The fluid level should be between the “MIN” and “MAX” marks on the dipstick. If the level is low, add the recommended transmission fluid (typically Dexron III) a little at a time, checking the level frequently to avoid overfilling. Overfilling can lead to fluid leakage or damage. If the fluid level is consistently low, inspect for leaks around the transmission pan, dipstick tube, and cooler lines. Address any leaks promptly to prevent further fluid loss and potential damage. Regular fluid checks are essential for maintaining the health and performance of your 4L60E transmission.

Scanning for Trouble Codes

Scanning for trouble codes is a critical step in diagnosing issues with your 4L60E transmission. Modern vehicles, including those equipped with the 4L60E, use an On-Board Diagnostics (OBD) system to monitor transmission performance. To retrieve trouble codes, locate the OBD-II port, typically found under the dashboard on the driver’s side. Use an OBD-II scanner or code reader to connect to the vehicle’s computer (PCM). Turn the ignition to the “ON” position, but do not start the engine. The scanner will display any stored codes related to the transmission, such as P0218 (transmission fluid over-temperature) or P0502 (vehicle speed sensor malfunction). These codes provide valuable insights into the root cause of the problem. Addressing the codes promptly can prevent further damage. If no codes are present, further diagnostic steps, such as a transmission pressure test, may be necessary. Always refer to a repair manual or consult a professional if you’re unsure about the meaning of a code or how to proceed with repairs.

Performing a Transmission Pressure Test

A transmission pressure test is essential for diagnosing internal issues within the 4L60E, such as slipping, harsh shifting, or gear engagement problems. This test measures hydraulic pressure levels to ensure they fall within the manufacturer’s specifications. To perform the test, you’ll need a transmission pressure gauge, a scan tool, and access to the transmission’s pressure ports. Locate the test ports, usually found near the valve body or on the transmission pan. Connect the pressure gauge and scan tool to monitor real-time data. With the engine running and the transmission in gear, observe the pressure readings. Normal operating pressure typically ranges between 50-100 psi, depending on the gear and load. Low pressure may indicate worn seals, a faulty boost valve, or insufficient fluid levels. High pressure could signal a blocked filter or malfunctioning pressure regulator. Compare your findings with the factory specifications to identify the root cause. If results are inconsistent, further disassembly or professional inspection may be required. Always consult a repair manual for precise test procedures and specifications.

Tools and Equipment Needed for Repair

Repairing the 4L60E transmission requires specialized tools and equipment to ensure accuracy and safety. Essential tools include a transmission repair manual, a set of metric and SAE wrenches, screwdrivers, and punches. A pressure gauge is necessary for diagnosing hydraulic issues, while a scan tool helps retrieve trouble codes and real-time data. Additional tools like a bearing puller, seal installer, and torque wrench are crucial for disassembly and reassembly. A transmission pan gasket set, filter, and fluid are needed for routine maintenance. A drain pan and jack stands are essential for safely lifting and draining the transmission. Specialty tools, such as a valve body tester and a sun gear shim kit, may be required for specific repairs; For more complex issues, a transmission rebuild kit, including bearings, seals, and clutch packs, is necessary. Always ensure tools are in good condition to avoid further damage. Having a clean, well-lit workspace is also vital for efficient and effective repairs. Consult a repair manual for a detailed list of tools and equipment tailored to your specific repair needs.

Resources for Further Reading and Repair Manuals

For in-depth understanding and repair of the 4L60E transmission, several resources are available to guide you. The official GM 4L60E repair manual provides detailed procedures, diagrams, and specifications. Websites like Autozone and RockAuto offer repair guides and part catalogs. Additionally, forums such as Transmission Rebuild Guide and Gm-Truck-HQ host extensive discussions and DIY tutorials. A free 186-page 4L60E rebuild manual is also available online, covering disassembly, inspection, and assembly processes. For troubleshooting, the Astrosafari forum features a comprehensive diagnosis chart for common issues. YouTube channels like Transmission Repair and EricTheCarGuy offer step-by-step repair videos. Local libraries may have Chilton or Haynes manuals for additional reference. Online marketplaces like Amazon and eBay provide access to both new and used repair manuals; These resources ensure you have the knowledge and tools needed to address any 4L60E transmission issue effectively.

hellblade trophy guide

Hellblade: Senua’s Sacrifice is a critically acclaimed game that delves into Celtic mythology and mental illness, offering a unique narrative experience․ This trophy guide helps players navigate the challenges and unlock all achievements, including the prestigious Platinum Trophy, by providing detailed strategies and tips for overcoming foes and solving puzzles․

Overview of the Game and Its Trophies

Hellblade: Senua’s Sacrifice features a total of 15 trophies, including one Platinum, five Gold, and nine Bronze․ The game combines hack-and-slash combat with puzzles and narrative-driven exploration․ Trophies are awarded for completing key story milestones, defeating major bosses, and overcoming specific challenges, such as the Blindness Shard puzzle․ Collectibles like Lorestones and hidden runes also play a role in unlocking certain achievements․ This trophy set is designed to guide players through the game’s core experiences while offering optional challenges for completionists․ A well-rounded guide is essential for tracking progress and strategies to earn every trophy efficiently․

Platinum Trophy Guide

To earn the Platinum Trophy in Hellblade: Senua’s Sacrifice, complete all other trophies․ It’s a straightforward process once all requirements are met with ease․

How to Unlock the Platinum Trophy

Earning the Platinum Trophy in Hellblade: Senua’s Sacrifice requires completing all other trophies in the game․ This includes defeating key bosses like Surtr and Valravn, meeting Hela, and overcoming challenges such as the Blindness Shard Challenge․ Additionally, players must collect all lorestones and runes, and solve various puzzles throughout the game․ The Platinum Trophy is considered relatively straightforward, as it involves achieving all other trophies without excessive difficulty․ Ensure progress by checking the in-game trophy menu regularly and focus on completing each requirement systematically․ With dedication, the Platinum Trophy is an attainable reward for your journey as Senua․

Requirements for Earning the Platinum

To earn the Platinum Trophy in Hellblade: Senua’s Sacrifice, you must unlock all other trophies in the game․ This includes completing the story, defeating boss enemies like Surtr and Valravn, and meeting key characters such as Hela․ Additionally, you must complete specific challenges like the Blindness Shard Challenge and collect all lorestones and runes scattered throughout the world․ The Platinum Trophy is awarded upon achieving 100% completion of all trophies, showcasing your mastery of the game’s narrative, combat, and puzzle-solving elements․ Ensure you track your progress through the trophy menu to stay focused on your goal․

Gold Trophies

The Fight Begins and Extinguished are key gold trophies in Hellblade: Senua’s Sacrifice․ Earning these requires reaching the Gate and defeating Surtr, showcasing early progress toward the Platinum Trophy․

The Fight Begins — Reaching the Gate for the First Time

Earning the The Fight Begins trophy marks your first major milestone in Hellblade: Senua’s Sacrifice․ This achievement is unlocked by reaching the Gate, an early symbolic barrier in the game․ As Senua, you’ll navigate through a haunting, atmospheric environment, setting the tone for the journey ahead․ The Gate represents the threshold into the underworld, where the story begins to unfold․ This trophy is a straightforward progression milestone, requiring no additional challenges beyond advancing through the narrative․ It’s a precursor to the deeper trials and combat encounters that await, introducing players to the game’s unique mechanics and themes․

Extinguished — Defeating Surtr

The Extinguished trophy is awarded for defeating Surtr, one of the game’s formidable bosses․ Surtr, the fiery giant, presents a challenging combat encounter that tests your mastery of the game’s mechanics․ To triumph, pay close attention to his attack patterns and utilize Senua’s abilities, such as dodging and parrying, to exploit openings․ Timing your attacks carefully and staying mobile will be crucial․ Defeating Surtr not only grants the trophy but also progresses the story significantly, showcasing the game’s intense narrative and gameplay blend․

This battle is a highlight of the game, requiring patience and strategy to overcome Surtr’s relentless assaults․ The trophy marks a major accomplishment on your journey toward the Platinum․

Silver Trophies

The Silver Trophies include Master of Illusion for defeating Valravn and Source of the Darkness for meeting Hela, both requiring skill and story progression․

Master of Illusion ⎼ Defeating Valravn

Defeating Valravn, the master of illusions, requires a mix of combat prowess and strategic thinking․ This boss fight demands careful observation of his attack patterns and exploiting his weaknesses․ Use Senua’s ability to dash and parry effectively, as Valravn’s illusions can deceive even the most skilled players; Stay patient, and focus on breaking his defenses during openings․ Once defeated, you’ll earn the Master of Illusion trophy, a testament to your skill in overcoming this challenging encounter․ Proper timing and awareness are key to triumphing over Valravn’s deceptive tactics․

Source of the Darkness ⎼ Meeting Hela

Meeting Hela, the Source of the Darkness, is a pivotal moment in Hellblade: Senua’s Sacrifice․ This encounter occurs early in the game, introducing players to the eerie and haunting atmosphere of the underworld․ Hela, a figure tied to Norse mythology, represents a significant narrative point for Senua’s journey․ To progress, players must navigate the unsettling environment and interact with key elements that reveal more about Hela’s role in the story․ This moment is crucial for understanding the game’s lore and Senua’s connection to the darkness she faces․ Earning this trophy marks a key milestone in the narrative․

Bronze Trophies

Earning bronze trophies in Hellblade: Senua’s Sacrifice involves overcoming specific challenges like the Blindness Shard Challenge and solving puzzles․ These achievements highlight Senua’s journey and require skill, patience, and exploration to unlock, offering a deeper connection to the game’s unique world and narrative․

Trust Your Senses, Completing the Blindness Shard Challenge

This bronze trophy requires players to complete the Blindness Shard Challenge, a unique section where Senua loses her sight․ Rely on sound cues and environmental interactions to navigate the dark world․ Pay attention to whispers, footsteps, and vibrations to guide Senua safely․ Use focus ability to highlight important objects or paths․ Patience and careful listening are key․ The trophy unlocks upon successfully completing this challenging segment, showcasing Senua’s resilience and adaptability in the face of adversity․

Different Perspectives — Solving Puzzles

Hellblade’s puzzles require a keen eye for detail and creative thinking․ Players must manipulate symbols or objects in the environment by rotating or approaching them from specific angles․ Use Senua’s focus ability to highlight hidden clues or patterns․ Environmental interactions often reveal hidden symbols when viewed from the right perspective․ This trophy rewards your ability to think outside the box and adapt to the game’s unique puzzle mechanics, showcasing the blend of exploration and problem-solving that defines the experience․

Lorestones and Collectibles

Hellblade features hidden lorestones and runes that reveal Celtic myths and Senua’s story․ Collecting all 44 lorestones unlocks the “Stories from the North” trophy, enhancing the narrative experience․

Stories from the North ⎼ Finding All Lorestones

To unlock the “Stories from the North” trophy, players must locate all 44 lorestones scattered throughout the game․ These stones reveal fragments of Celtic mythology and Senua’s personal journey․ Each lorestone emits a faint whisper, aiding detection․ Thorough exploration of every area is essential, as some are hidden in less obvious locations․ Revisiting regions with new abilities often uncovers previously inaccessible lorestones․ Collecting all of them enriches the game’s narrative depth and rewards dedication with this prestigious trophy․

Hidden Runes ⎼ Locations and Tips

Discovering hidden runes in Hellblade: Senua’s Sacrifice requires keen observation and patience․ These symbols, tied to Norse mythology, are often camouflaged in the environment, such as on walls, floors, or objects․ Use Senua’s “focus” ability to highlight them, as they glow when viewed from the right angle․ Explore every nook, especially in areas with strong mystical themes․ Some runes are easy to spot, while others are cleverly concealed, making thorough investigation essential; Collecting all runes contributes to a deeper understanding of the game’s lore and rewards diligent players with a satisfying achievement․

Challenges and Tips

Mastering Hellblade: Senua’s Sacrifice requires strategic combat, puzzle-solving, and exploration․ Use efficient tactics, exploit enemy weaknesses, and solve environmental puzzles to progress and earn all trophies․

Blindness Shard Challenge — Strategies

The Blindness Shard Challenge is a unique and daunting task where Senua must navigate without visual cues․ To succeed, listen carefully to environmental sounds and Senua’s whispers, as they guide her through the dark․ Use the controller’s speaker to pinpoint directions and avoid obstacles․ Move slowly and rely on auditory feedback to progress․ Patience and attention to detail are key, as the challenge requires precise navigation without visual assistance․ Completing this earns the Trust Your Senses trophy, showcasing mastery over sensory-based gameplay․

Combat and Puzzle-Solving Tips

Mastering combat and puzzles in Hellblade: Senua’s Sacrifice requires skill and observation․ In combat, dodge and parry enemy attacks to create openings for counterattacks․ Timing is crucial, as enemies telegraph their moves․ For puzzles, pay attention to environmental clues and use Senua’s focus ability to reveal hidden patterns․ Perspective-shifting puzzles often require re-examining objects from different angles․ Utilize lorestones to gain insights into the world’s lore, which can aid in solving certain puzzles․ Stay patient, as some challenges demand careful exploration and trial and error to overcome․

Congratulations on completing your journey to earn the platinum trophy in Hellblade: Senua’s Sacrifice! Overcoming its challenges is a testament to your skill and dedication․ This game’s unique narrative and emotional depth make it a memorable experience․

Final Thoughts on Earning All Trophies

Earning all trophies in Hellblade: Senua’s Sacrifice is a rewarding experience that highlights your mastery of both combat and puzzle-solving․ The journey through Senua’s world is emotionally intense and visually stunning, making each achievement feel like a milestone․ With patience and persistence, you’ve overcome every challenge the game offers․ This platinum trophy is not only a testament to your gaming skills but also a celebration of Senua’s courage and resilience․ Congratulations on completing this unforgettable adventure!

bread slicer manual

A bread slicer is a practical kitchen tool designed to help you slice bread evenly and safely, perfect for making sandwiches or toast. Manual models are cost-effective, compact, and easy to use, while mechanical slicers offer faster results for frequent use. Always handle the blades with care to avoid injuries. Proper maintenance ensures long-lasting performance and clean cuts every time.

What is a Bread Slicer?

A bread slicer is a kitchen tool designed to help you slice bread evenly and safely, making it ideal for preparing sandwiches, toast, or other bread-based dishes. It typically consists of a frame with adjustable guides and a sharp blade or cutting wire. Manual bread slicers are cost-effective, compact, and easy to use, while mechanical models offer faster slicing for frequent use. These tools are particularly useful for achieving uniform slice thickness, which is essential for even cooking or presentation. Many slicers also include features like crumb trays for mess-free operation and adjustable settings to accommodate different loaf sizes or slice thicknesses. Whether you prefer manual or mechanical, a bread slicer is a practical addition to any kitchen, ensuring clean and precise cuts every time.

Types of Bread Slicers

Bread slicers come in manual and mechanical models. Manual slicers are cost-effective, compact, and easy to use, while mechanical slicers are automatic and faster for heavy use.

Manual vs. Mechanical Slicers

Manual and mechanical bread slicers cater to different needs. Manual slicers are cost-effective, compact, and ideal for occasional use, offering precise control over slice thickness. They are easy to clean and require no electricity, making them perfect for small kitchens. Mechanical slicers, on the other hand, are automatic and designed for heavy-duty use, slicing bread quickly and efficiently. They often feature adjustable settings for slice thickness and are suitable for commercial or frequent home use. Manual slicers are lightweight and portable, while mechanical slicers are more robust but require regular maintenance to ensure optimal performance. Both options provide even slicing but vary in convenience, speed, and maintenance requirements.

Safety Precautions When Using a Bread Slicer

Always keep hands away from blades, use a pusher for control, and ensure the slicer is stable. Avoid distractions and never slice uneven or loose bread.

Key Safety Guidelines for Operating a Bread Slicer

When using a bread slicer, always prioritize safety to avoid accidents. Keep your hands away from the blades at all times and use the pusher or guide provided to control the bread. Ensure the slicer is placed on a stable, flat surface to prevent it from moving during operation. Never slice bread while distracted or when the slicer is unstable. Avoid slicing uneven or loose bread, as it may cause the slicer to malfunction. Always unplug the slicer before cleaning or maintaining it. Keep children away from the slicer and never let them operate it unsupervised. Follow the manufacturer’s instructions for installation, maintenance, and operation. Regularly inspect the blades and other components for wear and tear. Always use cold bread, as freshly baked bread can be too soft and difficult to slice evenly. By adhering to these guidelines, you can ensure safe and efficient use of your bread slicer.

How to Use a Manual Bread Slicer

Place the slicer on a stable surface, align the bread, adjust the thickness, and use a steady back-and-forth motion to slice evenly. Always use the pusher for control and safety.

Step-by-Step Guide to Slicing Bread Evenly

To slice bread evenly using a manual slicer, start by placing the slicer on a stable, flat surface. Align the bread loaf securely in the holding tray, ensuring it fits snugly. Adjust the slice thickness setting according to your preference, typically between 8-22 mm. Hold the pusher firmly to guide the bread through the blade with a steady, back-and-forth motion. Apply gentle pressure and maintain consistent speed to achieve uniform slices. After slicing, collect the bread slices in a tray or plate. Always handle the blades with care to avoid injury. Cleaning the slicer after use ensures optimal performance and hygiene. By following these steps, you can achieve perfectly even slices every time, making your bread preparation easier and more efficient.

Maintenance and Cleaning of a Bread Slicer

Regularly clean the crumb tray and blade with a damp cloth, then dry thoroughly. Sanitize with a vinegar solution and rinse. Oil mechanical parts occasionally and sharpen blades for optimal performance.

Tips for Keeping Your Slicer in Good Condition

To maintain your bread slicer, clean the crumb tray and blade after each use with a damp cloth. Sanitize using a vinegar solution and rinse thoroughly. For mechanical slicers, oil moving parts periodically to prevent rust. Store the slicer in a dry place to avoid moisture damage. Sharpen or replace dull blades to ensure clean cuts and prevent tearing. Always handle the slicer with care to avoid accidental damage. Regularly inspect and tighten loose screws or bolts. For manual slicers, wipe down the surface with a soft cloth to remove crumbs and spills. Avoid using abrasive cleaners that could scratch the finish. Proper upkeep ensures your slicer remains efficient and lasts longer, delivering consistent results for all your bread-cutting needs.

Troubleshooting Common Issues with Bread Slicers

Dull blades can be sharpened or replaced. Uneven slices may result from improper alignment or uneven pressure. Clean and adjust the slicer regularly for consistent results.

Resolving Blade Dullness and Other Problems

Blade dullness is a common issue that can be resolved by sharpening or replacing the blade. For manual slicers, check alignment and ensure even pressure to avoid uneven slices. Regular cleaning prevents crumb buildup, which can interfere with performance. If the slicer jams, remove bread gently and inspect for obstructions. For mechanical models, ensure proper power connections and consult the manual for troubleshooting electrical issues. Always handle blades with care to prevent injury. By addressing these problems promptly, you can maintain your slicer’s efficiency and extend its lifespan. Proper maintenance ensures consistent results and safe operation, keeping your bread slicer in optimal condition for years to come.

Proper use and maintenance of a bread slicer ensure optimal performance, safety, and longevity. Regular cleaning and blade care are essential for achieving perfect slices consistently.

Importance of Proper Use and Maintenance

Proper use and maintenance of a bread slicer are crucial for ensuring safety, efficiency, and longevity. Always follow the manual’s instructions to avoid accidents and damage. Regular cleaning prevents crumbs from accumulating and keeps the slicer hygienic. Sharpen or replace blades as needed to maintain sharpness, as dull blades can tear bread and pose safety risks. Store the slicer in a dry place to prevent rust. Proper use also extends the lifespan of the device, ensuring consistent performance. By adhering to these practices, you can enjoy perfectly sliced bread while protecting your investment in the slicer.

magic chef dehydrator manual

Welcome to the Magic Chef Dehydrator manual! This guide helps you master food dehydration, preserving flavors and nutrients effortlessly. Perfect for healthy snacks and gourmet dishes, it enhances your culinary skills with ease.

1.1 Overview of the Magic Chef Dehydrator

The Magic Chef Dehydrator is a compact, user-friendly appliance designed for preserving fruits, vegetables, and herbs. It offers precise temperature and timer controls, ensuring optimal dehydration. With multiple trays and accessories, it’s ideal for homemade snacks, jerky, and meal prep. Perfect for small kitchens, this dehydrator combines efficiency and versatility, making it a valuable addition to any culinary setup.

1.2 Importance of the Manual

This manual is essential for safe and effective use of the Magic Chef Dehydrator. It provides detailed instructions, safety guidelines, and maintenance tips. By following the manual, users can optimize dehydration results, extend the appliance’s lifespan, and ensure trouble-free operation. Reading it carefully helps you maximize the dehydrator’s potential and achieve professional-quality outcomes at home.

Key Features and Benefits

The Magic Chef Dehydrator offers a compact design, multiple trays for large batches, adjustable temperature control, and a timer for precise dehydration. It ensures even drying, retains nutrients, and is easy to clean, making it ideal for preserving fruits, vegetables, and herbs while maintaining healthy, flavorful results.

2.1 Model MCL10PFDRT Specifications

The Magic Chef MCL10PFDRT is a 10-tray food dehydrator designed for efficient food preservation. It features digital temperature control, a transparent door for monitoring, and includes accessories like tray liners for fruit leather. Compact and user-friendly, it’s ideal for home use, offering precise dehydration settings to ensure optimal results while retaining nutrients and flavors in your favorite foods.

2.2 Unique Features of the Dehydrator

The Magic Chef Dehydrator stands out with its adjustable temperature settings, allowing precise control for various foods. It includes multiple trays for large batches and accessories like mesh trays for herbs. The transparent door offers real-time monitoring, while the compact design fits seamlessly into any kitchen. These features make it versatile and efficient for home dehydration needs, ensuring consistent and high-quality results every time.

Unboxing and Initial Setup

Unbox your Magic Chef Dehydrator, including the base unit, food trays, tray liners, and mesh tray. Follow the manual for quick and easy assembly instructions.

3.1 Components Included

Your Magic Chef Dehydrator comes with a base unit, 5 food trays, 2 tray liners for fruit leather, and 1 mesh tray for herbs or finely chopped foods. These components ensure versatile dehydration options, from fruits and vegetables to herbs and custom creations, making it easy to achieve professional results at home.

3.2 Initial Installation Instructions

Unpack and place the dehydrator on a stable, heat-resistant surface. Ensure it is not in a humid or steamy area. Plug the unit into a grounded electrical outlet, keeping it away from water sources. Avoid placing it near flammable materials or where children can access it. Follow all safety guidelines provided in the manual for proper installation and operation.

Operating Instructions

Explore the Magic Chef Dehydrator’s intuitive controls for temperature and timer settings. Learn to dry fruits, vegetables, and herbs perfectly. The manual provides detailed guidance, ensuring optimal results and helping you master dehydration techniques.

4.1 Temperature and Timer Settings

Adjust the Magic Chef Dehydrator’s temperature between 95°F and 160°F for precise control. Set the timer up to 24 hours for optimal dehydration. Lower temperatures preserve nutrients, while higher settings ensure crispy results. Use the digital interface to customize settings based on food type. Always refer to the manual for specific guidelines. Proper settings ensure perfectly dried foods every time. Follow recommended ranges for fruits, vegetables, and herbs to achieve desired textures and flavors. Experiment with settings to find your perfect balance. Happy dehydrating!

4.2 Preparing Fruits, Vegetables, and Herbs

Wash and dry all produce thoroughly. Peel and slice fruits and vegetables evenly for consistent drying. Remove seeds and pits for better texture. Marinate or season foods before dehydration for enhanced flavor. For herbs, pat dry gently to avoid bruising. Arrange items in a single layer on trays to ensure even airflow. Follow specific preparation tips for each food type to achieve the best results. Happy preparing!

Maintenance and Cleaning

Regular cleaning and drying are essential for maintaining your Magic Chef Dehydrator. This prevents residue buildup and ensures optimal performance over time; Happy maintaining!

5.1 Cleaning Tips and Tricks

Regularly clean your Magic Chef Dehydrator after each use to prevent food residue buildup. Dampen a soft cloth with warm water, gently wipe down trays and surfaces. For tougher stains, mix baking soda and water to create a paste, apply it, and let it sit before rinsing. Dry thoroughly to avoid moisture damage. Always unplug the unit before cleaning for safety. Proper maintenance ensures longevity and optimal performance. Keep your dehydrator in great condition with these simple steps!

5.2 Replacing Parts and Accessories

To maintain your Magic Chef Dehydrator, replace worn or damaged parts promptly. Order genuine accessories from authorized dealers to ensure compatibility. Refer to your manual for specific part numbers and replacement instructions. Regularly inspect trays, liners, and meshes for wear. Replacing these parts prevents food from sticking and ensures even dehydration. Keep your dehydrator functioning like new by upgrading components as needed.

Safety Precautions

Always place the dehydrator on a stable, heat-resistant surface. Avoid steamy rooms and keep children away. Never leave the appliance unattended during operation for safety.

6.1 General Safety Guidelines

  • Always unplug the dehydrator before cleaning or maintenance to prevent electric shock.
  • Keep the appliance away from water and moisture to avoid hazards.
  • Do not touch hot surfaces; use oven mitts or tongs to handle trays.
  • Ensure the dehydrator is placed on a stable, heat-resistant surface.
  • Never leave children unattended near the operating unit.
  • Avoid overheating by following recommended temperature settings.

6.2 Avoiding Common Hazards

  • Avoid improper installation; ensure the dehydrator is placed in a well-ventilated, dry area away from direct sunlight.
  • Prevent overheating by adhering to recommended temperature and timer settings.
  • Never use damaged power cords or plug the appliance into an overloaded outlet.
  • Keep the dehydrator out of reach of children to avoid accidental burns or injuries.
  • Do not modify the appliance, as this can lead to electrical or fire hazards.

Regularly inspect the unit for wear and tear to ensure safe operation.

Common Recipes and Tips

Discover delicious dehydration recipes like gluten-free red lentil flatbread. Use silicone mats for fruit leathers and mesh trays for herbs. Experiment with seasonings for unique flavors.

7.1 Recommended Recipes for Beginners

Start with simple recipes like gluten-free red lentil flatbread, requiring just 2 ingredients. Try drying fruits like strawberries or bananas for healthy snacks. Use mesh trays for herbs and silicone mats for fruit leathers; Experiment with seasoning blends to enhance flavors. These easy recipes help you master dehydration basics and explore creative possibilities.

7.2 Tips for Successful Dehydration

Ensure consistent results by slicing foods evenly and using the correct temperature settings. Monitor dehydration progress to avoid over-drying. For fruits, aim for 135°F–155°F, and for herbs, 95°F–115°F. Store dehydrated foods in airtight containers to maintain freshness. Pat dry excess moisture before dehydration and follow recipe guidelines for optimal outcomes. Experiment with seasoning blends for enhanced flavor profiles.

Troubleshooting Common Issues

Check power cord connections if the dehydrator won’t start. Ensure even drying by rotating trays. Address noise by verifying tray alignment and airflow. Consult the manual for solutions.

8.1 Identifying and Solving Problems

If the dehydrator won’t start, check power cord connections. Ensure trays are evenly loaded for consistent drying. Noise issues may arise from misaligned trays; adjust for proper airflow. Refer to the manual for reset instructions if necessary. Regular cleaning prevents blockages. Address uneven drying by rotating trays midway. Always unplug before troubleshooting to ensure safety.

8.2 Frequently Asked Questions

Q: What is the maximum temperature setting?
A: The dehydrator operates up to 160°F for optimal drying.
Q: How long does it take to dry food?
A: Drying time varies from 4-12 hours, depending on food type and thickness.
Q: Can I dehydrate meat?
A: Yes, but ensure it reaches a safe temperature for food safety.
Q: How do I prevent food from sticking?
A: Use the included trays or parchment paper for easy cleanup.
Q: What is the best way to store dried foods?
A: Store in airtight containers in a cool, dark place.
For more details, refer to the manual.

Advanced Techniques

Explore custom dehydration settings for meats, herbs, and creative recipes. Adjust temperatures and times for precise results, enhancing flavor retention and texture preservation in your dishes.

9.1 Customizing Dehydration Settings

Customize dehydration settings by adjusting temperature and timer based on food type. Lower temperatures preserve herbs, while higher settings suit meats. Experiment with durations for crispier or chewier textures, ensuring optimal flavor retention. Refer to the manual for guidelines on specific foods to achieve professional results at home with ease and precision.

9.2 Exploring Creative Recipes

Explore creative recipes with your Magic Chef Dehydrator! Try making fruit leather, jerky, or crispy herbs. Experiment with gluten-free snacks like oil-free red lentil flatbread. Customize marinades and seasonings for unique flavors. Preserve garden produce or craft healthy granola. The dehydrator’s versatility allows you to innovate and enjoy nutritious, homemade treats with minimal effort and maximum creativity.

FAQs and User Support

Find answers to common questions in the FAQs section. Access user manuals, troubleshooting guides, and expert support for optimal use. Contact support for further assistance.

10.1 Frequently Asked Questions

How do I properly clean the dehydrator? Can I dehydrate frozen foods? What is the ideal temperature for herbs? Find answers to these and more in our FAQs section, covering common queries about operation, maintenance, and troubleshooting. Access detailed guides and solutions to ensure optimal performance of your Magic Chef Dehydrator.

10.2 Accessing Customer Support

For any inquiries or issues, visit the official Magic Chef website and navigate to the “Support” or “Contact Us” page. Reach customer service via phone, email, or live chat. The website also offers downloadable manuals, FAQs, and troubleshooting guides. Ensure to have your product model number ready for efficient assistance, guaranteeing a smooth experience with your Magic Chef Dehydrator.

Mastering your Magic Chef Dehydrator ensures delicious, healthy snacks and gourmet meals. Follow the manual for optimal results, fostering creativity and better eating habits effortlessly every time.

11.1 Summary of Key Points

11.2 Final Tips for Optimal Use

For optimal use, clean your dehydrator after each use and store it in a dry place. Always slice fruits and vegetables evenly for consistent drying. Monitor the dehydration process to avoid over-drying. Store dried foods in airtight containers to maintain freshness. Experiment with new recipes and settings to explore its full potential and enjoy healthy, homemade snacks effortlessly.

Additional Resources

Explore comprehensive guides and manuals for the Magic Chef Dehydrator online. Visit forums and communities for tips, troubleshooting, and creative recipes. Access customer support for assistance and enhanced user experience.

12.1 Recommended Reading and Guides

Enhance your dehydrating experience with official Magic Chef Dehydrator manuals and user guides. Discover detailed instructions, troubleshooting tips, and creative recipes. Explore online forums and communities for shared knowledge and expert advice. Access additional resources like recipe books and maintenance guides to maximize your appliance’s potential. Visit the official Magic Chef website for downloadable PDFs and comprehensive support materials.

12.2 Online Communities and Forums

Join online forums and communities to connect with fellow Magic Chef Dehydrator users. Share recipes, troubleshooting tips, and creative ideas. These platforms offer valuable insights and support from experienced users. Participate in discussions to enhance your dehydration skills and explore new possibilities. Online communities are a great resource for learning and staying updated on the latest trends in food dehydration.

yamaha rx v675 user manual

The Yamaha RX-V675 is a 7.2-channel AV receiver offering 4K support, built-in Wi-Fi, Bluetooth, and Dolby Atmos. It delivers high dynamic range and multi-zone functionality, ideal for home theaters. Rated highly by users, its manual is available for free PDF download, providing detailed setup and operation guidance.

Key Features of the Yamaha RX-V675

The Yamaha RX-V675 is a 7.2-channel AV receiver with 4K Ultra HD support, Dolby Atmos, and DTS:X. It features built-in Wi-Fi, Bluetooth, and multi-zone audio capabilities, ensuring versatile home theater solutions.

Digital Signal Processing

The Yamaha RX-V675 employs advanced digital signal processing to enhance audio quality. It supports Dolby Atmos and DTS:X for immersive sound, while Cinema DSP 3D creates realistic soundscapes. The receiver also features adaptive dynamic range compression for maintaining dialogue clarity and optimizing audio at lower volumes. Additionally, its Compressed Music Enhancer improves the quality of lossy audio formats. With 4K Ultra HD pass-through and upscaling, it ensures compatibility with the latest video standards. These technologies work together to deliver a cinematic experience tailored to your home theater setup.

HDMI and 4K Support

The Yamaha RX-V675 is equipped with HDMI 2.0 ports, supporting 4K Ultra HD video at 60Hz. It enables pass-through of HDR (High Dynamic Range) content, ensuring vivid visuals with enhanced contrast and color. The receiver also supports 4K upscaling, improving the quality of lower-resolution content. With ARC (Audio Return Channel) and HDMI-CEC, it simplifies connectivity and control between devices. These features make the RX-V675 an ideal choice for modern home entertainment systems, providing seamless integration with 4K-capable TVs and peripherals. Its HDMI capabilities ensure a future-proof setup for high-resolution audio and video.

Setup and Installation Guide

The Yamaha RX-V675 setup begins with unpacking and placing the unit in a well-ventilated area. Connect HDMI devices, speakers, and power, then follow the on-screen guide for initial configuration.

Unpacking and Physical Installation

Carefully unpack the Yamaha RX-V675, ensuring all components are included. Place the receiver on a stable, flat surface in a well-ventilated area to prevent overheating. Connect the power cord securely, avoiding loose connections. Next, organize HDMI cables and speaker wires, ensuring they are neatly arranged to minimize interference. Mount speakers at optimal listening heights and angles for balanced sound distribution. Refer to the manual for specific placement recommendations to achieve the best audio performance. Proper installation ensures reliable operation and enhances overall system efficiency.

Initial Configuration

After physical installation, power on the Yamaha RX-V675 and navigate to the setup menu using the remote or front panel controls. Select the input source corresponding to your connected devices. Configure basic settings like HDMI input names and audio output modes. Use the remote to adjust speaker settings and calibrate audio levels for optimal performance. Ensure all HDMI cables are securely connected to their respective ports. Refer to the manual for guidance on enabling features like Dolby Atmos or Wi-Fi connectivity. Proper initial setup ensures seamless operation and maximizes your home theater experience.

Operating the Receiver

The Yamaha RX-V675 offers intuitive controls for seamless operation. Use the remote to select inputs, adjust volume, and enable features like Dolby Atmos or Bluetooth connectivity.

Basic Controls and Navigation

The Yamaha RX-V675 features an intuitive interface with a front-panel display and buttons for essential functions. Use the navigation buttons to scroll through menus and adjust settings directly. The volume knob provides precise control, while input buttons allow quick switching between connected devices. The on-screen display (OSD) offers a user-friendly way to configure settings without needing the remote. This design ensures smooth operation, making it easy to navigate and customize your home theater experience to your preferences.

Using the Remote Control

The Yamaha RX-V675 comes with a remote control designed for easy navigation and operation. It features an ergonomic design with clearly labeled buttons, ensuring intuitive control of the receiver’s functions. The remote includes direct access buttons for input selection, sound modes, and zone control. Use the cursor buttons to navigate through menus and adjust settings seamlessly. For enhanced convenience, the remote is programmable to control other compatible devices. Refer to the user manual for instructions on customizing remote functions and troubleshooting any connectivity issues. Proper battery installation ensures reliable performance.

Connectivity Options

The Yamaha RX-V675 offers extensive connectivity, including 6 HDMI inputs and 2 outputs, supporting 4K and 3D pass-through. It also features MHL and wireless connectivity options for seamless integration.

HDMI Connections

The Yamaha RX-V675 features six HDMI inputs and two outputs, ensuring compatibility with 4K and 3D content. These ports support ARC and pass-through, allowing seamless audio and video transmission. HDCP 2.2 compliance ensures secure content playback. Multiple HDMI inputs accommodate various devices, while dual outputs enable connection to two displays simultaneously. The AVR also supports upscaling of lower-resolution content to 4K, enhancing visual quality. Proper HDMI configuration is essential for optimal performance, as detailed in the user manual. This setup ensures a robust and versatile home theater experience.

Network and Wireless Connectivity

The Yamaha RX-V675 supports robust network and wireless connectivity, enabling seamless integration with modern entertainment systems. Built-in Wi-Fi allows for easy connection to home networks, while Bluetooth ensures wireless streaming from compatible devices. This receiver is compatible with Yamaha’s AV Controller app, offering remote operation and enhanced control. Wireless connectivity options simplify setup and expand entertainment possibilities, making it easy to stream music or control settings via smartphone. The user manual provides detailed guidance for configuring these features, ensuring a smooth and intuitive experience for users.

Advanced Settings and Customization

The Yamaha RX-V675 offers advanced customization options, including detailed audio calibration and multi-zone controls, allowing users to tailor their home theater experience to precise preferences.

Audio Calibration

The Yamaha RX-V675 features advanced audio calibration tools, including the YPAO (Yamaha Parametric Acoustic Optimizer) system, which automatically adjusts speaker settings for optimal sound quality. Users can manually fine-tune settings like crossover frequencies, speaker levels, and equalization to tailor the audio experience. The receiver supports high-resolution audio formats and advanced decoding technologies such as Dolby Atmos and DTS:X. Detailed calibration options ensure precise sound customization, enhancing immersion in movies and music. The user manual provides step-by-step guidance for achieving the best audio performance tailored to your home theater setup.

Multi-Zone Functionality

The Yamaha RX-V675 supports multi-zone audio distribution, allowing users to enjoy different audio sources in up to three separate zones. This feature enables independent control of each zone, including source selection and volume adjustment. Users can assign specific inputs to each zone, ensuring tailored audio experiences across different areas of the home. The receiver also supports wireless multi-zone functionality via Yamaha’s MusicCast system, enhancing flexibility and convenience. The user manual provides detailed instructions for configuring and managing multi-zone setups, ensuring seamless integration into any home audio system. This feature is ideal for whole-home entertainment solutions.

Troubleshooting Common Issues

The Yamaha RX-V675 user manual provides solutions for common issues like connectivity problems, audio delays, and HDMI handshake errors. Check connections, restart devices, and update firmware for resolution.

Common Problems and Solutions

The Yamaha RX-V675 may encounter issues like HDMI connectivity problems or audio delays. Ensure all connections are secure and restart the receiver. For HDMI handshake errors, disable and re-enable HDMI on connected devices. Audio synchronization issues can be resolved by adjusting the audio delay settings in the receiver’s menu. Firmware updates often address bugs and improve performance. Refer to the user manual for detailed troubleshooting steps or contact Yamaha support for assistance. Regularly updating the firmware and checking connections can prevent many common issues.

Maintenance and Support

Regularly clean the Yamaha RX-V675 with a soft cloth and ensure proper ventilation. Update firmware for optimal performance. For support, visit Yamaha’s official website or download the user manual for troubleshooting and repair guidance.

Regular Maintenance Tips

To ensure optimal performance, regularly clean the Yamaha RX-V675 with a soft, dry cloth. Avoid harsh chemicals or liquids, as they may damage the finish. Proper ventilation is crucial; ensure the receiver is placed in a well-ventilated area to prevent overheating. Update firmware periodically to access the latest features and improvements. Check for dust buildup inside the unit and clean gently with compressed air if necessary. Regularly inspect all connections and cables for wear or damage to maintain signal integrity. For detailed maintenance procedures, refer to the user manual or Yamaha’s official support website.

Accessing Yamaha Support

For assistance with the Yamaha RX-V675, visit the official Yamaha support website at https://usa.yamaha.com/support. Here, you can download user manuals, FAQs, and firmware updates. The site also offers troubleshooting guides and detailed technical specifications. For direct support, contact Yamaha’s customer service via phone, email, or live chat. Additionally, authorized Yamaha dealers and service centers provide professional help for complex issues. Many resources are available in multiple languages, ensuring global accessibility. For more information, refer to the user manual or visit the Yamaha support page.

special diet form odsp pdf

The Special Diet Form ODSP PDF is a crucial document for Ontario residents requiring specialized nutrition due to medical conditions, enabling eligibility for the Special Diet Allowance.

1.1 Overview of the Ontario Disability Support Program (ODSP)

The Ontario Disability Support Program (ODSP) provides financial and other supports to eligible Ontario residents with disabilities. It is part of the province’s social assistance system, aiming to help individuals with disabilities cover basic needs and achieve greater independence. ODSP offers income support, health benefits, and employment assistance. Eligibility is based on disability status, income, and assets. It also includes the Special Diet Allowance for those requiring specialized nutrition due to medical conditions.

1;2 Purpose of the Special Diet Allowance

The Special Diet Allowance is designed to provide financial support to ODSP recipients with specific medical conditions requiring specialized diets. It helps cover the additional costs of food necessary for health management. This allowance is a non-taxable benefit added to income support, ensuring individuals can afford essential nutrition without impacting other benefits. Its goal is to support well-being and independence for those with higher dietary needs due to medical conditions.

Eligibility Criteria for the Special Diet Allowance

Eligibility is based on medical conditions requiring a special diet and meeting income/asset requirements. Applicants must submit a completed form signed by a healthcare professional.

2.1 Medical Conditions That Qualify for the Allowance

Qualifying medical conditions include diabetes, high blood pressure, and other health issues requiring a special diet. The condition must necessitate a dietary modification confirmed by a healthcare provider. The form must be completed by a doctor, nurse, or registered dietitian, ensuring the medical need aligns with the Special Diet Allowance requirements.

2.2 Income and Asset Requirements

To qualify for the Special Diet Allowance, applicants must meet specific income and asset criteria set by ODSP. Income limits vary based on household size and other factors, ensuring support is targeted to those in need. Assets, such as savings or property, are also assessed to determine eligibility. Meeting these financial requirements is essential for receiving the allowance, alongside the medical condition verification.

How to Apply for the Special Diet Allowance

Applicants must obtain and complete the Special Diet Form, have it signed by a healthcare professional, and submit it to ODSP with required documentation.

3.1 Obtaining the Special Diet Form (PDF)

The Special Diet Form (PDF) can be downloaded from the official ODSP website or obtained from local ODSP offices. It is essential to ensure the form is up-to-date, as outdated versions may not be accepted. Applicants can also access fillable templates online, making it easier to complete electronically before printing. The form must be signed by a healthcare provider, and Section 4 requires the applicant’s or authorized representative’s signature. Using the correct version is crucial to avoid delays or rejection.

3.2 Completing the Application Form

Completing the Special Diet Form requires accurate information about the applicant’s medical condition and dietary needs. The healthcare provider must detail the specific dietary requirements and confirm the medical necessity. Applicants must ensure all sections are filled out correctly, including personal and medical details. Signatures from both the healthcare provider and the applicant (or authorized representative) are mandatory. For children under 16, a social worker’s signature may also be required to process the application effectively.

3.3 Required Documentation and Signatures

The application must include a completed and signed Special Diet Form by a healthcare professional, such as a doctor or registered dietitian. Applicants or their authorized representatives must also sign the form. For children under 16, a social worker’s signature may be required. All documentation must be submitted within 90 days of the application date to avoid cancellation of the allowance. Extensions may be granted for valid reasons, ensuring timely processing.

Role of Healthcare Professionals

Healthcare professionals, such as doctors or dietitians, must confirm the medical condition and recommend a special diet, ensuring the form is accurately completed and signed.

4.1 Healthcare Providers Eligible to Sign the Form

Eligible healthcare providers include doctors, nurse practitioners, registered nurses with extended experience, and registered dietitians. They must confirm the medical condition and recommend a special diet. The provider’s signature is mandatory for form validation. For children under 16, a social worker’s signature may also be required. This ensures the request is medically justified and aligns with program requirements.

4.2 Responsibilities of the Healthcare Professional

Healthcare professionals must assess the individual’s medical condition, recommend a suitable special diet, and accurately complete the form. They ensure all information is correct and aligns with the patient’s needs. Professionals must also maintain professional standards and provide clear, evidence-based recommendations. Their role is crucial in validating the application and ensuring compliance with ODSP guidelines. They must stay updated on program requirements and changes to provide accurate support.

Benefits and Financial Implications

The Special Diet Allowance provides financial support for individuals with specific dietary needs, with a 2.8% rate increase in 2025, reflecting inflation adjustments since 2022.

5.1 Amount of the Special Diet Allowance

The Special Diet Allowance amount varies based on individual needs and medical conditions, with rates adjusted annually to reflect inflation. As of 2025, a 2.8% increase has been implemented, following previous adjustments since 2022, totaling a 20% rise. The allowance is calculated to cover additional dietary costs, with maximum amounts allocated per household member. Recipients must submit updated forms annually to maintain eligibility, ensuring continued financial support for specialized nutrition needs.

5.2 How the Allowance Affects ODSP Benefits

The Special Diet Allowance is an additional benefit provided to ODSP recipients, separate from basic income support. It does not reduce other ODSP benefits and is non-taxable. The allowance is intended to cover extra dietary costs due to medical conditions. Recipients must report any changes in household income or expenses, as these may affect overall ODSP eligibility. The allowance is renewable annually, ensuring continued support for specialized nutritional needs.

Changes and Updates in 2025

The 2025 updates include a 2.8% inflation-based increase to ODSP rates, effective July 1, 2025, and adjustments to the Special Diet Allowance program.

6.1 Rate Increases and Inflation Adjustments

The 2025 updates include a 2.8% inflation-based increase to ODSP rates, effective July 1, 2025. This adjustment reflects the fourth rate increase since September 2022, totaling a 20% rise. These changes ensure the Special Diet Allowance aligns with inflation, providing adequate support for recipients with medical conditions requiring specialized diets.

6.2 Key Dates for Application and Renewal

Applications for the Special Diet Allowance must be submitted within 90 days of completion. Renewals are required annually, with updated forms and medical verification. Extensions may be granted for difficulty in completing the form. Key dates include the program’s end on July 31 and the new program’s start on April 1, ensuring continuity for eligible recipients requiring specialized diets due to medical conditions.

The Approval Process

The approval process involves reviewing the submitted form, verifying medical eligibility, and assessing financial need. ODSP notifies applicants of their decision, ensuring timely communication and clarity.

7.1 Submission and Review Timelines

The Special Diet Allowance application is reviewed within 90 days of submission. ODSP processes the form efficiently, ensuring timely assessments. Applicants receive updates on their application status, with decisions typically made within a few weeks. If additional information is required, processing times may extend. Applicants can request extensions if facing challenges in meeting deadlines, ensuring flexibility for those needing more time to complete or submit their forms.

7.2 What Happens After Submitting the Form

After submitting the Special Diet Form, ODSP reviews the application to determine eligibility. Applicants are notified in writing regarding approval or denial. If approved, a confirmation letter outlines the allowance amount and duration. Payments are typically incorporated into regular ODSP benefits. Recipients are informed of renewal requirements to continue receiving the allowance. If denied, applicants receive reasons for the decision and information on the appeal process.

Common Challenges and Solutions

Challenges include completing the form accurately and meeting submission deadlines. Solutions involve seeking assistance from healthcare providers or requesting a 90-day extension if needed.

8.1 Difficulties in Completing the Form

Many applicants face challenges completing the form due to its complexity and medical terminology. Ensuring accuracy and gathering required documentation can be overwhelming. Additionally, understanding eligibility criteria and navigating the submission process may pose difficulties for those without assistance. Recipients must ensure all sections, including healthcare provider signatures, are correctly filled out to avoid delays or rejection. Seeking guidance from healthcare professionals or support organizations can help alleviate these challenges.

8.2 Extension of the 90-Day Submission Period

An extension of the 90-day submission period may be granted if applicants face difficulties in completing the form. This can include challenges in obtaining required signatures or documentation. Recipients must request the extension before the deadline, providing justification for the delay. ODSP may approve extensions on a case-by-case basis to ensure individuals have adequate time to submit a completed application without penalty.

The Special Diet Form ODSP PDF is a vital resource for individuals needing specialized nutrition support. Proper completion ensures eligibility for essential benefits, improving overall well-being.

9.1 Summary of Key Points

The Special Diet Form ODSP PDF is essential for individuals with medical conditions requiring specialized nutrition. It outlines eligibility criteria, application processes, and required documentation. Key points include the role of healthcare professionals, submission timelines, and the importance of accurate completion to receive benefits. Understanding the form ensures proper navigation of the ODSP system, maximizing support for those in need of dietary accommodations due to health conditions.

9.2 Importance of Understanding the Special Diet Allowance

Understanding the Special Diet Allowance is crucial for individuals with dietary needs due to medical conditions. It ensures eligibility verification, proper application submission, and awareness of required documentation. Accurate comprehension prevents errors, delays, or denial of benefits. It empowers individuals to navigate the ODSP system effectively, securing necessary financial support for specialized nutrition and improving overall well-being through informed decision-making;

Additional Resources

Visit the official Ontario government website for detailed guides, PDF forms, and contact information to assist with your Special Diet Allowance application and inquiries.

10.1 Where to Find More Information

Visit the official Ontario government website for detailed guides, downloadable PDF forms, and step-by-step instructions. Additional resources include the Ontario Works Act, contact information for ODSP support, and third-party platforms like DocHub for form management. These sources provide comprehensive assistance for applicants seeking clarity on the Special Diet Allowance process and requirements.

10.2 Contact Information for ODSP Support

For assistance with the Special Diet Allowance, contact ODSP support through their official website or visit a local office. You can also call the ODSP hotline or email for inquiries. Additional support is available through community organizations and online platforms offering form guidance. Ensure to verify eligibility and required documentation before reaching out for streamlined assistance.

Page 1 of 3

Powered by WordPress & Theme by Anders Norén