Month: November 2024 Page 2 of 3

canon rebel t3i instruction manual

The Canon Rebel T3i is a versatile 18-megapixel DSLR camera designed for both beginners and professionals. It features a vari-angle LCD‚ Full HD video recording‚ and an 18-55mm kit lens‚ making it ideal for capturing high-quality images and videos. This manual provides comprehensive guidance on mastering its features and settings to enhance your photography experience.

1.1 Overview of the Camera and Its Features

The Canon Rebel T3i is an 18-megapixel DSLR camera featuring a CMOS sensor‚ DIGIC 4 processor‚ and vari-angle 3-inch LCD. It supports Full HD 1080p video‚ 3.7 fps continuous shooting‚ and a 9-point autofocus system. Designed for both beginners and advanced users‚ it offers manual controls‚ creative modes‚ and compatibility with EF-S lenses‚ making it versatile for photography and videography.

1.2 Importance of the Instruction Manual

The instruction manual is essential for understanding the Canon Rebel T3i’s features‚ troubleshooting‚ and optimizing its performance. It provides detailed guidance on camera settings‚ shooting modes‚ and maintenance‚ ensuring users maximize their photography experience. The manual also offers solutions for common issues‚ making it a vital resource for both beginners and advanced photographers to master the T3i effectively.

Key Features of the Canon Rebel T3i

The Canon Rebel T3i features an 18-MP CMOS sensor‚ DIGIC 4 processor‚ vari-angle LCD‚ and Full HD video‚ offering versatility for photography and videography needs.

2.1 18-Megapixel CMOS Sensor

The Canon Rebel T3i’s 18-megapixel CMOS sensor captures high-resolution images with detailed clarity. It ensures excellent performance in various lighting conditions‚ delivering vibrant colors and smooth tonal gradations. This sensor is key to producing sharp‚ professional-quality photos‚ making it ideal for both casual and advanced photography projects.

2.2 DIGIC 4 Image Processor

The DIGIC 4 Image Processor enhances image quality with efficient noise reduction and vibrant color reproduction; It enables fast processing of large image files‚ supports continuous shooting up to 3.7 fps‚ and facilitates advanced camera functions like Full HD video recording and Live View. This processor ensures quick autofocus and precise metering for optimal performance.

2.3 Vari-Angle 3-Inch LCD Screen

The Vari-Angle 3-inch LCD screen offers flexible shooting from various angles. Its 1‚040‚000-dot resolution ensures sharp and detailed previews of images and videos. The swivel design allows shooting in challenging positions‚ while the wide viewing angle enhances clarity. This feature is particularly useful for recording videos or composing shots from low or high perspectives with ease and precision.

2.4 Full HD 1080p Video Recording

The Canon Rebel T3i captures stunning Full HD 1080p videos with manual exposure control. It offers selectable frame rates and an HDMI output for HDTV playback. While continuous autofocus isn’t available during recording‚ manual focus adjustments ensure precise control. This feature makes it ideal for creative storytelling and professional-grade video production‚ enhancing your visual storytelling capabilities effectively.

Camera Controls and Components

The Canon Rebel T3i features an array of controls and components‚ including a vari-angle LCD screen‚ designed for easy access and intuitive operation of various camera functions.

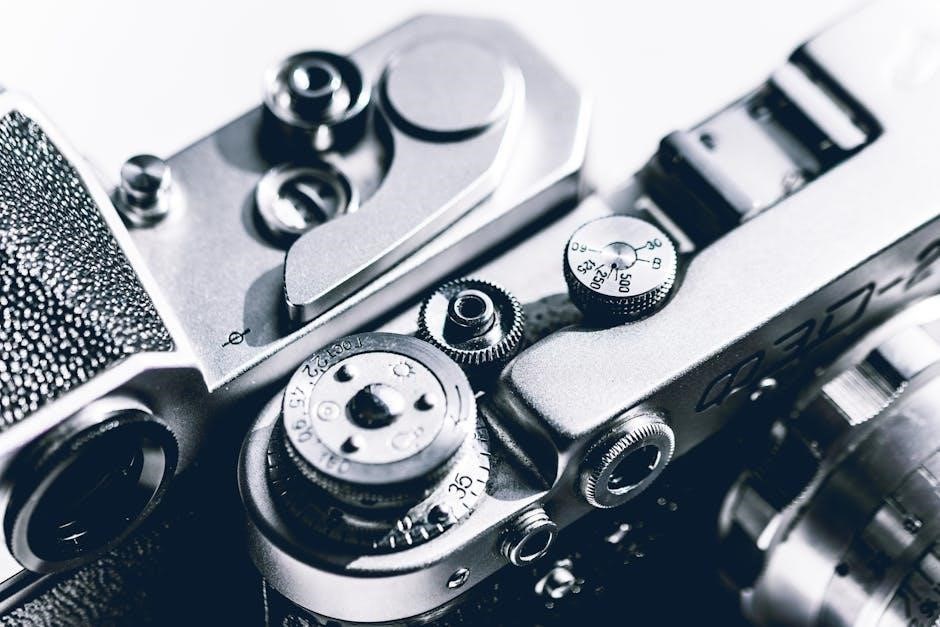
3.1 Top Controls: Mode Dial‚ ISO Button‚ and Main Dial

The Mode Dial on the Canon Rebel T3i allows users to switch between shooting modes like Program‚ Av‚ Tv‚ and Manual. The ISO Button provides quick access to adjust sensitivity‚ while the Main Dial offers intuitive control over settings‚ ensuring seamless navigation and operation during photo sessions.

3.2 Rear Controls: AF Button‚ Cross Keys‚ and Live View

The AF Button on the rear of the Canon Rebel T3i enables quick access to autofocus modes. The Cross Keys allow for easy navigation of menu options and AF point selection. The Live View button activates the camera’s vari-angle LCD screen for precise framing and focusing‚ enhancing both still and video shooting experiences.

Shooting Modes

The Canon Rebel T3i offers multiple shooting modes‚ including Program‚ Aperture Priority‚ Shutter Priority‚ and Manual Mode‚ catering to both automatic and manual photography preferences for precise control over settings.

4.1 Program Mode (P)

Program Mode (P) offers automatic exposure control‚ adjusting aperture and shutter speed for optimal results. It allows flexibility to adjust ISO‚ white balance‚ and other settings while maintaining ease of use‚ making it ideal for everyday photography and quick shots without manual adjustments.

4.2 Aperture Priority Mode (Av)

In Aperture Priority Mode (Av)‚ you control the aperture while the camera adjusts the shutter speed. This mode is perfect for creative depth-of-field effects‚ allowing you to isolate subjects or ensure background sharpness. Use the main dial to select your desired f-stop‚ making it ideal for portraits‚ landscapes‚ and macro photography.

4.3 Shutter Priority Mode (Tv)

In Shutter Priority Mode (Tv)‚ you set the shutter speed using the main dial‚ and the camera adjusts the aperture. This mode is ideal for capturing motion effects‚ such as freezing fast-moving subjects or creating artistic motion blur. It’s perfect for sports‚ wildlife‚ or creative photography where controlling time is essential for the desired visual effect.

4.4 Manual Mode (M)

In Manual Mode (M)‚ you have full control over both aperture and shutter speed. Set aperture using the AV dial and shutter speed with the main dial. ISO can be adjusted separately to fine-tune exposure. This mode offers complete creative freedom‚ allowing you to manually balance lighting for precise results in any shooting scenario.

ISO Sensitivity and Noise Reduction

The Canon Rebel T3i features an ISO range of 100-6400‚ allowing shooting in diverse lighting conditions; Built-in noise reduction minimizes grain‚ ensuring sharp‚ detailed images even in low-light environments.

5.1 Adjusting ISO Settings

To adjust ISO settings on the Canon Rebel T3i‚ press the ISO button located on the top of the camera. Rotate the main dial to select the desired ISO value‚ ranging from 100 to 6400. This allows for optimal sensitivity in various lighting conditions‚ balancing exposure and minimizing digital noise effectively for clearer images. Use lower ISOs for bright settings and higher for low-light scenarios.

5.2 Understanding ISO Ranges (100-6400)

The Canon Rebel T3i offers an ISO range of 100 to 6400‚ providing flexibility in diverse lighting conditions. ISO 100 is ideal for bright environments‚ ensuring minimal noise. Higher ISOs like 6400 allow shooting in low light but may introduce digital noise. The camera balances this with noise reduction features‚ maintaining image quality across the range for versatile photography needs effectively.

5.3 Managing Digital Noise

Digital noise appears as grain in images‚ especially at high ISOs. The Rebel T3i includes noise reduction features to minimize this effect. Use the lowest ISO necessary for your lighting conditions and enable noise reduction in the menu. For best results‚ shoot in RAW format or use external noise reduction software during post-processing to maintain image clarity and detail effectively.

Autofocus and Manual Focus

The Rebel T3i offers three autofocus modes: One-Shot AF for stationary subjects‚ AI Focus AF for switching between stills‚ and AI Servo AF for tracking moving subjects. Manual focus allows precise control using the focus ring or AF point selection for enhanced creativity and accuracy in various shooting scenarios.

6.1 Autofocus Modes: One-Shot AF‚ AI Focus AF‚ and AI Servo AF

The Rebel T3i features three autofocus modes. One-Shot AF is ideal for stationary subjects‚ locking focus once. AI Focus AF automatically switches between One-Shot and AI Servo AF‚ detecting subject movement. AI Servo AF continuously tracks moving subjects‚ ensuring sharp images. These modes provide flexibility for various shooting scenarios‚ from portraits to dynamic action photography.

6.2 Manual Focus and AF Point Selection

Manual focus on the Rebel T3i is activated by switching the lens to MF mode‚ allowing precise control over focus. AF point selection is done via the AF button and cross keys‚ enabling you to choose from nine selectable points for accurate subject focus. This feature enhances compositional control and focusing precision in various shooting situations.

Video Recording and Settings

The Rebel T3i offers Full HD 1080p video recording with manual exposure control‚ enabling creative freedom; Selectable frame rates and an HDMI output allow for high-quality playback on HDTVs‚ enhancing versatility in video capture.

7.1 Starting and Stopping Video Recording

To begin recording video on the Canon Rebel T3i‚ switch the mode dial to the Movie mode (marked by a video camera icon). Press the red record button to start filming. The live view screen will display the video as it records. To stop recording‚ press the red record button again. The camera will automatically save the video to the memory card for later review or playback.

7.2 Adjusting Video Resolution and Frame Rate

Access the menu system to adjust video resolution and frame rate. Choose from resolutions like 1080p‚ 720p‚ or 480p‚ and frame rates such as 24‚ 25‚ or 30 fps. Use the cross keys to navigate and select your preferred settings. These adjustments ensure optimal video quality for your creative needs‚ enhancing your storytelling through precise control over motion and detail.

7.3 Manual Focus in Video Mode

For precise control‚ enable Manual Focus by switching the lens to MF mode. Use the focus ring to adjust focus before or during recording. Ensure the subject is sharp by checking the LCD. Manual focus prevents unwanted autofocus shifts‚ allowing for smooth‚ professional-looking transitions in your video footage.

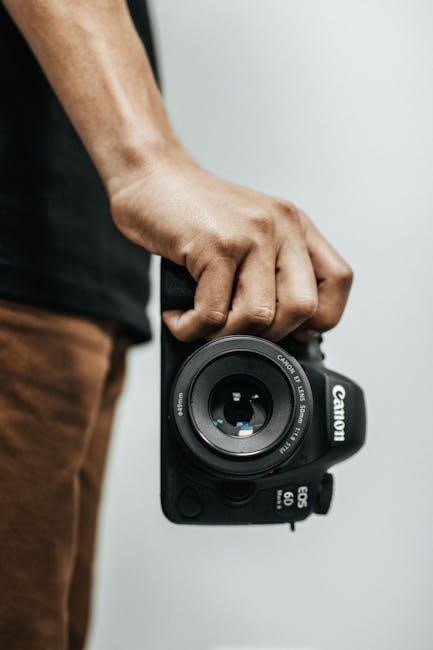
Ergonomics and Build Quality

The Canon Rebel T3i features a lightweight yet durable design‚ ensuring comfort during extended use. Its ergonomic grip and intuitive controls provide easy handling‚ while the body is built to withstand regular use‚ making it a reliable choice for photographers of all levels.

8.1 Lightweight and Durable Construction

The Canon Rebel T3i combines a lightweight design with durable materials‚ ensuring both portability and resilience. Its compact body weighs approximately 570 grams‚ making it easy to carry for extended periods. Constructed with high-quality plastics and internal metal components‚ it withstands regular use while maintaining a professional feel‚ offering a balance between comfort and durability for photographers.

8.2 Compatibility with EF and EF-S Lenses

The Canon Rebel T3i is compatible with Canon’s extensive range of EF and EF-S lenses‚ offering flexibility for various photography needs. From wide-angle to telephoto lenses‚ this compatibility allows photographers to explore creative possibilities while maintaining high image quality across different focal lengths and aperture settings.

Memory Cards and Storage

The Canon Rebel T3i supports SD‚ SDHC‚ and SDXC memory cards‚ ensuring ample storage for high-resolution photos and videos. Use high-speed cards for optimal performance.

9.1 Supported Memory Card Types

The Canon Rebel T3i supports SD‚ SDHC‚ and SDXC memory cards‚ offering flexibility for various storage needs. These cards are compatible with high-speed data transfer‚ ensuring efficient performance during photo and video capture. Always use Class 6 or higher cards for optimal functionality‚ especially for Full HD video recording and burst shooting.

9.2 Best Practices for Memory Card Usage

Always format memory cards in the camera before use to ensure compatibility. Use high-speed Class 6 or higher cards for optimal performance. Avoid using cards across multiple cameras to prevent data mix-ups. Safely eject cards to prevent data loss. Regularly back up images and format cards as needed to maintain performance and reliability.

Troubleshooting Common Issues

Common issues include autofocus errors‚ video recording malfunctions‚ and memory card problems; Cleaning the lens‚ resetting settings‚ and updating firmware often resolve these issues effectively.

10.1 Resolving Autofocus Problems

Autofocus issues can often be resolved by cleaning the lens and ensuring proper alignment. Use the AF point selection button to choose the correct focus area. If problems persist‚ reset the camera settings or update the firmware. Refer to the manual for detailed steps to troubleshoot and fix autofocus malfunctions effectively.

10.2 Addressing Video Recording Issues

If you’re experiencing problems with video recording on your Canon Rebel T3i‚ start by ensuring your memory card is compatible and has sufficient space. Check the camera’s video settings to confirm the correct resolution and frame rate are selected. If autofocus is unreliable‚ switch to manual focus using the AF button. Formatting the memory card via the setup menu can also resolve issues. Ensure the firmware is up-to-date‚ as updates often improve functionality. Refer to the manual for detailed troubleshooting steps to resolve video-related problems effectively.

Software and Accessories

The Canon Rebel T3i supports software like EOS Utility and Digital Photo Professional for enhanced image management. Accessories include EF and EF-S lenses‚ remote controls‚ and memory cards‚ expanding its functionality and user experience.

11.1 Canon EOS Utility and Digital Photo Professional

The Canon EOS Utility simplifies image transfer and remote shooting‚ while Digital Photo Professional offers advanced RAW editing. Both tools enhance workflow‚ allowing precise control over image processing and management‚ ensuring optimal results from your Rebel T3i.

11.2 Recommended Accessories for the Rebel T3i

The Rebel T3i can be enhanced with accessories like high-quality EF/EF-S lenses‚ memory cards‚ and a tripod for stability. A remote switch or wired remote reduces camera shake‚ while a protective camera bag ensures safe transport. Additionally‚ external flashes and filters expand creative possibilities‚ helping you capture stunning images and videos with ease and precision.

Maintenance and Upkeep

Regularly clean the camera and lens to prevent dust buildup. Check for firmware updates to ensure optimal performance. Store the camera in a dry‚ cool place to maintain functionality and longevity.

12.1 Cleaning the Camera and Lens

Regularly clean the camera and lens to prevent dust buildup. Use a microfiber cloth to wipe the lens and camera body. For stubborn spots‚ lightly dampen the cloth with water‚ avoiding liquid contact with internal components. Use a soft-bristle brush to gently remove dust from the lens surface and camera crevices. Avoid harsh chemicals or abrasive materials that may damage the equipment.

12.2 Updating Firmware and Software

Regularly update the camera’s firmware and software for optimal performance and security. Connect the camera to a computer via USB‚ then use Canon’s EOS Utility to download and install the latest updates. Ensure the camera is fully charged and avoid INTERRUPTIONS during the update process. Visit Canon’s official website for the most recent firmware versions.

Thank you for completing the Canon Rebel T3i instruction manual. With practice and experimentation‚ you’ll master its features and capture stunning photos. Happy shooting!

13.1 Mastering the Canon Rebel T3i

Mastering the Canon Rebel T3i requires practice and experimentation with its advanced features. Familiarize yourself with the 18-Megapixel CMOS sensor‚ DIGIC 4 processor‚ and vari-angle LCD for versatile shooting. Explore manual controls‚ ISO settings‚ and autofocus modes to enhance your photography skills. Regular use of the instruction manual will help you unlock the camera’s full potential and capture stunning images with ease and creativity.

13.2 Final Tips for Getting the Most Out of Your Camera

Experiment with different shooting modes and settings to discover your photography style. Regularly clean the sensor and lens for optimal image quality. Use the vari-angle LCD for unique compositions. Explore compatible EF-S lenses to expand creative possibilities. Always refer to the manual for troubleshooting and maintenance tips to ensure longevity and performance.

piercings guide

Body piercings are a timeless form of self-expression‚ with roots in ancient cultures․ Today‚ they blend personal style‚ cultural heritage‚ and modern trends‚ offering endless customization options for all․

History and Evolution of Body Piercings

Body piercings trace back to ancient civilizations in Egypt‚ India‚ and the Americas‚ serving spiritual‚ cultural‚ and symbolic purposes․ Early practices included adornments like earrings and nose rings‚ often signifying status or religious devotion․ Over time‚ piercings evolved from ritualistic acts to a form of personal expression․ By the 20th century‚ they became a mainstream phenomenon‚ blending traditional techniques with modern aesthetics․ Today‚ piercings represent a fusion of history‚ culture‚ and individuality‚ offering a universally accepted way to celebrate identity and style․

Modern Trends and Popularity of Piercings

Body piercings have evolved into a mainstream phenomenon‚ embraced by diverse cultures worldwide․ Today‚ they serve as a vibrant form of self-expression‚ blending fashion‚ art‚ and personal identity․ Social media has fueled their popularity‚ showcasing unique designs and inspiring individuals to explore creative possibilities; From delicate ear piercings to bold facial and body designs‚ modern trends emphasize individuality and experimentation․ High-quality jewelry and professional techniques have made piercings safer and more accessible‚ appealing to both newcomers and seasoned enthusiasts․ This art form continues to grow‚ reflecting contemporary style and cultural influences․

Popular Types of Piercings

Body piercings come in various forms‚ each offering unique aesthetic possibilities․ Common types include ear‚ facial‚ and body piercings‚ catering to diverse preferences and personal styles․

Ear Piercings

Ear piercings are a popular and versatile choice‚ offering a range of options for beginners and enthusiasts alike․ The earlobe piercing is the most common‚ with a healing time of 6-8 weeks and minimal aftercare․ Cartilage piercings‚ such as the helix‚ tragus‚ and daith‚ provide unique placements and jewelry options‚ though they require more care due to the density of cartilage․ Transverse and forward helix piercings add modern twists‚ while snug and conch piercings offer bold‚ eye-catching styles․ Each type allows for personalized expression‚ making ear piercings a timeless favorite․

Facial Piercings

Facial piercings are bold and eye-catching‚ offering unique ways to enhance natural features․ Nose piercings‚ including nostril and septum options‚ are popular for their versatility and cultural significance․ The eyebrow piercing adds an edgy aesthetic‚ customizable with various jewelry styles․ Lip piercings‚ such as the labret‚ Monroe‚ and snake bites‚ provide dramatic flair‚ while frenulum piercings offer discreet yet playful options․ Each placement requires careful consideration of anatomy and aftercare‚ making facial piercings a striking form of personal expression․

Body Piercings

Body piercings offer a versatile way to enhance and personalize your appearance․ Popular options include navel piercings‚ which are adorned with decorative jewelry‚ and nipple piercings‚ known for their striking aesthetic․ Surface piercings‚ such as those on the chest or back‚ provide creative freedom․ Each placement allows individuals to accentuate different body parts‚ with jewelry ranging from minimalist designs to elaborate styles․ Proper aftercare is crucial‚ especially for navel piercings‚ which may require longer healing times․ Body piercings are a bold form of artistic expression and personal style․

Piercing Aftercare

Piercing aftercare is crucial for promoting healing and preventing complications․ Regular cleaning with saline solution‚ avoiding tight clothing‚ and refraining from jewelry changes help ensure a smooth recovery․

Importance of Proper Cleaning

Proper cleaning is the cornerstone of successful piercing aftercare․ Using saline solution daily helps prevent infections and promotes healing․ Avoid harsh chemicals‚ as they can irritate the skin․ Regular cleaning ensures the piercing heals from the inside out‚ reducing the risk of complications․ Neglecting proper hygiene can lead to prolonged healing times or infections․ Consistent care routines are essential for maintaining healthy‚ vibrant piercings that enhance your appearance and personal style․

Healing Time and Care Requirements

Healing times vary by piercing type‚ with earlobe piercings healing in 6-8 weeks and cartilage piercings taking longer․ Facial piercings‚ like septum or nostril‚ typically heal in 2-4 months․ Body piercings‚ such as navel‚ may take up to a year․ Proper care includes consistent saline soaks‚ avoiding tight clothing‚ and refraining from jewelry changes until fully healed․ Patience is key‚ as rushing the process can lead to complications․ Always follow a professional piercer’s advice to ensure optimal healing and minimize risks․

Choosing the Right Jewelry

Selecting the right jewelry is crucial for both safety and style․ Opt for high-quality‚ body-safe materials like surgical stainless steel or solid gold to minimize risks and ensure comfort․

Jewelry Materials and Safety

Choosing the right jewelry materials is vital for safety and healing․ Surgical stainless steel‚ titanium‚ and solid gold are recommended for their biocompatibility and resistance to irritation․ Avoid low-quality metals like brass or plated jewelry‚ as they can cause allergic reactions․ Properly polished surfaces prevent bacteria buildup‚ ensuring a smooth healing process․ Always opt for jewelry designed specifically for piercings‚ as it adheres to safety standards and minimizes health risks․

Styles and Designs for Different Piercings

From delicate studs to bold statement pieces‚ piercings offer endless styling options․ Ear piercings can feature dainty hoops‚ drops‚ or stacked jewelry for a personalized look․ Facial piercings‚ like septum or eyebrow piercings‚ often use minimalistic designs such as thin barbells or rings for a sleek aesthetic․ Body piercings‚ including navel or industrial styles‚ showcase unique designs like curved barbells or ornate rings․ Each piercing type allows for creative expression‚ with jewelry ranging from subtle to elaborate‚ ensuring a look that suits every individual’s style and preference․

Cost of Piercings

Piercing costs vary widely‚ ranging from $30 to $150‚ depending on the type‚ jewelry material‚ and piercer expertise․ Basic piercings like earlobes are more affordable‚ while complex designs or premium materials increase prices․

Factors Influencing Pricing

The cost of piercings is influenced by several factors‚ including the type of piercing‚ the material of the jewelry‚ and the expertise of the piercer․ Basic piercings like earlobes are generally more affordable‚ while complex piercings such as industrials or dermals require more time and skill‚ increasing their price․ Jewelry quality also plays a role‚ with premium materials like gold or platinum costing more than stainless steel․ Additionally‚ the reputation and experience of the piercer‚ as well as the studio’s location‚ can affect pricing․ These factors collectively determine the final cost of a piercing․

Safety and Health Considerations

Safety and health are critical in piercings․ Proper aftercare‚ choosing a professional piercer‚ and selecting safe jewelry materials are essential to minimize risks like infections and allergic reactions․

How to Find a Professional Piercer

Choosing a professional piercer is crucial for a safe and positive experience․ Look for certifications from reputable organizations like the Association of Professional Piercers․ Check online reviews‚ ask for referrals‚ and visit studios to assess cleanliness and hygiene standards․ A skilled piercer will guide you through the process‚ use high-quality equipment‚ and provide clear aftercare instructions․ Ensure they prioritize your health and comfort‚ avoiding any studio that compromises on safety or sterilization․

Common Health Risks and Precautions

While piercings are generally safe‚ they carry risks like infections‚ allergic reactions‚ and prolonged healing․ Proper cleaning is essential to prevent infections‚ and choosing hypoallergenic jewelry materials can reduce the risk of allergic reactions․ Avoiding tight clothing and improper jewelry changes is crucial․ Patience is key‚ as piercings may appear healed before the process is complete internally․ Following aftercare routines diligently and consulting professionals can minimize complications and ensure a smooth recovery․

The Piercing Process

The piercing process involves preparation‚ precision‚ and care․ Professional piercers ensure safety by using sterilized equipment and guiding clients through each step‚ from jewelry selection to aftercare instructions․

What to Expect During a Piercing Session

During a piercing session‚ expect a clean‚ professional environment․ A trained piercer will guide you through the process‚ ensuring safety and comfort․ They’ll prepare the area‚ use sterilized equipment‚ and perform the piercing quickly․ You’ll feel a brief pinch‚ but the process is generally fast․ Afterward‚ the piercer will provide aftercare instructions and jewelry options․ The experience is straightforward‚ with the piercer ensuring you’re informed and at ease throughout․ Proper preparation and a calm mindset will make the session smooth and stress-free․

Pain Levels and Personal Experiences

Pain levels during piercings vary depending on the location and individual tolerance․ Earlobe piercings are typically mild‚ while cartilage or facial piercings may cause more discomfort․ Personal experiences differ; some find it a quick pinch‚ while others describe a brief sting․ Breathing techniques and mental preparation can help manage anxiety․ Professional piercers ensure the process is swift‚ minimizing pain․ After the piercing‚ some may experience swelling or tenderness‚ but proper aftercare eases discomfort․ Overall‚ the brief pain is often outweighed by the satisfaction of achieving a desired look․

Healing and Maintenance

Proper healing requires patience‚ with durations varying by piercing type․ Regular cleaning and avoiding irritants ensure a smooth recovery․ Consistent care prevents complications and promotes longevity of piercings․

The Importance of Patience in the Healing Process

Piercings heal at varying rates‚ with some taking weeks and others several months․ Patience is crucial‚ as premature jewelry changes or neglect can lead to complications․ Even when a piercing appears healed externally‚ the interior may still be fragile․ Avoiding irritants and adhering to aftercare routines ensures proper healing․ Impatience can result in infections or prolonged recovery․ Consistent care and time allow piercings to fully heal‚ ensuring they remain healthy and visually appealing․ Patience is key to enjoying your piercing long-term․

Long-Term Care for Piercings

Proper long-term care ensures piercings remain healthy and visually appealing․ Regularly clean piercings with saline solution and avoid harsh chemicals․ Check jewelry for tightness to prevent migration or irritation․ Avoid tight clothing that may rub against piercings‚ especially in sensitive areas․ Refrain from excessive touching‚ as this can introduce bacteria․ By maintaining consistent care‚ individuals can enjoy their piercings for years․ Proper long-term care prevents complications and keeps piercings looking their best‚ making them a lasting form of personal expression and style․

Future Trends in Piercings

As piercings evolve‚ future trends emphasize innovative designs‚ personalized styles‚ and advanced jewelry techniques‚ blending artistry with technology for unique‚ customizable expressions that celebrate individuality and modern aesthetics․

Emerging Styles and Techniques

Emerging piercing styles focus on minimalism and uniqueness‚ with micro-dermal implants and surface piercings gaining popularity․ These techniques allow for subtle‚ artistic expressions while maintaining a clean aesthetic․ Advanced jewelry designs‚ such as customizable shapes and interchangeable pieces‚ are also trending‚ enabling individuals to personalize their piercings further․ Additionally‚ innovative materials and finishes‚ like textured metals and biocompatible plastics‚ are being explored to cater to diverse preferences and safety needs․

The Role of Technology in Modern Piercings

Technology has transformed the piercing industry by enhancing safety‚ hygiene‚ and customization․ Advanced tools‚ like precision piercing guns and 3D jewelry design software‚ allow for intricate styles and personalized fits․ Online platforms now offer virtual consultations and aftercare guides‚ making the process more accessible․ Additionally‚ innovations in jewelry materials‚ such as biocompatible plastics and smart metals‚ prioritize comfort and durability․ These advancements ensure a safer‚ more efficient‚ and creatively fulfilling experience for those exploring body piercings․

thomson refrigerator manual

Welcome to the Thomson Refrigerator Manual‚ your comprehensive guide to understanding and optimizing your appliance. This manual provides essential information for safe installation‚ operation‚ and maintenance‚ ensuring optimal performance and longevity of your refrigerator.

Overview of the Thomson Refrigerator Manual

The Thomson Refrigerator Manual is a comprehensive guide designed to help users understand and utilize their appliance effectively. It covers essential aspects such as safety precautions‚ installation steps‚ and operational features. The manual also includes detailed instructions for maintenance‚ troubleshooting‚ and optimizing energy efficiency. Whether you’re setting up your refrigerator for the first time or resolving an issue‚ this manual provides clear and concise information to ensure optimal performance and longevity of your appliance.

Importance of Reading the Manual

Reading the Thomson Refrigerator Manual is crucial for ensuring safe and efficient operation. It provides essential safety guidelines‚ installation instructions‚ and troubleshooting tips. By understanding the manual‚ users can optimize appliance performance‚ reduce energy consumption‚ and extend its lifespan. Proper usage and maintenance‚ as outlined in the manual‚ prevent potential hazards and ensure compliance with manufacturer recommendations. Neglecting to read the manual may lead to improper installation or usage‚ resulting in damage or safety risks.

What the Manual Covers

The Thomson Refrigerator Manual covers essential topics for optimal appliance use. It includes safety guidelines‚ installation instructions‚ electrical and water connection procedures‚ and operating tips. The manual also details temperature controls‚ special features‚ and maintenance routines. Troubleshooting common issues and understanding technical specifications are addressed to ensure longevity and efficiency. This comprehensive guide helps users make the most of their refrigerator while adhering to safety and performance standards.

Safety Precautions and Instructions

Ensure safe operation by following guidelines for proper handling‚ installation‚ and electrical connections. Adhere to fire safety measures and avoid hazardous practices to prevent accidents and damage.

Important Safety Information

Always prioritize safety when using your Thomson refrigerator. Avoid placing flammable materials near the appliance and ensure proper ventilation. Never attempt repairs without disconnecting the power. Keep children away from moving parts and door seals. Follow all electrical safety guidelines to prevent shocks or fires. Regularly inspect the power cord and plug for damage. Ensure the appliance is grounded correctly. Adhere to all safety instructions provided in the manual to maintain safe and efficient operation.

Proper Handling and Installation

Handle your Thomson refrigerator with care during transportation and installation. Avoid tilting or laying the appliance on its side to prevent damage. Use a sturdy trolley or lifting equipment to move the refrigerator. Ensure the installation site is level‚ firm‚ and well-ventilated. Leave adequate space around the appliance for proper air circulation. Follow the manual’s installation instructions to avoid damage and ensure optimal performance. Avoid exposing the refrigerator to direct sunlight or moisture during installation.

Electrical and Fire Safety Guidelines

Always plug your Thomson refrigerator into a grounded electrical outlet rated for its power consumption. Avoid using extension cords or overloaded circuits. Keep flammable materials away from the appliance. Ensure proper ventilation to prevent moisture buildup‚ which can lead to electrical issues. Never attempt repairs yourself‚ as this can cause fire hazards. If you notice sparks or unusual odors‚ unplug the refrigerator and contact a certified technician immediately for assistance.

Installation and Setup Guide

Unpack your Thomson refrigerator carefully and ensure it is placed on a level‚ stable surface. Connect the electrical and water supply as per the manual’s instructions for proper installation.

Unpacking and Initial Setup

Begin by carefully unpacking your Thomson refrigerator‚ ensuring all components are intact and undamaged. Remove all packaging materials and protective covers. Place the appliance in a dry‚ ventilated area‚ away from direct sunlight. Before plugging in‚ allow the refrigerator to stand upright for at least 24 hours to ensure proper functioning of the cooling system. This step is crucial for optimal performance and longevity of your appliance.

Leveling and Positioning the Refrigerator

Proper leveling ensures even cooling and prevents door misalignment. Use a spirit level to adjust the feet until the refrigerator is perfectly horizontal. Position the appliance on a firm‚ flat surface‚ away from direct sunlight and heat sources. Ensure adequate ventilation by maintaining a 5 cm clearance from walls and surrounding surfaces. This setup optimizes performance and prevents overheating. Always refer to the manual for specific spacing recommendations.

Connecting Electrical and Water Supply

Connect your Thomson refrigerator to a grounded electrical outlet matching the specified voltage in the manual. Avoid using extension cords to ensure safe operation. For water-supplied models‚ attach the water line to a compatible supply‚ ensuring secure connections to prevent leaks. Always follow the manual’s guidelines for proper installation. Consult a professional if unsure‚ and refer to the Manufacturer’s instructions for optimal setup and safety.

Operating the Thomson Refrigerator

Familiarize yourself with the control panel to adjust settings like temperature and humidity. Use special features such as eco-mode for energy efficiency and optimal performance.

Understanding the Control Panel

The control panel is your central interface for managing the refrigerator’s settings. It features intuitive buttons and a clear display to adjust temperature‚ humidity‚ and specialized modes like eco-mode or fast-cool. Familiarize yourself with each function to customize your settings for optimal performance. For detailed guidance‚ refer to the manual‚ ensuring you maximize your refrigerator’s efficiency and maintain your desired conditions effortlessly.

Setting Temperature and Humidity Levels

Adjusting the temperature and humidity levels on your Thomson refrigerator ensures optimal food preservation. Use the control panel to set the refrigerator compartment between 3°C and 5°C and the freezer at -18°C or lower. Maintain humidity levels in the crisper drawers to keep vegetables fresh. Refer to the manual for precise button operations and guidelines to achieve the ideal settings for your stored items.

Using Special Features and Modes

Your Thomson refrigerator offers advanced features for enhanced performance. Use the Fast Cool mode to quickly chill items‚ while Vacation Mode conserves energy when you’re away. The Energy-Saving Mode optimizes power consumption without compromising cooling efficiency. These modes ensure your appliance operates efficiently‚ catering to various needs and preferences.

Maintenance and Troubleshooting

Regular maintenance ensures your Thomson refrigerator runs efficiently. Clean condenser coils and check door seals to maintain performance. Refer to the manual for troubleshooting common issues promptly.

Cleaning and Sanitizing the Refrigerator

Regular cleaning and sanitizing are crucial for maintaining hygiene and efficiency. Wipe shelves and drawers with mild soap and warm water‚ avoiding harsh chemicals; Clean the exterior with a damp cloth. Check and replace water filters as recommended. Ensure door seals are free from food residue for optimal performance. Refer to the manual for specific cleaning instructions to keep your Thomson refrigerator in top condition and prevent odors or bacteria growth.

Routine Maintenance Checks

Regular maintenance ensures your Thomson refrigerator operates efficiently and extends its lifespan. Check door seals for tightness to prevent air leaks. Inspect the drain for blockages and clean as needed. Ensure proper ventilation around the unit for optimal cooling. Refer to your manual for specific guidance on routine checks to maintain peak performance and address potential issues before they escalate.

Common Issues and Solutions

Common issues with Thomson refrigerators include unusual noises‚ temperature fluctuations‚ or water leaks. Check for blockages in vents or drain tubes and ensure proper door sealing. If the refrigerator isn’t cooling‚ verify power supply and temperature settings. For persistent issues‚ refer to the troubleshooting guide in your manual or contact customer support for assistance. Regular maintenance can often prevent these problems and ensure smooth operation.

Technical Specifications

The Thomson refrigerator manual details key specifications‚ including model‚ dimensions‚ capacity‚ and energy ratings; It also outlines advanced features and technical requirements for optimal performance and efficiency.

Key Features and Specifications

The Thomson refrigerator manual highlights key features such as advanced cooling systems‚ precise temperature control‚ and energy-efficient designs. Specifications include model details‚ dimensions‚ and capacity‚ ensuring optimal performance. The manual also covers technical requirements for installation and operation‚ providing a comprehensive overview of the appliance’s capabilities and functionalities to help users make the most of their Thomson refrigerator.

Energy Efficiency Ratings

The Thomson refrigerator manual details energy efficiency ratings‚ ensuring eco-friendly performance. With high Energy Star certifications‚ these models minimize energy consumption while maintaining optimal cooling. The manual outlines how advanced insulation and smart compressors contribute to lower utility bills. Understanding these ratings helps users make informed decisions‚ promoting sustainable and cost-effective appliance use. This section emphasizes Thomson’s commitment to environmental responsibility and energy savings‚ aligning with modern eco-friendly practices.

Warranty and Service Information

The Thomson refrigerator manual includes detailed warranty and service information‚ ensuring comprehensive coverage for repairs and maintenance. Thomson offers a robust warranty program‚ covering parts and labor for a specified period. Customers can access dedicated support through phone‚ email‚ or online portals. Authorized service centers provide genuine parts and expert technicians‚ ensuring reliable repairs. This section outlines the process for filing claims and scheduling service‚ giving users peace of mind and protecting their investment.

Energy Efficiency and Optimization

The Thomson refrigerator manual highlights energy-saving modes and eco-friendly practices to reduce consumption. Learn how to optimize settings for lower utility bills while maintaining performance and efficiency.

Understanding Energy-Saving Modes

The Thomson refrigerator manual explains energy-saving modes designed to reduce power consumption. These modes optimize cooling efficiency while minimizing energy use. Adaptive technology adjusts settings based on usage patterns‚ ensuring optimal performance. Smart sensors monitor temperature and humidity levels‚ automatically switching to eco-friendly settings when possible. Regularly using these modes helps lower utility bills and supports environmentally responsible appliance operation. Refer to the manual for specific instructions on activating and customizing these energy-saving features.

Optimizing Energy Consumption

To optimize energy consumption‚ ensure proper door sealing and regular defrosting to maintain efficiency. Keep the refrigerator away from direct sunlight and heat sources. Organize storage to allow air circulation‚ reducing the need for constant cooling. Adjust temperature settings to recommended levels‚ avoiding overly cold settings. Regular maintenance‚ like cleaning condenser coils‚ also enhances energy efficiency. These practices help minimize energy use while maintaining performance‚ supporting eco-friendly operation and lowering utility bills.

Eco-Friendly Practices

Eco-friendly practices with your Thomson refrigerator involve efficient energy use and sustainable habits. Regularly clean condenser coils to improve efficiency and reduce energy consumption. Proper door sealing prevents cold air loss‚ minimizing energy waste. Store food in airtight containers to maintain humidity and reduce cooling demands. Avoid overloading‚ as this strains the motor. Use energy-saving modes when possible. These practices not only lower utility bills but also contribute to environmental conservation by reducing overall energy consumption and carbon footprint.

Where to Find the Thomson Refrigerator Manual

Access the Thomson Refrigerator Manual online through the official Thomson website or authorized retailers. Download the PDF version for detailed instructions and guidance on your appliance.

Downloading the Manual Online

To download the Thomson Refrigerator Manual‚ visit the official Thomson website or authorized retailer sites. Use the search function with your model number to find the manual quickly. Most manuals are available in PDF format‚ making them easy to download and print. Ensure you select the correct model to access accurate information for your specific refrigerator. This convenient option allows you to reference the manual anytime‚ ensuring proper usage and troubleshooting.

Accessing the Manual on the Manufacturer’s Website

Visit the official Thomson website to access your refrigerator’s manual directly. Navigate to the support or downloads section and enter your model number in the search bar. Manuals are typically available in PDF format for easy viewing or printing. Ensure you select the correct model to obtain accurate instructions tailored to your appliance. This resource is ideal for quick reference or troubleshooting without needing a physical copy.

Additional Resources and Support

Beyond the manual‚ Thomson offers extensive support resources. Visit ManualsLib for over 44 Thomson refrigerator manuals‚ or explore the official website for FAQs and troubleshooting guides. For personalized assistance‚ contact Thomson’s customer support team via phone or email. Additional resources include instructional videos and community forums where users share tips and solutions. These tools ensure comprehensive support‚ helping you make the most of your appliance and address any concerns effectively.

dmc fz300 manual

The Panasonic Lumix DMC-FZ300 manual provides a comprehensive guide to unlocking the camera’s potential, featuring its 24x zoom, 4K capabilities, weather-sealed design, and 12MP sensor.

Overview of the Camera and Manual

The Panasonic Lumix DMC-FZ300 is a versatile bridge camera featuring a 24x optical zoom, 4K video capabilities, and a weather-sealed design. The manual provides detailed instructions for operating the camera, covering basic and advanced features. It includes guides for shooting modes, custom settings, and troubleshooting. Available in PDF format, the manual ensures users can explore the camera’s full potential, from its 12MP MOS sensor to Wi-Fi connectivity. Whether you’re a beginner or an experienced photographer, the manual offers essential insights to maximize your photography experience.

Importance of Reading the Manual

Reading the Panasonic Lumix DMC-FZ300 manual is essential for understanding its advanced features and optimizing performance. The manual provides detailed instructions for operating the camera, including setup, shooting modes, and customization options. It also covers troubleshooting and maintenance tips to ensure longevity. By familiarizing yourself with the manual, you can unlock the camera’s full potential, from its 4K capabilities to its weather-sealed design. Whether you’re a novice or an experienced photographer, the manual serves as a valuable resource for enhancing your photography skills and addressing common issues effectively.

Key Features of the Panasonic Lumix DMC-FZ300

The Panasonic Lumix DMC-FZ300 offers a 24x optical zoom, 4K video and photo capabilities, weather-sealed design, and a 12MP high-sensitivity MOS sensor for exceptional image quality.

24x Optical Zoom and Leica Lens

The Panasonic Lumix DMC-FZ300 boasts an impressive 24x optical zoom, capturing distant subjects with precision. Paired with a high-quality Leica DC lens, it delivers sharp, vibrant images. The lens’ 25-600mm equivalent focal range ensures versatility, from wide-angle landscapes to telephoto shots. Optical image stabilization minimizes blur, even at maximum zoom. This combination makes the FZ300 ideal for wildlife, sports, and outdoor photography, offering professional-grade optics in a compact, user-friendly design. The Leica lens enhances color accuracy and contrast, ensuring outstanding image quality in various lighting conditions.

4K Video and Photo Capabilities

The Panasonic Lumix DMC-FZ300 excels in 4K Ultra HD video recording, capturing stunning footage at 30fps. Its 4K Photo mode allows extracting high-quality 8MP images from 4K video, perfect for capturing fleeting moments. A dedicated 4K Photo button simplifies access to this feature. Additionally, the camera supports 4K Live Cropping, enabling smooth zoom and pan effects. The 4K capabilities are complemented by advanced editing software, making it ideal for both video and still photography enthusiasts. This feature-rich system ensures high-resolution output and creative flexibility for users seeking professional-grade results.

Weather-Sealed Design

The Panasonic Lumix DMC-FZ300 features a weather-sealed design, providing protection against dust and moisture. This rugged construction allows photographers to shoot confidently in harsh outdoor conditions, such as rain or dusty environments. The sealing ensures reliable performance and extends the camera’s durability. While not fully waterproof, the weather-sealing offers peace of mind for capturing moments in challenging weather. This feature makes the DMC-FZ300 ideal for outdoor enthusiasts and professionals seeking a robust camera for versatile shooting scenarios.

12MP High-Sensitivity MOS Sensor

The Lumix DMC-FZ300 is equipped with a 12MP high-sensitivity MOS sensor, delivering crisp images with excellent low-light performance. This sensor ensures minimal noise and vibrant colors, even in challenging lighting conditions. Combined with the Venus Engine image processor, it offers enhanced detail and faster autofocus. The sensor’s high sensitivity makes it ideal for capturing sharp, professional-quality photos in various environments, from bright landscapes to indoor settings with limited light, ensuring versatility for photographers of all levels.

Understanding the Camera Controls

The Lumix DMC-FZ300 features intuitive controls, including a mode dial, rear control layout, and manual focus and zoom controls, designed for easy navigation and precise adjustments.

Mode Dial and Shooting Modes

The Panasonic Lumix DMC-FZ300 features a mode dial that provides quick access to various shooting modes, including Intelligent Auto, PASM (Program, Aperture Priority, Shutter Priority, Manual), and 4K Photo Mode. These modes cater to different photography needs, from automatic settings for beginners to manual controls for advanced users. The mode dial allows seamless switching between modes, enabling photographers to adapt to changing conditions and creative demands efficiently. This versatility ensures optimal performance in diverse shooting scenarios, making the camera suitable for both casual and professional use.

Rear Control Layout and Functions

The rear of the Panasonic Lumix DMC-FZ300 features an intuitive control layout designed for easy operation. A 3-inch touchscreen LCD dominates the back, allowing for menu navigation, focus selection, and image review. Below the screen, the Q.Menu button provides quick access to frequently used settings. The AF/AE lock button enables precise focus and exposure control. Navigation buttons on the D-pad adjust settings like ISO, white balance, and focus modes. A dedicated button for 4K Photo Mode is also present, simplifying access to advanced capture features. This ergonomic design enhances usability for photographers of all skill levels.

Manual Focus and Zoom Controls

The Panasonic Lumix DMC-FZ300 offers precise manual focus and zoom controls for enhanced creativity. A dedicated manual focus dial is located on the lens barrel, allowing for smooth, tactile adjustments. The zoom rocker, positioned near the shutter button, provides seamless zoom control. A focus mode button enables switching between auto and manual focus, ensuring flexibility. These controls are ergonomically designed for intuitive operation, enabling photographers to quickly adjust settings while maintaining focus on their subject.

Shooting Modes and Settings

The Panasonic Lumix DMC-FZ300 offers versatile shooting modes, including Intelligent Auto, PASM (Program, Aperture Priority, Shutter Priority, Manual), and 4K Photo Mode, catering to various photography needs.

Intelligent Auto Mode

Intelligent Auto Mode simplifies photography by automatically adjusting settings for optimal results. It uses Scene Detection to identify shooting conditions and selects the best parameters. The mode also incorporates Face Recognition, which prioritizes portrait subjects, and the Optical Image Stabilizer, reducing camera shake. Additionally, Intelligent Auto enhances dynamic range and color accuracy. This mode is ideal for beginners or quick shooting situations, ensuring high-quality images with minimal user input. It streamlines the photography process, making it easy to capture professional-looking photos without manual adjustments.

PASM (Program, Aperture Priority, Shutter Priority, Manual) Modes

The PASM modes offer advanced control for enthusiasts and professionals. Program Mode (P) automatically adjusts settings but allows customization of ISO, white balance, and more. Aperture Priority (A) lets you set the aperture for depth of field control, while the camera adjusts shutter speed. Shutter Priority (S) enables manual shutter speed adjustment for motion effects, with the camera setting the aperture. Manual Mode (M) provides full control over both aperture and shutter speed for precise creative control. These modes cater to users seeking greater artistic freedom and technical precision in their photography.

4K Photo Mode

The Panasonic Lumix DMC-FZ300’s 4K Photo Mode allows users to capture high-quality 8MP images from 4K video footage. This feature is ideal for freezing fast-moving moments or selecting the perfect frame from a sequence. The camera records 4K video at 30fps, enabling precise extraction of images. Users can choose from modes like Loop Recording, which continuously records and saves images before and after the shutter is pressed. This mode is perfect for capturing fleeting moments and offers flexibility in post-shooting image selection, enhancing creativity and efficiency in photography.

Advanced Features and Customization

The DMC-FZ300 offers customizable settings, allowing users to tailor the camera to their preferences. Advanced features include focus/exposure compensation and Wi-Fi connectivity for enhanced control and sharing.

Custom Settings and Presets

The DMC-FZ300 allows users to save custom settings as presets, ensuring quick access to preferred configurations. This feature is ideal for photographers who frequently switch between shooting scenarios, such as landscapes and portraits. By saving settings like aperture, shutter speed, and ISO, users can streamline their workflow and maintain consistency in their shots. Additionally, the camera’s intuitive menu system makes it easy to organize and recall these presets, enhancing overall shooting efficiency and creativity.

Focus and Exposure Compensation

The DMC-FZ300 offers precise control over focus and exposure, allowing photographers to fine-tune their shots. Manual focus is accessible via the lens barrel, while the joystick enables quick AF point selection. Exposure compensation can be adjusted up to ±5 EV, ensuring optimal brightness in challenging lighting conditions. These features provide flexibility for capturing sharp, well-exposed images, whether in auto or manual modes, making the camera versatile for both casual and professional use. This level of control enhances creativity and ensures superior results in various shooting scenarios.

Wi-Fi and Connectivity Options

The Panasonic Lumix DMC-FZ300 features built-in Wi-Fi connectivity, enabling seamless image transfer to smartphones, tablets, or computers. This functionality allows users to share photos instantly and control the camera remotely using the Panasonic Image App. The app supports remote shooting, focusing, and adjusting settings, enhancing convenience for both professional and casual photography. Additionally, the camera’s connectivity options streamline workflows, making it easier to manage and edit images on the go. This feature underscores the FZ300’s modern design, catering to photographers who value flexibility and efficiency in their creative processes.

Troubleshooting and Maintenance

The DMC-FZ300 manual provides solutions for common issues and maintenance tips to ensure optimal performance, such as cleaning the sensor and addressing error messages effectively.

Common Issues and Solutions

Common issues with the DMC-FZ300 include camera freezing, lens error messages, and battery drain. Solutions involve power cycling the camera, cleaning the lens, and updating firmware. For lens errors, gently cleaning the lens and ensuring it’s dry can resolve the issue. Battery drain can be mitigated by using genuine Panasonic batteries and disabling Wi-Fi when not in use. For software-related problems, resetting the camera to factory settings or reinstalling the latest firmware often resolves the issue. Refer to the manual for detailed troubleshooting steps and solutions.

Cleaning and Maintaining the Camera

To maintain the Panasonic Lumix DMC-FZ300, start by using a microfiber cloth to gently wipe the lens and exterior surfaces. For stubborn spots, dampen the cloth slightly with distilled water, avoiding any chemical cleaners that could harm coatings. Regularly clean the lens to prevent smudges and ensure clear imagery. For the sensor, use the camera’s built-in cleaning mode or manual cleaning with a soft brush. Avoid touching the sensor to prevent dust and oils from your skin. Clean buttons and dials with a soft, dry cloth, and store the camera in a dry, protective case when not in use. Update firmware regularly for optimal performance and refer to the manual for detailed maintenance instructions.

The Panasonic Lumix DMC-FZ300 manual is essential for mastering its advanced features. Regular updates, proper cleaning, and exploring its capabilities ensure optimal performance and creative photography experiences.

Final Tips for Getting the Most Out of Your DMC-FZ300

To maximize your experience with the Panasonic Lumix DMC-FZ300, explore its advanced features like 4K Photo and Focus Stacking. Experiment with manual controls for creative results. Regularly clean the lens and sensor for optimal image quality; Familiarize yourself with custom settings to streamline your workflow. Stay updated with firmware improvements and refer to the manual for troubleshooting. Practice different shooting modes and techniques to enhance your photography skills. By mastering these tips, you’ll unlock the full potential of your DMC-FZ300 and capture stunning images effortlessly.

physical chemistry a molecular approach pdf

Physical chemistry explores molecular interactions, thermodynamics, and quantum mechanics, providing a foundation for understanding chemical processes at the molecular level.

Overview of the Molecular Approach in Physical Chemistry

The molecular approach in physical chemistry focuses on understanding chemical phenomena at the molecular level, emphasizing the behavior and interactions of individual molecules. This methodology integrates quantum mechanics, thermodynamics, and statistical mechanics to explain how molecular properties influence macroscopic systems. By examining molecular structures, dynamics, and energetics, researchers gain insights into chemical reactions, material properties, and biological processes. Experimental techniques such as spectroscopy and chromatography are essential tools for studying molecular interactions. This approach is foundational in fields like materials science and nanotechnology, where molecular-level understanding drives innovation. Resources like McQuarrie and Simon’s Physical Chemistry: A Molecular Approach provide comprehensive guidance, making it a cornerstone for both students and researchers.

Importance of Molecular-Level Understanding in Chemical Processes

Molecular-level understanding is crucial for explaining chemical phenomena, as it reveals the fundamental mechanisms driving reactions and material properties. By studying molecular interactions, scientists uncover the principles governing chemical behavior, enabling precise predictions and control. This knowledge is vital in fields like catalysis, where molecular insights optimize reaction efficiency, and in drug design, where molecular interactions determine efficacy. The molecular approach also aids in developing new materials and technologies, such as nanotechnology and energy storage systems. Textbooks like Physical Chemistry: A Molecular Approach emphasize this perspective, providing a robust framework for analyzing and applying molecular principles to real-world challenges, thereby advancing scientific and technological progress.

Key Concepts in Physical Chemistry

Key concepts include molecular interactions, thermodynamics, and quantum mechanics, forming the foundation for understanding chemical systems and their behavior at both microscopic and macroscopic levels.

Quantum Mechanics and Its Role in Molecular Interactions

Quantum mechanics provides the foundation for understanding molecular behavior by describing the distribution and energy of electrons in atoms and molecules. The principles of wave-particle duality and uncertainty are central to this framework, enabling predictions of molecular structures and reactivity. Through concepts like atomic orbitals and molecular orbitals, quantum mechanics explains how electrons are distributed, influencing chemical bonding and interactions. Advanced techniques, such as computational quantum chemistry, allow researchers to model molecular systems, offering insights into reaction mechanisms and material properties. This understanding is crucial for designing new materials, drugs, and technologies, highlighting the transformative role of quantum mechanics in modern physical chemistry and its applications across various scientific fields, from nanotechnology to biochemistry.

Thermodynamics: Principles and Applications at the Molecular Level

Thermodynamics is the study of energy transformations, focusing on principles such as internal energy, entropy, and free energy. At the molecular level, these principles explain how energy is distributed and exchanged, influencing chemical reactions and phase changes; The first law of thermodynamics, energy conservation, and the second law, entropy increase, are fundamental. Applications include predicting reaction spontaneity via Gibbs free energy and understanding molecular systems’ stability. Statistical thermodynamics connects macroscopic properties to molecular behavior, enabling calculations of thermodynamic quantities from molecular data. This field is essential for optimizing industrial processes, material design, and biological systems, underscoring its importance in both theoretical and applied physical chemistry, as detailed in resources like “Physical Chemistry: A Molecular Approach” by McQuarrie and Simon.

Statistical Mechanics: Connecting Molecular Behavior to Macroscopic Properties

Statistical mechanics bridges molecular-level dynamics and macroscopic properties, providing a framework to understand how molecular motion, distribution, and interactions determine bulk behavior. By analyzing probabilities and distributions of molecular states, it explains phenomena like pressure, temperature, and phase transitions. Key concepts include the Maxwell-Boltzmann distribution and partition functions, which quantify molecular energy states. This approach enables prediction of thermodynamic properties from molecular data, linking quantum mechanics to observable behavior. Applications range from understanding phase changes to modeling chemical reactions. Statistical mechanics is foundational in physical chemistry, offering tools to connect microscopic details to macroscopic observations, as discussed in texts like Physical Chemistry: A Molecular Approach by McQuarrie and Simon. This methodology is essential for advancing materials science and nanotechnology.

Experimental Methods in Physical Chemistry

Experimental methods in physical chemistry involve spectroscopic and chromatographic techniques to analyze molecular structures, interactions, and dynamics, providing insights into chemical properties and processes.

Spectroscopic Techniques for Molecular Analysis

Spectroscopic techniques are essential tools in physical chemistry for analyzing molecular structures and interactions. Methods such as infrared (IR), nuclear magnetic resonance (NMR), and ultraviolet-visible (UV-Vis) spectroscopy provide detailed insights into molecular vibrations, electronic transitions, and magnetic properties. These techniques enable researchers to identify functional groups, determine molecular geometries, and study reaction mechanisms. Advanced spectroscopic methods, like Raman spectroscopy and mass spectrometry, further enhance the ability to characterize complex molecules and their dynamics. By leveraging these tools, scientists can gain a deeper understanding of molecular behavior, which is critical for advancing fields such as materials science and biochemistry. Spectroscopy’s non-destructive nature and high sensitivity make it indispensable in both research and industrial applications, offering precise molecular-level information.

Chromatographic Methods in Studying Molecular Interactions

Chromatographic techniques play a pivotal role in studying molecular interactions by separating and analyzing complex mixtures. Methods like gas chromatography (GC) and high-performance liquid chromatography (HPLC) enable researchers to identify and quantify components in a sample. These techniques are particularly useful for understanding molecular behavior, such as adsorption, partitioning, and affinity interactions. Chromatography provides insights into thermodynamic properties, such as equilibrium constants and binding energies, which are crucial for modeling molecular systems. Additionally, advanced chromatographic methods, like affinity chromatography, allow for the study of specific molecular recognition events. By combining chromatography with spectroscopic detection, researchers can achieve detailed characterization of molecular structures and their interactions, making these methods indispensable in both academic and industrial settings. Chromatography’s versatility and precision make it a cornerstone in molecular-level research and analysis.

Applications of Molecular Approach in Physical Chemistry

The molecular approach in physical chemistry drives advancements in materials science, nanotechnology, and biochemical processes. It enables detailed understanding of molecular interactions, fostering innovation in technology and medicine.

Materials Science and Nanotechnology

The molecular approach in physical chemistry plays a pivotal role in advancing materials science and nanotechnology. By understanding molecular interactions and properties, researchers can design and synthesize materials with tailored characteristics, such as enhanced strength, conductivity, or optical properties. Nanotechnology benefits from this approach, as it relies on manipulating matter at the molecular and atomic levels to create nanostructures with unique functionalities. These advancements are crucial for developing innovative devices, sensors, and energy storage solutions. The integration of physical chemistry principles, such as thermodynamics and quantum mechanics, enables the prediction and optimization of material behavior, driving technological progress in fields ranging from electronics to biomedical applications. This synergy between molecular insights and material innovation continues to shape the future of both disciplines.

Biochemical Processes and Molecular Biology

The molecular approach in physical chemistry is essential for understanding biochemical processes and molecular biology. By studying molecular interactions, researchers can uncover the mechanisms behind biological systems, such as protein folding, DNA binding, and enzyme catalysis. This approach provides insights into the thermodynamic and kinetic aspects of biochemical reactions, enabling the development of new drugs and therapeutic strategies. Advanced spectroscopic techniques, a key tool in physical chemistry, allow for the analysis of biomolecules in detail, aiding in the discovery of their functions and interactions. The integration of physical chemistry principles with molecular biology has revolutionized our understanding of life processes, paving the way for breakthroughs in medicine and biotechnology. This interdisciplinary connection continues to drive innovation in both fields, enhancing our ability to address complex biological challenges.

Resources for Learning Physical Chemistry

Key textbooks like Physical Chemistry: A Molecular Approach by McQuarrie and Simon, along with solution manuals, provide comprehensive learning tools. Supplementary online materials enhance understanding of molecular concepts.

Recommended Textbooks and Online Materials

For a deep understanding of physical chemistry, textbooks like Physical Chemistry: A Molecular Approach by Donald A. McQuarrie and John D. Simon are highly recommended. This text emphasizes a molecular-level approach, making complex concepts accessible. Other notable resources include solution manuals and supplementary materials that accompany these textbooks, providing worked-out problems and additional explanations. Online platforms offer eBooks and PDF versions of these texts, ensuring accessibility for students. Websites like LitRes and academic databases provide downloadable resources, while journals and online courses complement traditional learning. These materials are essential for mastering topics like quantum mechanics, thermodynamics, and statistical mechanics. They cater to both undergraduates and graduates, offering a comprehensive learning experience.

Solution Manuals and Supplementary Resources

Solution manuals and supplementary resources are invaluable for mastering Physical Chemistry: A Molecular Approach. These materials provide detailed solutions to textbook problems, helping students understand complex concepts. For instance, the solution manual by McQuarrie and Cox offers step-by-step explanations for problems in Physical Chemistry: A Molecular Approach, aiding in self-study and homework completion. Additionally, online platforms like LitRes and University Science Books offer downloadable PDFs and supplementary guides. These resources are particularly beneficial for visual learners, as they often include diagrams and additional examples. Educators also utilize these materials to create comprehensive lesson plans. By leveraging these tools, students can deepen their understanding of topics like quantum mechanics and thermodynamics, ensuring academic success in physical chemistry courses.

calculus and vectors 12 nelson pdf

This course introduces fundamental concepts of calculus and vectors, essential for STEM fields․ It explores rates of change, derivatives, and vector applications, using the Nelson textbook as a core resource․

1․1 Overview of the Course

Grade 12 Calculus and Vectors (MCV4U) introduces students to foundational concepts in calculus and vector algebra․ The course emphasizes rates of change, derivatives, and vector applications, aligning with the Ontario curriculum․ Topics include limits, continuity, implicit differentiation, and relationships between points, lines, and planes․ Practical problem-solving and real-world applications are integrated throughout the course․ Assessments include tests, quizzes, and a final exam, with resources like the Nelson textbook and solutions manual available for support;

1․2 Importance of Calculus and Vectors in STEM Fields

Calculus and vectors are foundational in STEM disciplines, enabling the analysis of complex systems․ In engineering, calculus models dynamic systems and optimizes designs, while vectors describe forces and motions․ Physics relies on calculus for energy and motion calculations and vectors for force analysis․ Computer science uses these concepts in graphics and algorithms․ Mastery of these tools prepares students for advanced studies and real-world problem-solving in STEM fields, where mathematical modeling and analytical thinking are essential for innovation and progress․

Key Chapters in the Nelson Calculus and Vectors Textbook

The textbook covers essential topics like limits, derivatives, implicit differentiation, and vector operations․ Chapters include introductions to calculus, relationships between points and planes, and advanced calculus applications․

Chapter 1 provides a foundational understanding of calculus, introducing key concepts such as limits, continuity, and the concept of a tangent to a curve․ It explores the history and development of calculus, highlighting its significance in problem-solving․ The chapter also covers the basics of functions, including polynomial, rational, and trigonometric functions, and their graphical representations․ These concepts are essential for understanding rates of change and laying the groundwork for derivatives, which are central to calculus․ The chapter emphasizes the practical applications of calculus in real-world scenarios, making it a critical starting point for the course․

2․2 Chapter 5: Implicit Differentiation

Chapter 5 focuses on implicit differentiation, a powerful technique for differentiating implicitly defined functions․ It explores how to apply the chain rule to equations involving multiple variables, enabling the differentiation of functions that cannot be easily expressed in explicit form․ The chapter includes practice problems and solutions, emphasizing applications in related rates and optimization․ The Nelson textbook provides detailed explanations and examples, ensuring a solid understanding of this critical calculus concept․ This chapter is essential for mastering advanced differentiation methods․

2․3 Chapter 6: Relationships Between Points, Lines, and Planes

Chapter 6 delves into the geometric relationships between points, lines, and planes in three-dimensional space․ It explores vector equations of lines and planes, emphasizing how these concepts are foundational in calculus and vector analysis․ The chapter provides practical applications, such as determining intersections and distances between geometric entities․ Through detailed examples and exercises, students develop spatial reasoning and problem-solving skills, preparing them for advanced topics in calculus and vector operations․ This chapter bridges algebraic and geometric interpretations, enhancing understanding of 3D space․

2․4 Chapter 8: Vectors and Their Applications

Chapter 8 focuses on vectors, their properties, and real-world applications․ Students learn vector operations, including addition, subtraction, and scalar multiplication, as well as the dot and cross products․ The chapter emphasizes vector applications in physics, engineering, and computer science, such as force analysis and 3D modeling․ Through practical problems and examples, students develop the ability to solve complex vector-based problems, reinforcing their understanding of vector algebra and its relevance in STEM fields․ This chapter is crucial for building a strong foundation in vector analysis․

2․5 Chapter 9: Advanced Topics in Calculus

Chapter 9 delves into advanced calculus topics, building on foundational concepts․ It explores integral calculus, including techniques of integration and improper integrals, as well as sequences, series, and convergence tests․ The chapter also introduces differential equations and their applications in modeling real-world phenomena․ Students learn to apply calculus to solve complex problems in optimization, physics, and engineering․ These advanced topics prepare students for further studies in mathematics and STEM fields, emphasizing the practical relevance of calculus in diverse applications․

Core Concepts in Calculus

Calculus focuses on limits, continuity, derivatives, and rates of change, providing tools to analyze functions and model real-world phenomena, with applications in optimization and related rates․

3․1 Limits and Continuity

Limits involve analyzing the behavior of a function as it approaches a specific point, while continuity ensures no breaks or jumps at that point․ Limits are formally defined using the epsilon-delta concept, allowing precise determination of a function’s behavior near a value․ Continuity is confirmed if a function’s limit at a point equals its function value there․ Discontinuities arise from undefined points, jumps, or infinite limits․ These concepts form the foundation of calculus, enabling the study of derivatives and rates of change․ The Nelson textbook provides detailed examples and exercises for mastering these ideas․

3․2 Derivatives and Their Applications

Derivatives measure the rate at which a function changes, providing insights into a function’s increasing or decreasing behavior․ They are calculated using limits and are fundamental in understanding optimization problems, motion, and rates of change․ Applications include finding slopes of tangents, analyzing velocity and acceleration, and solving real-world problems in economics and physics․ The Nelson textbook offers comprehensive coverage, with exercises that explore these concepts and their practical implications, ensuring a strong foundation for advanced calculus topics․

3․4 Rates of Change and Related Rates

Rates of change are essential in calculus, measuring how a quantity changes relative to another․ Related rates problems involve differentiating with respect to time, connecting variables like distance, velocity, and acceleration․ These concepts are applied in physics, engineering, and economics․ The Nelson textbook provides exercises on optimizing systems, such as water filling or draining, and motion along curves, emphasizing practical applications of derivatives in dynamic scenarios․ Mastering these skills enhances problem-solving abilities in STEM disciplines, showcasing calculus’s power in modeling real-world phenomena․

Vector Operations and Applications

Vector operations, including addition and scalar multiplication, are foundational in STEM fields․ Applications in force analysis, engineering, and 3D space highlight their practical relevance and importance․

4․1 Vector Algebra and Geometry

Vector algebra involves operations like addition, subtraction, and scalar multiplication․ Geometry explores vector direction and magnitude, enabling spatial analysis․ Key concepts include dot and cross products, essential for calculating projections and perpendicular vectors․ Applications in physics and engineering demonstrate vector algebra’s practicality in solving real-world problems․ Understanding these principles is vital for advanced topics in calculus and vector analysis, providing a foundation for 3D modeling and complex systems․ These tools are indispensable in STEM fields, bridging theory with application․

4․2 Lines and Planes in Three-Dimensional Space

Understanding lines and planes in 3D space is crucial for vector analysis․ Lines can be defined parametrically or with vector equations, while planes are described by their normal vectors and equations․ Intersections and distances between lines and planes are key concepts, often solved using vector projections․ Applications include computer graphics and physics, where precise spatial relationships are essential․ Mastery of these principles enhances problem-solving skills in advanced calculus and vector studies, providing a robust foundation for real-world applications․ These concepts are extensively covered in the Nelson textbook․

Practice and Review Materials

Key resources include practice problems, past exams, and a solutions manual․ These materials help reinforce concepts, with detailed explanations for self-study and exam preparation;

5․1 Solutions Manual and Corrections

The Nelson Calculus and Vectors Solutions Manual provides detailed solutions to textbook problems, including corrections for clarity․ Available as a PDF, it covers all chapters, offering step-by-step explanations for complex calculus and vector questions․ This resource is invaluable for self-study, helping students understand problem-solving methods and review challenging concepts․ Corrections ensure accuracy and alignment with curriculum standards, making it a trusted companion for academic success in Grade 12 calculus and vectors․

5․2 Practice Problems and Past Exams

The Nelson Calculus and Vectors textbook includes extensive practice problems and past exam questions to reinforce learning․ These resources cover key chapters, such as implicit differentiation and vector applications, allowing students to test their understanding․ Past exams provide realistic practice, familiarizing students with exam formats and timing․ Detailed solutions are often available, enabling learners to review mistakes and improve problem-solving skills․ Regular practice with these materials is essential for mastering calculus and vectors, ensuring readiness for assessments and future academic challenges․

Digital Resources and Textbook Availability

The Nelson Calculus and Vectors textbook is available in PDF format, accessible online․ Supplementary materials, including solutions manuals and study guides, are also available digitally for student use․

6․1 Accessing the Nelson PDF Textbook

The Nelson Calculus and Vectors textbook in PDF format is widely available online․ Students can access it through platforms like Z-lib․org or their school’s digital resources․ The PDF is free to download, though some versions may require registration․ Additionally, the textbook is accompanied by correction manuals and supplementary materials, ensuring comprehensive study support․ The file size exceeds 1MB, so previews are often unavailable, but direct downloads are accessible․ This digital accessibility makes it convenient for students to study anywhere, anytime․

6․2 Online Supplements and Study Guides

Online supplements for the Nelson Calculus and Vectors textbook include practice problems, solutions, and additional explanations․ These resources are available through official websites or educational forums․ The solutions manual, available as a PDF, provides detailed answers to textbook questions․ Online study guides offer interactive tools, such as video tutorials and quizzes, to enhance understanding․ These supplements are particularly helpful for complex topics like implicit differentiation and vector applications, allowing students to reinforce their learning outside the classroom․ They are accessible via platforms like Z-lib․org or school-provided links, ensuring easy access for all students․

Curriculum Alignment and Assessment

The course aligns with Ontario curriculum standards for Grade 12 mathematics․ Assessments include tests, quizzes, and projects, ensuring comprehensive evaluation of understanding and application of calculus and vectors concepts․

7․1 Ontario Curriculum Standards

The Grade 12 Calculus and Vectors course aligns with the Ontario curriculum standards for mathematics, focusing on rates of change, derivatives, and vector operations․ It emphasizes critical thinking, problem-solving, and the application of mathematical concepts to real-world scenarios․ The curriculum is designed to prepare students for university programs in STEM fields, ensuring a deep understanding of fundamental principles․ The Nelson textbook is approved for use in Ontario schools, supporting the revised 2007 curriculum guidelines for grades 11 and 12․

7․2 Assessment Strategies and Evaluation

Assessment in Grade 12 Calculus and Vectors involves a combination of tests, quizzes, projects, and summative evaluations․ The Nelson textbook’s solutions manual and practice problems are key resources for student preparation․ Evaluations focus on understanding limits, derivatives, and vector applications, with emphasis on critical thinking and problem-solving․ Past exams and review materials are used to assess readiness for final evaluations, ensuring alignment with Ontario curriculum standards and university preparation requirements․

Real-World Applications of Calculus and Vectors

Calculus and vectors are foundational in engineering, physics, and computer science․ They model population growth, optimize systems, and design graphics, proving essential in modern problem-solving and innovation․

8․1 Engineering and Physics

Calculus and vectors are integral to engineering and physics, enabling the analysis of motion, forces, and energy․ Derivatives model acceleration and rates of change, while integrals calculate area and work․ Vector operations describe forces, torque, and electromagnetism, essential for designing structures and systems․ These tools solve real-world problems, such as optimizing mechanical systems and understanding wave dynamics, making them indispensable in these fields․

8․2 Computer Science and Graphics

In computer science and graphics, calculus and vectors are crucial for creating realistic animations and simulations․ Vectors define 3D spaces, enabling transformations and projections․ Calculus algorithms model smooth transitions, lighting effects, and particle dynamics․ These principles power game engines, CGI, and data visualization, enhancing user experiences and visual fidelity․ The Nelson textbook provides foundational knowledge, bridging math with digital applications․

the elements of style fourth edition pdf

This classic guide by William Strunk Jr. and E.B. White offers timeless writing advice, updated in the fourth edition with a foreword by Roger Angell.

Overview of the Book’s Significance

The Elements of Style, Fourth Edition, is a cornerstone of American writing education, offering concise, timeless advice on grammar, style, and composition. First published in 1918 by William Strunk Jr., it gained prominence after E.B. White’s revisions in 1959. The fourth edition, updated with modern guidelines, remains indispensable for writers, students, and professionals, emphasizing clarity, precision, and effectiveness in communication. Its enduring relevance has made it a standard resource for improving writing skills across generations.

Structure and Key Features of the Fourth Edition

The Elements of Style, Fourth Edition is structured into concise sections, focusing on elementary rules of usage and composition. It includes William Strunk Jr.’s original principles, enhanced by E.B. White’s insightful additions. Key features include a foreword by Roger Angell, updated guidelines for modern writing, and a chapter on writing by E.B. White. The edition retains its hallmark clarity and wit, making it a practical and engaging resource for writers seeking to refine their craft and communicate effectively.

Authors and Their Contributions

William Strunk Jr. laid the foundation with his original work, while E.B. White expanded it, adding his iconic chapter on writing, enhancing the guide’s depth and relevance.

William Strunk Jr. and His Original Work

William Strunk Jr. created the original version of The Elements of Style in 1918, a concise guide for his Cornell students. His work emphasized clarity, precision, and simplicity in writing, providing foundational rules for proper English usage. Strunk’s initial slim volume focused on practical advice, becoming a cornerstone for future editions. His contributions laid the groundwork for E.B. White’s later expansions, ensuring the guide’s enduring relevance and influence on American writing standards.

E.B. White’s Revisions and Additions

E.B. White expanded Strunk’s original work, infusing it with his signature wit and charm. In the 1959 edition, White added new sections, including a chapter on writing that shared his personal insights. His revisions modernized the guide, making it more accessible while retaining its authoritative tone. White’s contributions ensured the book’s evolution, adapting it to the needs of contemporary writers while honoring Strunk’s foundational principles. His influence cemented the book’s status as a timeless resource for clear and effective communication.

Content and Structure of the Book

The fourth edition of “The Elements of Style” includes elementary rules of usage, principles of composition, and a chapter on writing by E.B. White, offering clear guidance for effective communication.

Elementary Rules of Usage

The fourth edition outlines eight foundational rules for correct English usage, including forming possessive singulars with “s” and using commas in series. These rules, concise and practical, guide writers toward clarity and precision, ensuring effective communication. They address common grammatical challenges, providing straightforward solutions to enhance writing quality. By adhering to these principles, writers can avoid errors and convey ideas with greater impact. These rules remain essential for anyone seeking to master clear and effective writing.

Elementary Principles of Composition

The fourth edition details ten fundamental principles to enhance writing clarity and effectiveness. These include choosing the right word, avoiding unnecessary words, and ensuring each sentence conveys a complete thought. Writers are encouraged to use active voice, parallel structure, and clear pronoun references. These principles guide the creation of concise, engaging, and precise writing, making them indispensable for anyone aiming to improve their communication skills and produce high-quality content.

A Chapter on Writing by E.B. White

E.B. White’s chapter on writing offers practical insights and timeless advice for crafting clear, engaging, and effective prose. He emphasizes the importance of clarity, precision, and style, while encouraging writers to develop their unique voice. White’s witty and approachable tone makes the chapter both informative and enjoyable. His contributions complement Strunk’s foundational rules, providing readers with a comprehensive guide to mastering the art of writing in a concise and memorable way.

Historical Background

First published in 1918 by William Strunk Jr., the guide was expanded by E.B. White in 1959, with the fourth edition released in 1999, refining its timeless principles.

Evolution from the First Edition to the Fourth

First published in 1918, William Strunk Jr.’s slim manual grew in influence, with E.B. White expanding it in 1959. The fourth edition, released in 1999, refined earlier content, adding modern insights while preserving the original’s clarity and wit. Roger Angell’s foreword in the fourth edition underscored the guide’s enduring relevance, ensuring its adaptation to contemporary writing needs while maintaining its foundational principles of clear and effective communication.

Key Milestones in the Book’s Publication History

First published in 1918 by William Strunk Jr., the book gained popularity after E.B. White’s 1959 revisions. The fourth edition, released in 1999, included a foreword by Roger Angell, enhancing its modern relevance while maintaining its foundational principles. Each edition has built on the last, solidifying its status as a cornerstone of American writing style, with updates ensuring its advice remains applicable to contemporary writers and students alike.

Impact and Influence

The Elements of Style is a bestselling guide that has profoundly influenced American writing, shaping clarity and precision in communication across generations and educational institutions.

The Book’s Role in Shaping American Writing Styles

The Elements of Style has become a cornerstone of American English, influencing generations of writers. Its clear, concise rules and principles have set standards for effective communication, making it indispensable in education and professional writing. The guide’s emphasis on clarity, precision, and style has shaped the way Americans write, ensuring its relevance across various contexts and industries. Its enduring popularity underscores its vital role in maintaining high-quality writing standards nationwide.

Adoption in Educational Institutions

The Elements of Style has long been a staple in American education, widely adopted in high schools and universities. Its clear guidelines on grammar, usage, and composition make it a foundational text for teaching writing skills. Many institutions require it as essential reading, ensuring its principles are passed to new generations of writers. This widespread adoption reflects its enduring relevance and effectiveness in fostering clear, precise communication in academic settings.

Where to Find “The Elements of Style, Fourth Edition, PDF”

The PDF version of The Elements of Style, Fourth Edition can be found on platforms like Amazon, Google Books, and Archive.org. Ensure to use legitimate sources for download.

Legitimate Sources for Download

To access The Elements of Style, Fourth Edition in PDF, consider purchasing from reputable sources like Amazon, Google Books, or eBookstores. Platforms like Archive.org may offer it legally. Avoid unauthorized sites to support authors and publishers. Always verify the authenticity of the source before downloading. Additionally, check your local library or educational institution for potential access to this essential writing guide.

Important Considerations for Digital Access

When accessing The Elements of Style, Fourth Edition in PDF, ensure compliance with copyright laws by using legitimate sources. Avoid pirated versions to respect intellectual property rights. Digital formats may vary, so verify compatibility with your devices. Additionally, be cautious of websites offering free downloads without proper authorization, as they may contain malware or inaccurate content. Prioritize trusted platforms to guarantee quality and safety.

Features of the Fourth Edition

The fourth edition includes a new foreword by Roger Angell, updated guidelines for modern writers, and retains its timeless advice on clarity and wit.

New Foreword by Roger Angell

Roger Angell’s foreword in the fourth edition reminds readers of the timeless relevance of Strunk and White’s advice. He emphasizes how their guidance remains invaluable today, just as it was when first published. Angell’s contribution highlights the enduring wisdom of the book, ensuring its principles continue to resonate with modern writers. His insightful commentary bridges the past and present, celebrating the book’s unique tone, wit, and charm that have captivated millions of readers for generations.

Updated Guidelines for Modern Writers

The fourth edition includes updated guidelines tailored for contemporary writers, addressing modern communication needs. It emphasizes clarity, precision, and conciseness, with practical advice on digital writing and inclusive language. The revised rules ensure relevance in today’s fast-evolving literary and professional landscapes, blending timeless principles with fresh insights to meet the demands of modern audiences and writing styles.

Practical Applications

The fourth edition offers practical tools for improving writing skills, with clear examples and exercises to refine sentence structure, grammar, and style for everyday communication.

Using the Book for Everyday Writing Improvement

The Elements of Style, Fourth Edition, serves as a practical guide for enhancing writing skills in daily communication. Its concise rules and examples help refine sentence structure, grammar, and clarity. The book’s timeless advice, such as forming possessives correctly and using commas effectively, makes it an invaluable tool for improving clarity and precision. By applying its principles, writers can produce more engaging and polished content, whether for professional or personal purposes, ensuring effective communication in any context.

Case Studies and Examples from the Text

The Elements of Style, Fourth Edition, provides numerous examples to illustrate its principles. For instance, it demonstrates correct punctuation in series and possessive forms, such as “Charles’s friend” and “Burns’s poems.” These examples clarify complex rules, making them easier to apply in real writing scenarios. The text also includes practical advice on avoiding common errors, ensuring clarity, and enhancing overall writing quality, making it a valuable resource for both novice and experienced writers to refine their craft effectively.

Critical Reception

The Elements of Style, Fourth Edition, has received widespread acclaim for its clear, concise writing advice. Critics praise its enduring influence on American writing styles, while debates continue about its strict approach to grammar and usage rules.

Reviews and Praise for the Fourth Edition

The Elements of Style, Fourth Edition, has been widely praised for its timeless advice on clear and concise writing. Reviewers commend its ability to remain relevant, with Roger Angell’s foreword adding fresh perspective. The book is celebrated as a go-to guide for writers, offering practical insights that transcend modern writing challenges. Its concise yet impactful style has solidified its place as a must-have resource for both professionals and students, ensuring its enduring legacy in the world of literature and education.

Criticisms and Controversies Surrounding the Guide

The Elements of Style, Fourth Edition has sparked debates over its strict adherence to traditional writing rules. Critics argue that some guidelines are outdated, failing to adapt to modern writing contexts. Additionally, some educators believe the book’s rigid framework may stifle creative expression. Despite these criticisms, the guide remains a cornerstone of writing instruction, valued for its clear and concise advice that has shaped American writing styles for generations, ensuring its continued relevance in educational settings.

The Elements of Style, Fourth Edition remains a timeless resource for writers, offering clear, concise guidance that continues to shape American writing traditions effectively.

The Enduring Relevance of “The Elements of Style”

The Elements of Style remains a cornerstone of clear and effective writing. Its timeless principles, refined in the fourth edition, continue to guide writers across generations. The book’s concise advice on grammar, usage, and composition ensures its relevance in modern communication. With contributions from William Strunk Jr. and E.B. White, it offers practical insights for improving clarity and precision. Its enduring popularity underscores its value as a resource for both students and professionals, making it indispensable in the digital age.

Final Thoughts on Its Value for Writers

The Elements of Style, Fourth Edition stands as a timeless resource for writers seeking clarity and precision. Its updated guidelines and enduring principles make it indispensable for modern writers. Whether refining grammar or enhancing composition, this guide offers practical wisdom. Its relevance spans generations, solidifying its place as a must-have tool for anyone aiming to master the craft of writing effectively and elegantly.

lexile levels and guided reading levels

Lexile Levels and Guided Reading Levels are systems used to measure reading ability and match students with appropriate texts․ Lexile Levels use a numerical scale based on text complexity and reader ability‚ while Guided Reading Levels rely on teacher observations and text characteristics․ Both systems aim to support literacy development by ensuring students engage with challenging yet achievable material․

Overview of Lexile Levels

Lexile Levels measure reading ability and text complexity on a numerical scale‚ ranging from below 0L (beginner) to above 1600L (advanced)․ This system helps educators and parents match students with appropriate texts‚ ensuring challenging yet achievable reading material․ Lexile Levels are determined through standardized assessments or the Lexile Text Analyzer tool‚ which evaluates factors like sentence complexity and vocabulary․ Widely used in schools‚ Lexile Levels aim to personalize reading experiences‚ promoting growth and engagement․ They are also used to find books through tools like “Find a Book‚” making it easier to align texts with individual reading abilities․

Overview of Guided Reading Levels

Guided Reading Levels categorize texts based on difficulty‚ helping teachers match students with appropriate materials․ Levels are determined by factors like vocabulary‚ sentence structure‚ and comprehension demands․ This system emphasizes teacher observation and small-group instruction to support reading development․ Unlike Lexile Levels‚ Guided Reading Levels focus on instructional strategies and student engagement rather than numerical scores․ Widely used in classrooms‚ they provide a framework for differentiated instruction and progress monitoring‚ helping students gradually improve their reading skills․ Tools like Raz-Kids align books with these levels‚ making it easier to find suitable texts for each student’s growth․ This approach ensures personalized learning and fosters a deeper understanding of reading concepts‚ preparing students for more complex texts over time․ By focusing on both accuracy and comprehension‚ Guided Reading Levels create a balanced approach to literacy development‚ making them a valuable tool for educators․ Additionally‚ resources like the Fountas & Pinnell Benchmark Assessment System provide detailed guidance for implementing these levels effectively‚ ensuring consistency and coherence in reading instruction across grade levels․ Overall‚ Guided Reading Levels offer a structured yet flexible method for teaching reading‚ emphasizing the importance of teacher involvement and student-centered strategies to enhance literacy skills․ They are particularly useful for identifying gaps in reading abilities and tailoring instruction to meet individual needs‚ which is crucial for student success in both elementary and secondary education settings․ Furthermore‚ the correlation between Guided Reading Levels and grade-level expectations helps educators align instruction with broader academic goals‚ ensuring that students are well-prepared for standardized tests and future academic challenges․ By integrating assessment‚ instruction‚ and text selection‚ Guided Reading Levels provide a comprehensive approach to teaching reading‚ enabling educators to create meaningful and impactful learning experiences for their students․ This system not only supports the development of reading fluency and comprehension but also nurtures a lifelong love of reading‚ which is essential for personal and academic growth․ In summary‚ Guided Reading Levels are a vital component of effective reading instruction‚ offering educators the tools and insights needed to help students achieve their full reading potential․

How Lexile Levels and Guided Reading Levels Work

Lexile Levels use a numerical scale (0L-1600L) to measure reading ability and text complexity‚ matching students to appropriate texts․ Guided Reading Levels categorize texts from A-Z based on difficulty‚ focusing on teacher observation and instructional strategies to support reading growth․ Both systems aim to align students with challenging yet achievable materials‚ fostering literacy development through targeted approaches․

The Science Behind Lexile Levels

Lexile Levels are based on the Lexile Framework for Reading‚ which scientifically measures reading ability and text complexity․ The system uses a algorithm analyzing sentence length‚ word frequency‚ and syntactic complexity․ Readers and texts are assigned Lexile scores on a common scale‚ ensuring accurate matching․ This approach helps educators identify appropriate materials‚ fostering reading growth and comprehension․ The framework is widely used to support personalized literacy instruction and assessment․

The Methodology of Guided Reading Levels

Guided Reading Levels use a qualitative approach to assess reading ability‚ focusing on teacher observations and text analysis․ The system categorizes texts into levels based on complexity‚ vocabulary‚ and comprehension demands․ Teachers use running records to evaluate students’ fluency‚ accuracy‚ and understanding․ This method emphasizes personalized instruction‚ allowing teachers to match students with texts that challenge yet support their reading growth‚ fostering incremental skill development and confidence․

Comparing Lexile Levels and Guided Reading Levels

Lexile Levels and Guided Reading Levels differ in approach but share the goal of matching students to appropriate texts․ Lexile uses numerical scores based on text complexity‚ while Guided Reading relies on teacher observations and text features to determine levels‚ ensuring personalized reading experiences tailored to individual student needs and abilities․

Similarities Between the Two Systems

Both Lexile Levels and Guided Reading Levels aim to enhance reading experiences by matching students to texts that align with their skills․ They share common goals‚ such as promoting literacy development and ensuring materials are challenging yet achievable․ Both systems emphasize the importance of differentiation‚ allowing teachers to tailor reading experiences to individual needs․ Additionally‚ they provide frameworks for tracking student progress and understanding‚ supporting effective instruction and fostering a love for reading in learners of all levels․

Differences in Approach and Application

Lexile Levels use a numerical scale to measure text complexity and reader ability‚ offering a quantitative approach to matching students with texts․ Guided Reading Levels‚ however‚ rely on teacher observation and qualitative assessments of text characteristics․ While Lexile Levels focus on individual reader-text alignment‚ Guided Reading emphasizes instructional strategies and group dynamics․ Lexile Levels are applied through standardized tools like the Text Analyzer‚ whereas Guided Reading Levels are integrated into classroom teaching practices and leveled book selections․

Determining a Student’s Reading Level

Determining a student’s reading level involves using both Lexile Levels and Guided Reading Levels․ Lexile Levels are measured through standardized tests or text analysis tools like the Lexile Text Analyzer‚ providing a numerical score to match students with appropriate texts․ Guided Reading Levels are assessed by teachers through observations of fluency‚ comprehension‚ and accuracy during reading activities‚ often using benchmark assessments or running records․ These methods complement each other by combining quantitative data with qualitative insights to tailor instruction and select suitable reading materials․

How to Measure a Student’s Lexile Level

Measuring a student’s Lexile Level involves administering standardized reading assessments or using tools like the Lexile Text Analyzer․ These assessments evaluate reading ability‚ producing a numerical score that reflects text complexity and reader skill․ Educators can interpret these scores to identify appropriate reading materials‚ ensuring students engage with texts that match their reading level for optimal learning and growth․ This data-driven approach supports personalized instruction and helps track progress over time․

Assessing Reading Levels for Guided Reading

Guided Reading Levels are assessed through teacher observations‚ running records‚ and student reading behaviors․ Educators evaluate factors like accuracy‚ fluency‚ and comprehension to determine a student’s level․ This process involves listening to students read aloud‚ analyzing their strategies‚ and noting their ability to discuss texts․ The goal is to identify instructional and independent reading levels‚ ensuring students are placed in appropriate groups and provided with suitable texts to support their growth as readers;

Using Lexile and Guided Reading Levels to Find Appropriate Books

Lexile and Guided Reading Levels help educators and parents find books that match students’ reading abilities․ Tools like “Find a Book” allow searching by Lexile range or grade level‚ ensuring texts are challenging yet achievable․ For Guided Reading‚ resources such as Scholastic’s Book Wizard provide level-specific book lists․ These systems enable personalized reading experiences‚ fostering engagement and growth․

Search filters‚ such as grade level or reading complexity‚ refine book selections․ Websites like Find a Book and Book Wizard simplify the process‚ ensuring students access texts that align with their skills and interests․

Tools for Searching Books by Lexile Level

Online tools like “Find a Book” and “Lexile Text Analyzer” simplify searching for books by Lexile Level․ These platforms allow users to input a Lexile range or specific criteria‚ generating lists of suitable texts․ The “Find a Book” tool‚ available on the Lexile website‚ enables searches by grade‚ interest‚ and reading complexity․ Additionally‚ the “Quick Book Search” feature on certain websites allows users to enter a book’s title‚ author‚ or ISBN to find its Lexile Level instantly‚ aiding in tailored reading selections․

Visit Find a Book or use the Lexile Text Analyzer to explore these resources and find books that match specific reading levels for students․

Resources for Finding Books by Guided Reading Level

Teachers and parents can utilize platforms like Raz-Kids and Scholastic’s Book Wizard to search for books by Guided Reading Levels․ These tools allow users to filter by grade level‚ genre‚ or specific skills․ Additionally‚ websites like Reading A-Z provide comprehensive book lists categorized by reading levels‚ ensuring educators can easily find appropriate texts for their students’ needs․

  • Use Raz-Kids for leveled eBooks aligned with Guided Reading Levels․
  • Explore Scholastic’s Book Wizard for detailed book searches․
  • Visit Reading A-Z for printable and digital books by level․

The Benefits and Limitations of Each System

Lexile Levels offer precise numerical measures for matching students with texts‚ while Guided Reading Levels provide teacher-driven insights into reading skills․ Both systems help tailor instruction but may oversimplify reading ability․

Advantages of Using Lexile Levels

Lexile Levels provide a precise‚ numerical measure of reading ability‚ enabling educators to match students with texts that align with their skill level․ This system allows for personalized learning and tracks progress over time; The Lexile Text Analyzer tool offers a consistent way to evaluate text complexity‚ ensuring accurate placement․ Additionally‚ Lexile Levels facilitate finding books within a specific range‚ helping students access challenging yet achievable material․ This approach supports tailored instruction and fosters independent reading growth․

Limitations of Guided Reading Levels

Guided Reading Levels lack the precision of Lexile Levels‚ as they rely on subjective teacher observations and text evaluations․ This system does not provide a numerical scale‚ making it harder to track student progress objectively․ Additionally‚ Guided Reading Levels focus primarily on instructional reading levels‚ which may not fully capture a student’s independent reading ability․ These limitations can make it challenging to tailor reading materials to individual student needs effectively․

Aligning Lexile Levels with Educational Standards

Lexile Levels align with educational standards by providing a numerical scale to measure text complexity and reader ability‚ ensuring materials match curriculum goals and support differentiated instruction․

How Lexile Levels Correlate with Grade Levels

Lexile Levels are designed to correlate with grade levels‚ providing educators with a standardized measure of reading ability․ While there is a general alignment‚ Lexile Levels focus on individual reading performance rather than strict grade-based expectations․

Tools like the Lexile Text Analyzer and “Find a Book” help match students with texts that suit their reading level‚ ensuring a personalized approach to literacy development across all grade levels․

Integrating Guided Reading Levels into Classroom Instruction

Guided Reading Levels are integrated into classroom instruction through small-group teaching‚ allowing educators to tailor instruction to students’ specific reading abilities․ Teachers use leveled texts to scaffold learning‚ ensuring students progress gradually․ This approach supports differentiated instruction‚ fostering independent reading skills and confidence․ By aligning texts with students’ reading levels‚ educators create engaging and effective reading experiences․

Criticism and Controversies Surrounding Reading Levels

Critics argue that reading levels like Lexile and Guided Reading can be limiting‚ as they may restrict students to specific texts‚ potentially stifling their interest and exploration of diverse literature․

Criticisms of Lexile Levels

Lexile Levels have faced criticism for potentially limiting students’ reading choices and fostering a rigid approach to literacy education․ Some educators argue that the system oversimplifies text complexity by focusing on sentence length and word frequency‚ neglecting deeper aspects like thematic depth․ Critics also contend that Lexile Levels may discourage exploration of diverse texts‚ as students are often confined to their measured range․ This criticism highlights concerns about the system’s potential to stifle creativity and limit exposure to varied literature․

Challenges with Guided Reading Levels

Guided Reading Levels face criticism for their lack of standardization across educators and schools‚ leading to inconsistent assessments․ The system’s reliance on teacher observation and subjective judgment can result in varying interpretations of text complexity․ Additionally‚ the focus on surface-level text features may overlook deeper reading comprehension skills․ Critics argue that this approach can limit flexibility and may not fully capture students’ reading capabilities‚ potentially hindering personalized instruction․

Lexile Levels and Guided Reading Levels remain vital tools for assessing and supporting reading development․ While both systems have strengths‚ their limitations highlight the need for evolution․ Future advancements may integrate more nuanced measures of comprehension and technology-enhanced assessments․ Educators should adopt a balanced approach‚ combining these systems with other strategies to foster a deeper understanding of reading proficiency and tailor instruction to individual needs‚ ensuring all students achieve literacy success․

goldline controls aqua logic manual

The Goldline Controls Aqua Logic Manual is a comprehensive guide for installing, operating, and maintaining the Aqua Logic system. It provides essential information for optimal functionality.

Discover key features, compatibility with gas heaters, and remote control options. Understand the importance of proper setup and maintenance for long-term performance and efficiency.

1.1 Overview of the Aqua Logic System

The Aqua Logic system by Goldline Controls is a advanced pool and spa control solution designed to manage pumps, valves, heaters, lighting, and chlorination. It offers seamless integration with gas heaters and heat pumps, ensuring efficient operation. The system is user-friendly, with remote control options for convenience. Its comprehensive control logic enables precise management of various pool and spa functions. Whether for residential or commercial use, the Aqua Logic system is a versatile and reliable choice for pool automation needs.

Key features include low voltage dry contacts for connecting to external devices and compatibility with home automation modules. The system supports wireless and wired remote controls, providing flexibility in operation. It also includes manual override options for heaters, ensuring user control in any situation. The Aqua Logic system is designed to optimize energy efficiency and enhance the overall pool experience.

While the system is easy to use, proper setup and configuration are essential for optimal performance. The manual provides detailed instructions for installation, wiring, and maintenance, ensuring users can troubleshoot common issues and maintain the system effectively. Regular updates and support from Goldline Controls further enhance the system’s reliability and longevity.

1.2 Importance of the Manual for Proper Operation

The Aqua Logic manual is essential for proper installation, operation, and troubleshooting. It provides detailed instructions for wiring, plumbing, and system configuration, ensuring optimal functionality. Without the manual, users may encounter errors or safety risks. The guide includes troubleshooting tips and maintenance schedules to prolong system life. Adhering to the manual’s instructions ensures compliance with safety standards and prevents voiding the warranty. Regular updates and clear diagrams further enhance user understanding, making it a vital resource for both novice and experienced users.

Installation Instructions

Follow the manual’s step-by-step guide for safe and proper Aqua Logic installation. Adhere to pre-installation requirements and safety precautions to ensure optimal system functionality and longevity.

2.1 Pre-Installation Requirements and Safety Precautions

Before installing the Aqua Logic system, ensure a stable 120V power supply and proper grounding to prevent electrical hazards. Follow the manual’s instructions for compatibility with 24V control circuits for heaters and heat pumps. Ensure all components are rated for outdoor or pool environments. Refer to wiring diagrams for correct connections. Always disconnect power before servicing. Adhere to safety guidelines to avoid electrical shock or system damage. Proper preparation ensures safe and efficient system operation. Use approved materials and tools as specified in the manual.

2.2 Step-by-Step Installation Process

Begin by mounting the Aqua Logic base station near a 120V outlet. Connect the RF antenna up to 500ft away for optimal signal strength. Install the control panel and pair remote devices as outlined. Wire the system according to the provided diagrams, ensuring all pumps, valves, and heaters are correctly linked. Follow the sequence for plumbing connections to avoid leaks. Secure all components firmly and test each function post-installation. This structured approach ensures seamless integration and reliable operation of the Aqua Logic system. Always refer to the manual for specific instructions and safety guidelines. Proper installation is key to system longevity and efficiency.

2.3 Remote Mounting Options for Base Station

The Aqua Logic base station can be remotely mounted for convenience; The RF antenna may be installed up to 500ft away from the control panel for enhanced signal strength. Ensure the base station is placed near a 120V wall outlet for power. Use low-voltage wiring to connect remote components. Mounting options include wall or equipment pad installation. Ensure the area is dry and secure to prevent damage. Follow manual guidelines for optimal placement and connectivity. Proper installation ensures reliable operation and signal strength for remote controls. Always adhere to safety precautions during mounting.

Wiring and Plumbing Guidelines

Refer to pages 12 and 20 for detailed wiring and plumbing instructions. Ensure proper connections for pumps, valves, and heaters. Follow guidelines for optimal system functionality and safety.

3.1 Wiring Diagrams and Connections

Consult the wiring diagrams in the manual for precise connections. Ensure proper wiring for pumps, valves, and heaters. Low-voltage dry contacts are available for gas heaters and heat pumps. Refer to pages 12 and 20 for detailed instructions. Verify all connections are secure and meet safety standards. Proper wiring ensures seamless system operation and compatibility with additional components like remote controls and automation modules. Follow the guidelines to avoid interference and maintain optimal performance. Adhere to the specified wiring instructions to prevent potential issues and ensure long-term reliability.

3.2 Plumbing Instructions for Proper System Functionality

Follow the plumbing guidelines in the manual for optimal Aqua Logic performance. Ensure correct installation of the Turbo Cell and flow switch. Refer to pages 12 and 20 for detailed steps. Proper connections are crucial for maintaining water flow and system efficiency. Verify all plumbing components are securely fitted and aligned. This ensures smooth operation of pumps, valves, and chlorination systems. Adhere to the instructions to prevent leaks and maintain peak functionality. Correct plumbing setup is vital for longevity and effective system performance. Always follow the recommended procedures for best results.

Operation and Control Features

The Aqua Logic system offers advanced control features for pumps, valves, lighting, heaters, and chlorination. It provides low voltage dry contacts for gas heaters and heat pumps, ensuring seamless integration. The system is user-friendly but requires careful setup for optimal performance. Refer to the manual for specific control logic and operation details. Proper configuration ensures efficient and reliable functionality of all connected components.

4.1 Understanding the Control Logic for Pumps and Valves

The Aqua Logic system uses low voltage dry contacts to control pumps, valves, and other equipment. These contacts integrate with 24V control circuits, ensuring precise operation. The system allows for automatic or manual control of pool and spa functions. Pressing the POOL/SPA button on the keypad enables switching between modes. The manual provides detailed wiring diagrams and step-by-step instructions for configuring these controls. Proper setup ensures smooth operation and energy efficiency. Refer to the manual for specific guidelines on connecting actuators and optimizing system performance.

4.2 Heater Control and Manual Override Options

The Aqua Logic system offers advanced heater control, allowing seamless integration with gas heaters and heat pumps. Manual override options enable users to shut off the heater instantly. Pressing the heater button during operation turns it off and sets the control to manual mode. The LED indicator illuminates when the heater is active. Refer to pages 12 and 20 for detailed wiring and plumbing instructions. This feature ensures safe and efficient operation, providing users with full control over their pool or spa heating system.

Remote Control Options

Goldline Controls offers wireless and wired remote solutions for convenient system management. Remote mounting options ensure flexibility, and proper setup ensures seamless functionality and control.

5.1 Wireless and Wired Remote Control Solutions

Goldline Controls offers versatile remote control options, including wireless and wired solutions, to enhance system convenience. Wireless remotes provide flexibility, with RF antennas mountable up to 500ft away for reliable signal strength. Wired remotes offer a direct connection, ensuring consistent performance. Both options integrate seamlessly with the Aqua Logic system, allowing users to manage pool and spa functions effortlessly. Additional features include remote mounting capabilities and compatibility with home automation modules for advanced control. These solutions cater to diverse installation needs, ensuring optimal functionality and user satisfaction.

5.2 Setting Up and Pairing Remote Devices

Setting up remote devices for the Aqua Logic system involves pairing wireless or wired controls with the base station. Ensure the base station is powered and the remote is in pairing mode. Follow manual instructions to sync devices. For wireless remotes, check the RF antenna placement for optimal signal. Refer to the operation manual for specific pairing steps. Proper setup ensures reliable communication between devices, allowing seamless control of pool and spa functions. This process is straightforward and ensures efficient system operation.

Maintenance and Troubleshooting

Regularly inspect wiring, plumbing, and components for wear. Troubleshoot common issues like connectivity problems or error codes using diagnostic tools. Ensure optimal system performance and reliability.

6.1 Regular Maintenance Tips for Optimal Performance

Regular maintenance is crucial for the Aqua Logic system. Inspect wiring and plumbing connections monthly to ensure integrity. Clean filters and sensors to prevent blockages and inaccurate readings. Check for software updates and install them promptly. Lubricate moving parts like actuators and valves to maintain smooth operation. Replace worn-out components before they cause system failures. Schedule annual professional inspections to ensure all functions are within specifications. Proper upkeep extends the system’s lifespan and ensures consistent performance.

6.2 Common Issues and Diagnostic Procedures

Common issues with the Aqua Logic system include communication errors between components. Check wiring connections and ensure all devices are powered on. For sensor malfunctions, verify proper calibration and cleanliness. If the system fails to activate, inspect the circuit breaker and fuses. Refer to the diagnostic LED indicators on the control panel for error codes. Consult the manual for code meanings and troubleshooting steps. If issues persist, contact Goldline Controls support for professional assistance to resolve the problem efficiently.

Integration with Other Systems

The Aqua Logic system seamlessly integrates with gas heaters, heat pumps, and home automation modules, enhancing functionality and control through low-voltage dry contacts for compatibility with 24V systems.

7.1 Compatibility with Gas Heaters and Heat Pumps

The Aqua Logic system is designed to work seamlessly with gas heaters and heat pumps, providing precise temperature control and efficient operation. It offers low-voltage dry contacts that can be connected to most gas heaters and heat pumps with 24V control circuits. This compatibility ensures smooth integration and reliable performance. Additionally, the system supports advanced automation features, allowing for seamless operation with various pool and spa equipment. Proper setup ensures optimal functionality and energy efficiency.

7.2 Home Automation Module Integration

The Aqua Logic system supports integration with home automation modules, such as the AQ-CO-SERIAL, enabling advanced control and monitoring. This module provides a command set for emulating Aqua Logic functionality, allowing seamless integration with smart home systems. Users can control pumps, valves, heaters, and lighting through a single interface. The serial communication capability ensures compatibility with various home automation platforms, enhancing convenience and efficiency. This feature-rich integration allows for tailored automation solutions, ensuring optimal pool and spa management from a centralized system.

Warranty and Support Information

Goldline Controls offers a limited warranty for the Aqua Logic system, covering defects in materials and workmanship. For assistance, contact Goldline’s customer support team directly.

8.1 Limited Warranty Details from Goldline Controls

The limited warranty from Goldline Controls covers the Aqua Logic system for defects in materials and workmanship under normal use. The warranty period begins from the date of purchase and varies by product. Proper installation and registration are required to validate the warranty. Damage caused by misuse, improper installation, or unauthorized modifications is not covered. For specific terms and conditions, refer to the official Goldline Controls documentation or contact their customer support team for clarification.

8.2 Contacting Customer Support for Assistance

For any inquiries or issues with the Aqua Logic system, Goldline Controls offers dedicated customer support. Contact their team via phone, email, or through the official website. Ensure you have your product details and serial number ready for efficient assistance. The support team is available to address installation, operation, or warranty-related questions. Additionally, online resources, including FAQs and manuals, are accessible for troubleshooting and guidance.

The Goldline Controls Aqua Logic Manual provides a detailed guide for effective system operation. Its advanced automation and energy-efficient features ensure optimal pool management. Follow instructions carefully for the best experience.

9.1 Summary of Key Features and Benefits

The Aqua Logic system by Goldline Controls offers advanced automation for pool and spa management. It provides seamless control of pumps, valves, heaters, and lighting. The system enhances energy efficiency and ensures optimal performance. Remote control options add convenience, while the manual offers clear installation and maintenance guidelines. Integration with gas heaters and home automation modules further expands its functionality. By following the manual, users can maximize system benefits and enjoy a hassle-free swimming experience. The Aqua Logic is a comprehensive solution for modern pool management.

9.2 Importance of Following Manual Instructions

Adhering to the Goldline Controls Aqua Logic manual ensures proper system installation, operation, and maintenance. It guarantees compliance with safety standards and warranty terms. Following instructions prevents unauthorized modifications, which could void the warranty or cause malfunctions. Proper setup avoids interference issues and ensures optimal performance. The manual provides critical guidance for integrating with other systems, such as gas heaters and home automation modules. By following the manual, users can ensure long-term reliability, efficiency, and safety of their Aqua Logic system.

basc-3 parent rating scale pdf

Overview of the BASC-3 Parent Rating Scale (PRS)

The BASC-3 Parent Rating Scale (PRS) is a comprehensive tool designed to assess adaptive and problem behaviors in children and adolescents. It provides insights into behaviors observed in home and community settings, offering a valuable perspective for understanding a child’s emotional and behavioral well-being. The PRS is part of the broader BASC-3 system, which includes teacher and self-report forms, allowing for a multi-perspective evaluation. The scale is structured to measure various behavioral aspects, including adaptability, externalizing, and internalizing behaviors, and is widely used by psychologists and educators to identify potential issues and guide interventions.

1.1 What is the BASC-3 Parent Rating Scale?

The BASC-3 Parent Rating Scale (PRS) is a widely used assessment tool designed to measure adaptive and problem behaviors in children and adolescents. It is completed by parents or caregivers and covers three age ranges: preschool (2-5 years), child (6-11 years), and adolescent (12-21 years). The PRS evaluates behaviors observed in home and community settings, providing insights into a child’s emotional, social, and behavioral functioning. It is part of the broader BASC-3 system, which also includes teacher and self-report forms. The PRS is valued for its ability to identify behavioral patterns, aiding psychologists and educators in understanding a child’s needs and planning appropriate interventions.

1.2 Purpose and Scope of the PRS

The BASC-3 Parent Rating Scale (PRS) is designed to assess adaptive and problem behaviors in children and adolescents, providing a comprehensive understanding of their emotional and behavioral functioning. Its primary purpose is to identify behavioral patterns, strengths, and challenges observed in home and community settings. The PRS covers three age ranges: preschool (2-5 years), child (6-11 years), and adolescent (12-21 years). It is a vital tool for psychologists, educators, and caregivers to monitor behavioral changes, guide interventions, and support diagnostic processes. The scale’s scope includes evaluating adaptive skills, externalizing, and internalizing behaviors, offering a detailed perspective on a child’s overall behavioral health.

Structure of the BASC-3 Parent Rating Scale

The BASC-3 PRS covers three age ranges: preschool (2-5), child (6-11), and adolescent (12-21). It assesses adaptive and problem behaviors, typically completed in 10-20 minutes.

2.1 Age Ranges Covered by the PRS

The BASC-3 Parent Rating Scale (PRS) is designed for children and adolescents across three distinct age ranges: preschool (ages 2–5), child (ages 6–11), and adolescent (ages 12–21). These age ranges ensure that the scale is developmentally appropriate, allowing parents to report on behaviors specific to their child’s stage of growth. The preschool form focuses on early developmental behaviors, while the child and adolescent forms address more complex emotional and behavioral patterns. This structure enables the PRS to provide accurate and meaningful assessments across different developmental stages, helping to identify both adaptive and problem behaviors in a age-appropriate manner.

2.2 Components of the PRS

The BASC-3 Parent Rating Scale (PRS) includes several key components designed to comprehensively assess a child’s behaviors. The scale is divided into composite areas such as Adaptive Skills, Behavioral Symptoms Index, Externalizing Problems, and Internalizing Problems. Adaptive Skills measure positive behaviors like adaptability and social skills, while problem areas assess issues such as hyperactivity, aggression, anxiety, and depression. The PRS also includes validity scales to ensure accurate responses. The components are tailored across three age-specific forms (ages 2–5, 6–11, and 12–21), with items varying to reflect developmental differences. This structure allows parents to provide detailed insights into their child’s behavior in home and community settings, ensuring a thorough assessment of both strengths and challenges.

Administration and Scoring of the PRS

The BASC-3 PRS is completed by parents or caregivers, typically taking 10–20 minutes. Items are rated on a 4-point scale, and scoring involves converting raw scores to T-scores and percentile ranks for interpretation.

3.1 How to Administer the PRS

The BASC-3 Parent Rating Scale (PRS) is designed for parents or caregivers to assess their child’s behaviors. The form is available for three age ranges: preschool (2-5), child (6-11), and adolescent (12-21). Parents rate their child’s behaviors using a 4-point scale, from “Not at all” to “Very much.” The questionnaire typically takes 10–20 minutes to complete, focusing on observable behaviors in home and community settings. The PRS can be administered manually or via digital platforms, ensuring flexibility for respondents. Instructions are provided to guide parents through the process, ensuring accurate and consistent responses. This straightforward administration process helps gather essential insights into a child’s behavioral patterns.

3.2 Scoring and Interpretation of Results

The BASC-3 PRS uses T-scores and percentile ranks for interpretation, with a mean of 50 and standard deviation of 10. Scores are categorized as “normal,” “at-risk,” or “clinically significant.” T-scores above 70 indicate significant concerns, while scores below 30 suggest low behavior levels. Validity scales detect response biases, ensuring accurate interpretations. Results help identify adaptive and problem behaviors, aiding in diagnosis and intervention planning. Trained professionals interpret scores to guide decision-making and support strategies for behavioral and emotional well-being. This systematic approach ensures reliable and meaningful insights into a child’s behavior.

Clinical Applications of the PRS

The PRS is widely used to identify emotional and behavioral difficulties, aiding in diagnosis and intervention planning. It helps assess adaptive and problem behaviors, guiding clinical decisions.

4.1 Assessing Adaptive and Problem Behaviors

The PRS evaluates both adaptive and problem behaviors, providing a balanced view of a child’s functioning. Adaptive behaviors, such as social skills and emotional stability, are assessed alongside problem behaviors like hyperactivity or anxiety. This dual focus helps identify strengths and challenges, offering a comprehensive profile. The scale’s structure allows clinicians to pinpoint specific areas needing support, ensuring targeted interventions. By measuring these behaviors, the PRS aids in understanding a child’s overall behavioral health and guides effective treatment strategies. This assessment is crucial for early identification of issues and monitoring progress over time.

4.2 Use in Diagnostic and Intervention Planning

The PRS is instrumental in diagnostic and intervention planning, offering insights that guide clinical decisions. By identifying specific behavioral patterns, it aids in diagnosing conditions such as ADHD or anxiety disorders. The data collected informs the development of tailored intervention strategies, ensuring targeted support. Clinicians use PRS results to create personalized treatment plans, addressing both behavioral and emotional needs. Additionally, the scale’s longitudinal use allows for progress monitoring, helping to refine interventions over time. This makes the PRS a valuable tool in both assessment and ongoing management of children’s behavioral health, supporting better outcomes through informed decision-making and adaptive care strategies.

Interpretation of PRS Results

The PRS results provide insights into a child’s behavioral and emotional well-being, helping identify strengths and challenges. Interpretation involves comparing scores to normative data, guiding further assessment or intervention strategies.

5.1 Understanding T-Scores and Percentile Ranks

T-scores and percentile ranks are essential for interpreting PRS results. T-scores are standardized scores with a mean of 50 and a standard deviation of 10, allowing comparison to a normative sample. Percentile ranks indicate the percentage of individuals in the normative group who scored below the child. For example, a T-score of 60 corresponds to the 84th percentile, meaning the child’s behavior is higher than 84% of the population. These metrics help identify whether a child’s behavior falls within normal limits or exceeds clinical thresholds. Understanding these scores is crucial for distinguishing between typical and atypical behaviors, guiding further assessment or intervention strategies.

5.2 Clinical Significance and Cut-Off Scores

Clinical significance in the BASC-3 PRS is determined by T-scores and cut-off thresholds. Scores falling within the Clinically Significant range (T ≥ 70) indicate behaviors that may require intervention. The At-Risk range (T = 60–69) suggests behaviors that warrant monitoring but may not yet be clinically significant. These cut-off scores help differentiate between typical and problematic behaviors, guiding decision-making for further assessment or intervention. Clinicians use these thresholds to identify areas of concern, such as hyperactivity or anxiety, and to develop targeted strategies for supporting the child. The cut-off scores are critical for ensuring accurate interpretation and appropriate action based on PRS results.

Availability and Accessibility of the BASC-3 PRS PDF

The BASC-3 PRS PDF is available for purchase on the official Pearson Clinical website. It is accessible in various formats, including hand-scored workbooks and digital platforms.

6.1 Where to Obtain the BASC-3 PRS PDF

The BASC-3 PRS PDF can be obtained through the official Pearson Clinical website or authorized distributors. It is available in hand-scored workbooks and digital formats for convenience. The PRS forms are tailored to specific age ranges: preschool (2-5 years), child (6-11 years), and adolescent (12-21 years). Purchases typically require appropriate qualifications, such as a bachelor’s degree in a related field, to ensure proper use. The PDFs are accessible online, allowing professionals to download and use them for assessments. Always verify the seller’s authenticity to ensure compliance with copyright and ethical standards. Visit the Pearson Clinical website for direct access and detailed ordering information.

6.2 Related Materials and Resources

Beyond the BASC-3 PRS PDF, several related materials are available to support comprehensive assessments. The BASC-3 manual provides detailed guidance on administration, scoring, and interpretation. Additional forms, such as the Structured Developmental History (SDH) and the Parenting Relationship Questionnaire (PRQ), offer deeper insights into a child’s behavior and family dynamics. Supplementary materials include hand-scored worksheets and online scoring systems for efficient data processing. These resources are designed to enhance the utility of the PRS, ensuring a thorough understanding of a child’s behavioral profile. They are accessible through official distributors and the Pearson Clinical website, supporting professionals in their assessment and intervention planning efforts.

Page 2 of 3

Powered by WordPress & Theme by Anders Norén