
AeroPress Go Instructions: A Comprehensive Guide
This guide details the AeroPress Go, a portable coffee maker, covering setup, brewing (standard & inverted), cleaning, troubleshooting, and warranty details for optimal use.
What is the AeroPress Go?
The AeroPress Go is a remarkably portable coffee maker designed for coffee enthusiasts who value convenience and quality while traveling. It’s a streamlined, all-in-one version of the original AeroPress, specifically engineered for on-the-go brewing.
Unlike its predecessor, the AeroPress Go cleverly nests everything you need – the chamber, plunger, filter holder, scoop, and stirrer – directly into its travel mug. This compact design makes it ideal for camping, hiking, business trips, or simply enjoying a fresh cup anywhere.
It utilizes the same basic principles of immersion and pressure to deliver a smooth, rich, and customizable coffee experience, but with enhanced portability. The AeroPress Go offers a 3-in-1 brewing method, making it a versatile choice for various coffee preferences.
Unboxing and Components
Upon opening your AeroPress Go, you’ll find a complete brewing system neatly packaged. The core components include the AeroPress chamber and plunger – forming the brewing mechanism. A filter holder securely accepts the included micro-filters, essential for a clean cup.
You’ll also receive a dedicated coffee scoop for precise measurements, ensuring consistent results. A stirrer is provided for thorough saturation of the coffee grounds during brewing. Crucially, the unit includes a durable travel mug, designed to house all components for easy transport.
Finally, a small pouch of 350 micro-filters is included to get you started. Verify all components are present and undamaged before first use. The simplicity of the parts contributes to the AeroPress Go’s ease of use and cleaning.
AeroPress Go vs. Original AeroPress: Key Differences
The AeroPress Go builds upon the original’s design, prioritizing portability. Unlike the original, the Go includes a dedicated travel mug that neatly stores all components – chamber, plunger, scoop, stirrer, and filters – making it ideal for travel and outdoor use.
While the original requires a separate mug, the Go’s integrated design streamlines the brewing process on the move. Both models utilize the same brewing principles and produce comparable coffee quality. Filter size and type remain consistent between the two.
Essentially, the Go is a self-contained, travel-ready version of the classic AeroPress, offering convenience without sacrificing brewing performance. The original remains a great choice for home use, while the Go excels in mobile scenarios.

Setting Up Your AeroPress Go
Proper setup is crucial for enjoying your AeroPress Go. This involves assembling the device for travel and familiarizing yourself with the included filter and scoop.
Assembling the AeroPress Go for Travel
The AeroPress Go is designed for portability, making it ideal for travel. To assemble for on-the-go use, the chamber nests directly into the mug, creating a compact unit.
Simply place the chamber on top of the mug, ensuring a secure fit. The filter holder then attaches to the chamber, ready to accept the included microfilters.
The scoop and stirrer also fit neatly inside the chamber with the filters, keeping all essential components together. This clever design minimizes space and prevents lost parts during your adventures.
This self-contained system allows you to easily pack and enjoy fresh, delicious coffee wherever life takes you, whether it’s a hotel room or a camping trip.
Understanding the Included Filter and Scoop
The AeroPress Go includes both paper micro-filters and a dedicated scoop for precise coffee measurement. These filters are crucial for a clean, sediment-free brew, differing from traditional coffee methods. They eliminate bitterness and provide a smooth, rich flavor profile.
The included scoop isn’t a standard tablespoon; it’s calibrated to hold approximately 14 grams of ground coffee – roughly one AeroPress scoop equals one rounded tablespoon.
Using the scoop ensures consistency in your coffee-to-water ratio, vital for repeatable results. The filters are pre-folded for convenience, simplifying the brewing process.
Proper filter usage and accurate scooping are key to unlocking the AeroPress Go’s full potential and enjoying a consistently excellent cup of coffee.

Standard Brewing Method: Step-by-Step
This method involves adding coffee and water, steeping briefly, and then pressing for a smooth, concentrated brew – a simple and effective technique.
Grinding Your Coffee Beans
Achieving the right grind is crucial for optimal AeroPress Go brewing. A medium-fine grind, similar to table salt, generally works best. This consistency allows for proper extraction without over-extraction leading to bitterness.
Using freshly ground beans significantly enhances flavor; pre-ground coffee loses its aromatic oils quickly. A burr grinder is recommended over a blade grinder, as it provides a more consistent particle size. Consistency is key – uneven grinds result in an unbalanced brew.
Experimentation is encouraged! Adjust the grind slightly finer for a stronger brew or coarser for a milder one. The AeroPress is forgiving, allowing you to dial in your preferred taste profile. Remember to consider the bean’s roast level when adjusting your grind size.
Heating the Water to the Ideal Temperature

Water temperature profoundly impacts the AeroPress Go brew. Generally, 175-185°F (80-85°C) is recommended. This range extracts optimal flavors without scorching the coffee. Boiling water (212°F/100°C) can lead to bitterness, especially with finer grinds.
If you don’t have a temperature-controlled kettle, bring water to a boil and let it sit for a minute or two before pouring. This allows it to cool slightly. Using cooler water will result in under-extraction and a sour taste.
Experimentation is key! Lighter roasts often benefit from slightly hotter water, while darker roasts perform better with cooler temperatures. Consistent water temperature ensures repeatable, delicious results with your AeroPress Go.
Adding Coffee Grounds to the Chamber
Carefully place the AeroPress Go chamber onto your mug. Using the included scoop (or a separate measuring spoon), add your desired amount of coffee grounds directly into the chamber. A standard ratio is typically one to two level scoops (approximately 15-17 grams) for a single cup.
The amount of coffee grounds will influence the strength of your brew. Adjust this based on your preference and the coffee bean’s roast level. Finer grinds require less coffee, while coarser grinds may need more.
Ensure the grounds are evenly distributed within the chamber for consistent extraction. A level surface is crucial for a smooth pressing process later on.
Pouring Water and Stirring
Now, gently pour hot water (ideally between 175-185°F or 80-85°C) over the coffee grounds in the chamber. Start with a small amount to saturate the grounds – this is called the “bloom,” releasing trapped gases. Allow it to bloom for about 10-30 seconds.
Continue pouring water to reach your desired fill level, typically filling the chamber to just below the “4” mark. Use a stirring device (the included paddle works well) to gently stir the water and grounds for approximately 10 seconds.
Ensure all grounds are fully immersed for even extraction. Avoid vigorous stirring, as this can lead to over-extraction and bitterness.
Steeping Time: Finding Your Preference
Steeping, or brew time, significantly impacts the coffee’s flavor profile. A shorter steep (10-30 seconds) generally results in a brighter, more acidic cup, highlighting the coffee’s origin characteristics. Longer steeps (60+ seconds) extract more compounds, leading to a bolder, potentially more bitter brew.
Experimentation is key! Start with a 30-second steep and adjust based on your taste. If the coffee tastes sour, increase the steep time. If it’s bitter, reduce it.
The AeroPress Go’s quick brewing process allows for rapid adjustments. Keep notes on your steeping times and water temperatures to consistently recreate your perfect cup.
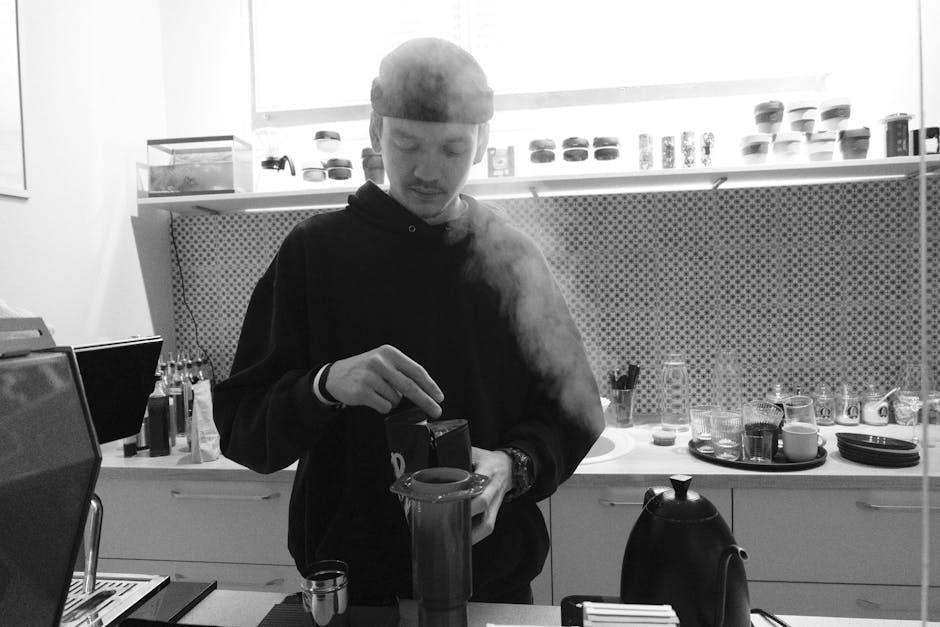
Pressing the AeroPress Go
Slow, steady pressure is crucial when pressing the AeroPress Go. Aim for a consistent force over approximately 20-30 seconds. Avoid pressing too quickly, as this can force sediment through the filter, resulting in a gritty cup.
You’ll hear a hissing sound as you press – this indicates air is escaping. Stop pressing when you hear a louder, sputtering sound, signifying you’ve reached the coffee grounds.
Don’t force the plunger if you encounter significant resistance; it could indicate the filter is clogged. Disassemble and check the filter if this occurs. Enjoy your freshly brewed AeroPress coffee!

The Inverted Method (With Caution)
Some users prefer brewing upside down, known as the inverted method, but AeroPress strongly discourages it due to potential instability and burn risks.
Why the Inverted Method is Popular
The inverted method gains popularity among AeroPress enthusiasts due to its perceived control over the brewing process. Specifically, it allows for a longer, more consistent steeping time without the risk of dripping before pressing.
With the traditional method, gravity can pull coffee through the filter prematurely, potentially leading to a weaker brew. The inverted technique eliminates this issue by sealing the chamber, enabling users to fully submerge the grounds and control the steep duration precisely.
Many believe this results in a richer, more full-bodied cup of coffee, extracting more flavor from the grounds. Experimentation and a desire for customization also drive its adoption within the AeroPress community.
Risks Associated with the Inverted Method
Despite its popularity, the inverted method carries inherent risks. AeroPress, Inc. strongly discourages its use, primarily due to potential instability and the danger of burns from hot liquid.
When brewing inverted, the seal between the chamber and cap can fail unexpectedly, especially with vigorous stirring or pressure buildup. This can cause hot coffee and grounds to eject forcefully, posing a burn hazard to the user.
Furthermore, the inverted setup can be less stable overall, increasing the chance of accidental spills or tipping. Careful handling and a secure grip are crucial, but the risk remains elevated compared to the standard method. Prioritize safety and consider the potential consequences before attempting this technique.
How to Perform the Inverted Method (If You Choose To)
Proceed with extreme caution. Insert the plunger slightly into the chamber, creating a seal. Flip the AeroPress Go upside down, resting it securely on the plunger. Add coffee grounds and hot water as in the standard method.
Stir gently, then allow to steep for your desired time. Crucially, when pressing, maintain a firm grip and press slowly and steadily. Be prepared for potential resistance or unexpected movement.
Once the pressing is complete, quickly and carefully flip the AeroPress Go right-side up to separate the chamber from the plunger. Remember, this method is not endorsed by the manufacturer due to safety concerns.

Cleaning and Maintenance
Disassemble the AeroPress Go after each use. Rinse components with water, and utilize travel-friendly cleaning solutions for thorough maintenance and longevity.
Disassembling the AeroPress Go
After brewing, allow the AeroPress Go to cool slightly before disassembly to prevent burns. Gently twist and pull the plunger from the chamber. Separate the chamber from the travel mug by twisting; it should detach easily. The filter cap consists of three parts: the cap itself, the filter holder, and the filter.
Unscrew the filter cap to separate these components. Discard the used filter. The rubber seal on the plunger can also be removed for more thorough cleaning, though it’s often sufficient to clean it in place. Ensure all parts are accounted for before storing or traveling. Proper disassembly facilitates effective cleaning and prevents buildup.
Cleaning the Components
Rinse all AeroPress Go components – chamber, plunger, filter cap, and travel mug – with warm water immediately after use. For a deeper clean, use mild dish soap. The filter holder and cap can be disassembled for individual cleaning, ensuring no coffee grounds remain. Avoid abrasive cleaners, as they can scratch the plastic.
Pay close attention to the rubber plunger seal; ensure it’s free of debris to maintain a proper seal during brewing. The travel mug is dishwasher safe (top rack recommended). Thoroughly dry all parts before reassembling and storing. Regular cleaning prevents coffee oil buildup and ensures optimal performance and longevity of your AeroPress Go.
Travel-Friendly Cleaning Solutions
When traveling, pre-portioned detergent sheets or biodegradable soap flakes are excellent cleaning options, minimizing bulk. A small, dedicated cleaning brush is invaluable for reaching tight spaces within the AeroPress Go components. Rinse thoroughly with bottled or filtered water, avoiding tap water with strong odors.
Consider packing a microfiber cloth for drying, as it’s lightweight and absorbent. For stubborn coffee residue, a paste of baking soda and water can be gently applied. Remember to dispose of used coffee grounds responsibly. These simple solutions ensure a clean AeroPress Go, even when you’re far from a full kitchen setup, maintaining coffee quality on the go.

Troubleshooting Common Issues
Addressing problems like bitter coffee, weak brews, or difficult pressing is key to enjoying your AeroPress Go; adjustments to grind size and technique help!
Coffee Tastes Bitter
Bitter coffee often indicates over-extraction, meaning too many compounds were pulled from the grounds. First, try a coarser grind size; finer grinds extract more quickly. Second, reduce your steeping time – shorter steeping minimizes bitterness. Third, lower the water temperature slightly; hotter water extracts more aggressively.
Ensure you aren’t pressing too slowly, as prolonged pressure can also contribute to bitterness. Experiment with a slightly shorter press duration. Finally, consider the quality of your coffee beans; stale or low-quality beans can inherently taste bitter, regardless of brewing method. Adjusting these variables will help you achieve a smoother, more palatable cup.
Coffee is Weak
Weak coffee typically signals under-extraction – not enough compounds were dissolved from the grounds. Begin by using a finer grind size; this increases the surface area for extraction. Next, extend your steeping time, allowing more contact between water and coffee. Also, ensure your water temperature is sufficiently hot, ideally between 175-185°F (80-85°C).
Increase the amount of coffee grounds used for the same amount of water. Verify you’re applying firm, even pressure during the press. Consider pre-infusing the grounds with a small amount of hot water before the full pour, allowing them to “bloom” and release gases. Experiment with these adjustments to boost the strength and flavor of your brew.
Pressing is Difficult
Difficulty pressing often indicates the grind is too fine, creating excessive resistance. Try a slightly coarser grind to alleviate this. Ensure you haven’t overfilled the chamber; exceeding the maximum fill line significantly increases pressure. Check that the AeroPress Go is assembled correctly, with the plunger properly inserted into the chamber.
Apply steady, even pressure during the press – avoid jerky movements. If the plunger still resists, a small amount of hot water can be added to loosen the grounds. Avoid excessive force, as this could damage the device. Remember to clean the plunger thoroughly, as coffee residue can build up and impede smooth operation.

AeroPress Go Warranty Information
The AeroPress Go is covered by a one-year warranty against defects in materials and workmanship from the date of purchase; retain your receipt.
What the Warranty Covers
The AeroPress Go warranty protects against defects in materials and workmanship under normal use for one year from the original purchase date. This includes issues with the chamber, plunger, filter cap, and scoop – essential components for brewing.
However, the warranty does not cover damage resulting from misuse, accidents, unauthorized modifications, or normal wear and tear. For example, cracks from dropping the device or damage from improper cleaning aren’t covered.
Furthermore, the warranty is limited to the original purchaser and is non-transferable. AeroPress, Inc. will, at its discretion, repair or replace the defective product, or issue a refund, as the sole remedy.
How to Make a Warranty Claim
To initiate a warranty claim for your AeroPress Go, retain your original purchase receipt as proof of date and location of purchase. Contact AeroPress, Inc. directly through their official website, www.aeropress.com, to obtain a Return Merchandise Authorization (RMA) number.
Carefully package the defective AeroPress Go, including all original components, and ship it to the address provided by AeroPress, Inc. with the RMA number clearly marked on the package. Shipping costs are the responsibility of the customer.
Upon receiving the returned product, AeroPress, Inc. will assess the defect and determine if it’s covered under the warranty. Allow several weeks for processing and resolution.
Resources and Further Learning
Explore the official AeroPress website (www.aeropress.com) for FAQs, downloadable instructions (PDF), and connect with vibrant online communities for recipes and tips.
Official AeroPress Website
The official AeroPress website, located at www.aeropress.com, serves as the primary hub for all things AeroPress, including the Go model. Here, you’ll find a wealth of information directly from the manufacturer, ensuring accuracy and up-to-date guidance.
Visitors can access detailed product specifications, frequently asked questions addressing common concerns, and downloadable instruction manuals in PDF format. Beyond the basics, the site often features brewing tips, advanced techniques, and inspiring coffee recipes contributed by AeroPress enthusiasts worldwide.
Furthermore, the website provides information regarding warranty claims and customer support, allowing users to easily resolve any issues they may encounter. It’s the definitive resource for maximizing your AeroPress Go experience and staying connected with the AeroPress community.
Online AeroPress Communities and Recipes
Beyond the official website, a vibrant online community surrounds the AeroPress, particularly the Go model. Numerous forums, social media groups, and dedicated websites are brimming with user-generated content, offering a diverse range of brewing techniques and recipes.
These communities provide a platform for sharing experiences, troubleshooting issues, and discovering innovative ways to utilize the AeroPress Go. You’ll find discussions on grind size, water temperature, steep times, and even creative coffee concoctions.
Websites and platforms like Reddit (r/aeropress) and various coffee enthusiast blogs showcase countless recipes, from classic espresso-style shots to cold brew variations, expanding your brewing horizons beyond the included instructions.
Downloadable AeroPress Go Instructions (PDF)
For convenient offline access and easy sharing, AeroPress provides downloadable instructions in PDF format. This digital version mirrors the printed manual, offering a comprehensive guide to setting up, brewing, cleaning, and maintaining your AeroPress Go.
The PDF is particularly useful for travelers who prefer not to carry a physical manual or for those who want a readily available reference on their smartphones or tablets. It ensures you always have the essential information at your fingertips, regardless of your location.
You can find the official PDF on the AeroPress website (www.aeropress.com) within the support or resources section. It’s a valuable asset for both new and experienced AeroPress Go users.
Leave a Reply
You must be logged in to post a comment.