Love to Dream Swaddle Guide: A Comprehensive Overview
Navigating early parenthood often presents challenges‚ and selecting the right swaddle is crucial. This guide details the Love to Dream swaddle‚
offering insights into its various stages and ensuring a peaceful sleep for your little one. Due to temporary website issues‚ detailed information may be limited.
What is a Love to Dream Swaddle?
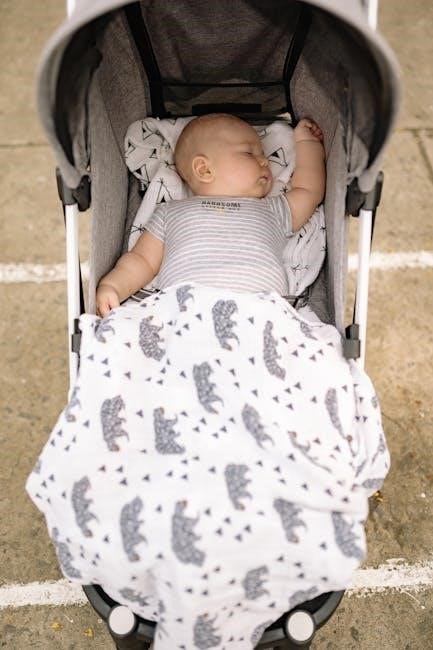
The Love to Dream Swaddle is a unique sleep solution designed to help babies sleep more soundly and for longer durations. Unlike traditional swaddles that tightly bind a baby’s arms‚ the Love to Dream allows infants to sleep with their arms up‚ mimicking a natural fetal position. This innovative design reduces the startle reflex‚ a common disruptor of infant sleep‚ and minimizes the risk of accidental rolling onto the stomach.
It’s essentially a wearable blanket with specially designed wings that allow for safe and comfortable arm movement. The swaddle aims to provide a sense of security while giving babies the freedom to move their arms‚ promoting self-soothing and potentially leading to longer‚ uninterrupted sleep periods. It’s available in various stages to accommodate a baby’s development‚ transitioning from a fully swaddled state to a sleep suit as they grow and begin to show signs of rolling over.
Benefits of Using a Love to Dream Swaddle
Employing a Love to Dream Swaddle offers a multitude of advantages for both baby and parents. Primarily‚ it promotes longer‚ more restful sleep by minimizing the Moro reflex – that startling sensation that wakes many newborns. Allowing arms to rest in a natural‚ upward position reduces sleep disturbances and encourages self-soothing behaviors.

Furthermore‚ the swaddle can contribute to improved sleep quality and potentially extend sleep duration. It offers a sense of security and comfort‚ mimicking the womb environment. Importantly‚ it reduces the risk associated with loose blankets in the crib. Parents often report easier transitions between sleep cycles and a decrease in nighttime wakings. The swaddle’s design also supports healthy hip development‚ allowing for natural leg movement‚ and can be a valuable tool in establishing healthy sleep habits from an early age.
Different Love to Dream Swaddle Versions
Love to Dream offers a thoughtfully designed range of swaddles‚ catering to a baby’s evolving needs as they grow. The collection isn’t a one-size-fits-all solution; instead‚ it features distinct stages to support development. The Original Swaddle (Stage 1) is ideal for newborns‚ providing a secure‚ arms-up embrace. As babies begin to show signs of rolling‚ the Transition Swaddle (Stage 2) allows for one or both arms to be free‚ easing the transition away from swaddling.
Finally‚ the Sleep Suit (Stage 3) functions as a wearable blanket‚ offering continued comfort and security without the constraints of a traditional swaddle. Each version is crafted from breathable fabrics‚ prioritizing baby’s comfort and safety. Understanding these differences is key to selecting the most appropriate swaddle for your child’s current developmental stage‚ ensuring a safe and peaceful sleep experience.
Love to Dream Swaddle Stage 1: Original Swaddle
The Love to Dream Original Swaddle‚ Stage 1‚ is specifically designed for newborns and young infants. This swaddle distinguishes itself with its unique arms-up design‚ mimicking a baby’s natural sleep position. Unlike traditional swaddles that restrict arm movement‚ the Original Swaddle allows babies to self-soothe by bringing their hands to their mouth‚ potentially leading to longer‚ more restful sleep.
Crafted from breathable cotton‚ it minimizes overheating risks and ensures comfort. The easy-to-use zipper system simplifies swaddling‚ even for first-time parents. It’s crucial to select the correct size based on your baby’s weight‚ ensuring a snug yet comfortable fit. This stage is best suited for babies who haven’t yet shown signs of rolling over‚ providing a secure and familiar environment for peaceful sleep.
Love to Dream Swaddle Stage 2: Transition Swaddle
The Love to Dream Transition Swaddle‚ Stage 2‚ bridges the gap between fully swaddled sleep and independent arm movement. Designed for babies showing signs of rolling‚ this swaddle features one arm free‚ allowing for greater mobility while still providing a sense of security. This gradual transition helps prevent startle reflexes from disrupting sleep as babies adjust to having an arm unrestrained.
Constructed with the same breathable cotton as Stage 1‚ it maintains comfort and minimizes overheating. The zipper system remains user-friendly‚ facilitating easy diaper changes. It’s vital to transition when your baby consistently breaks free from the Original Swaddle or demonstrates attempts to roll. Using Stage 2 allows a gentle adaptation‚ preparing your little one for sleeping with both arms free‚ fostering independent sleep habits and reducing sleep disturbances.
Love to Dream Swaddle Stage 3: Sleep Suit

The Love to Dream Sleep Suit‚ Stage 3‚ marks the final step in the swaddle journey‚ designed for babies who are confidently rolling over and showing readiness for unrestricted arm movement. This innovative sleepwear replaces the swaddle entirely‚ offering a comfortable and safe alternative that promotes independent sleep. Unlike traditional sleep sacks‚ the Sleep Suit allows for natural arm positioning – up near the face‚ just like in the womb – which can soothe and comfort your baby.
Made from stretchy‚ breathable fabric‚ it provides a snug yet flexible fit‚ ensuring freedom of movement without compromising safety. The unique design minimizes the startle reflex‚ contributing to longer‚ more restful sleep. Transitioning to the Sleep Suit is ideal once your baby consistently rolls from back to front and front to back. It’s a gentle way to encourage self-soothing and establish healthy sleep routines.
Sizing Guide: Finding the Right Fit

Ensuring a proper fit is paramount for both comfort and safety when using a Love to Dream swaddle. The sizing isn’t based on age‚ but rather on your baby’s weight‚ making it crucial to consult the official size chart provided by the manufacturer. Generally‚ Stage 1 (Original Swaddle) fits babies from newborn up to approximately 8.8 lbs (4 kg). Stage 2 (Transition Swaddle) is suitable for babies between 8.8 lbs and 18.7 lbs (4-8.5 kg)‚ and Stage 3 (Sleep Suit) accommodates babies from 18.7 lbs up to 35.3 lbs (8.5-16 kg).
However‚ individual babies grow at different rates‚ so weight is the most reliable indicator. If your baby is nearing the upper weight limit of a stage‚ it’s advisable to size up. A snug‚ but not tight‚ fit is ideal. Too loose‚ and the swaddle may be unsafe; too tight‚ and it could restrict movement. Regularly check the fit as your baby grows to maintain optimal comfort and security throughout the night.
How to Properly Swaddle with a Love to Dream
The Love to Dream swaddle differs significantly from traditional swaddling methods‚ prioritizing arms-up positioning. This unique design mimics a baby’s natural sleep posture‚ reducing startle reflex disruptions. Before beginning‚ lay your baby on their back on a flat‚ safe surface. Unzip the swaddle completely and lay it flat‚ ensuring the zipper is fully open. Place your baby onto the swaddle‚ aligning their shoulders with the armholes.
Bring the wings across your baby’s chest‚ ensuring a snug but not overly tight fit. Secure the wings using the Velcro closures‚ starting with the bottom set and then the top. Ensure the Velcro is firmly attached. Finally‚ zip up the swaddle from the bottom to the top‚ ensuring no fabric obstructs your baby’s face. Always double-check the fit before leaving your baby unattended‚ prioritizing safety and comfort.

Step-by-Step Swaddling Instructions (Stage 1)
Begin with the Love to Dream Original Swaddle fully unzipped and laid flat. Gently place your baby on their back‚ centering them on the swaddle with shoulders aligned to the armholes. Bring the right wing across the baby’s chest‚ securing it with the Velcro closure – start with the lower portion‚ then the upper. Repeat this process with the left wing‚ ensuring both are snug but allow for hip movement.
Next‚ zip up the swaddle from the bottom‚ carefully checking for any fabric bunching near the face. The zipper should run smoothly and securely. Ensure the arms remain positioned inside the wings‚ allowing for natural upward movement. A proper fit allows for hip flexion and extension‚ crucial for healthy development. Always perform a final check to confirm a secure‚ comfortable swaddle before leaving your baby unattended.
Transitioning from Stage 1 to Stage 2
The move from the Original Swaddle (Stage 1) to the Transition Swaddle (Stage 2) is a significant step. It’s designed for babies showing signs of rolling or attempting to break free from full swaddling. Begin by using the Transition Swaddle for naps‚ allowing your baby to adjust gradually. Initially‚ keep both arms inside the wings‚ mirroring Stage 1.
Over several days‚ slowly introduce one arm out of the swaddle. Observe your baby’s reaction; some adapt quickly‚ while others need more time. Once comfortable with one arm free‚ transition the second arm out. This gradual approach minimizes sleep disruption. The Transition Swaddle’s open bottom allows for kicking‚ promoting leg movement and preparing for independent sleep. Monitor for signs of distress and adjust the pace accordingly‚ prioritizing your baby’s comfort.
Using the Wings Down Method
The “Wings Down” method is a helpful technique when transitioning from a fully swaddled state‚ particularly with the Stage 2 Transition Swaddle. It allows for a more gradual adjustment to arm freedom‚ minimizing startle reflex disruptions. Begin by securing the baby with both wings initially positioned up‚ as in a traditional swaddle.
Over the next few nights‚ gently lower one wing at a time. This provides a sense of security while allowing one arm increasing mobility. Observe your baby’s sleep patterns and adjust the speed of lowering the wings based on their comfort level. Lowering both wings simultaneously can be too abrupt for some infants. The goal is to create a feeling of gentle liberation‚ not sudden restriction removal. This method supports a smoother transition to independent sleep‚ fostering a sense of calm and security.
Safety Considerations When Swaddling
While swaddling offers numerous benefits‚ prioritizing safety is paramount. Always ensure the swaddle isn’t too tight‚ allowing for healthy hip movement to prevent potential dysplasia. Never swaddle above the baby’s chest‚ as this can restrict breathing. Position your baby on their back for sleep – swaddling and placing a baby on their stomach significantly increases SIDS risk.

Regularly check your baby’s temperature; swaddling can lead to overheating. Use appropriate clothing layers underneath the swaddle to maintain a comfortable body temperature. Discontinue swaddling immediately when your baby shows signs of attempting to roll over‚ as a swaddled baby rolling onto their stomach is dangerous. Always follow the manufacturer’s instructions for the Love to Dream swaddle‚ and discontinue use if any damage is detected. Prioritize a safe sleep environment above all else.
Hip Dysplasia and Swaddling: What You Need to Know
Hip dysplasia‚ a condition where the hip joint doesn’t form properly‚ is a concern when swaddling. Traditional tight swaddling can restrict leg movement‚ potentially contributing to hip instability. The Love to Dream swaddle‚ however‚ is designed with a hip-healthy design‚ allowing for natural leg positioning and outward movement.
It’s crucial to choose a swaddle that accommodates this range of motion. Look for swaddles‚ like the Love to Dream‚ that feature a wider hip area. If you have concerns about your baby’s hip health‚ consult with your pediatrician. They can assess your baby’s hips and provide personalized recommendations regarding swaddling. Avoid forceful straightening of legs during swaddling. Early detection and appropriate swaddling techniques can minimize the risk of developmental hip issues‚ ensuring healthy growth.
When to Stop Swaddling
Determining the right time to discontinue swaddling is vital for your baby’s development. Generally‚ most babies begin showing signs of wanting to break free from the swaddle between 3-6 months. Continuing beyond this point can hinder the development of crucial motor skills‚ like rolling over.
Look for cues such as your baby consistently escaping the swaddle‚ attempting to roll‚ or resisting being swaddled. These indicate a readiness to transition. The Love to Dream offers transition swaddles (Stage 2) designed to help ease this process‚ allowing one or both arms to be free. Don’t delay stopping if your baby demonstrates rolling attempts‚ as a swaddled baby rolling onto their stomach poses a safety risk. Observe your baby closely and prioritize their developmental milestones when making this decision.
Recognizing When Baby is Ready to Stop
Identifying the signs your baby is ready to transition from swaddling is key to a smooth process. A primary indicator is consistent escape artistry – if your baby frequently breaks free‚ it’s a clear message. More importantly‚ watch for attempts to roll over. Even a single attempt signifies a need to liberate their arms.
Other clues include increased fussiness when swaddled‚ pushing arms out against the swaddle‚ or showing a preference for being unswaddled. These behaviors suggest discomfort or a desire for more freedom of movement. Remember‚ every baby develops at their own pace. Don’t compare your baby to others; focus on their individual cues. The Love to Dream’s transition stages are designed to support this shift‚ offering options with one or both arms free‚ allowing a gradual adjustment to unswaddled sleep.
Common Issues and Troubleshooting
Despite its benefits‚ using a Love to Dream swaddle can present some challenges. A frequent concern is the “swaddle escape‚” where babies manage to wiggle free‚ disrupting sleep. Ensure the swaddle is appropriately sized and snugly fitted‚ but not overly tight. If escape persists‚ consider transitioning to the next stage‚ offering more arm movement.
Another issue is overheating. Dress your baby appropriately for the room temperature‚ avoiding excessive layers under the swaddle. Regularly check your baby’s temperature to ensure they aren’t too warm. Fussiness or resistance to being swaddled can also occur‚ signaling discomfort or a readiness to stop. Experiment with different stages or consider alternatives if problems continue. Remember‚ patience and observation are crucial for finding what works best for your little one.
Dealing with Swaddle Escape Artists
Some babies are simply masters of escape! If your little one consistently breaks free from their Love to Dream swaddle‚ don’t despair. First‚ double-check the sizing – a too-large swaddle offers more room for maneuvering. Ensure the arms are securely positioned within the wings‚ but avoid overtightening‚ which can be uncomfortable.
Consider transitioning to the next stage swaddle sooner than recommended. The Stage 2 version‚ with one or both wings down‚ provides more arm freedom while still offering a sense of security. For persistent escape artists‚ a sleep sack might be a better option. It allows for movement without the restriction of a swaddle. Remember‚ a baby’s development progresses quickly‚ and their need for swaddling will naturally decrease. Prioritize safety and comfort over keeping them contained.

Cleaning and Care Instructions
Maintaining the cleanliness of your Love to Dream swaddle is essential for your baby’s hygiene. Always check the care label on your specific swaddle version‚ as instructions can vary slightly. Generally‚ machine washing in cold water on a gentle cycle is recommended. Avoid using harsh detergents‚ bleach‚ or fabric softeners‚ as these can irritate your baby’s sensitive skin.
Tumble dry on low heat or hang to dry. High heat can damage the fabric and elastic. Do not iron the swaddle. Regularly inspect the swaddle for any signs of wear and tear‚ such as loose seams or damaged zippers. Promptly address any issues to ensure continued safety and functionality. Proper cleaning and care will extend the life of your Love to Dream swaddle‚ providing comfort and security for your little one for longer.
Love to Dream Swaddle Alternatives

While the Love to Dream swaddle is popular‚ several alternatives cater to different preferences and baby needs. Traditional muslin swaddles offer a lightweight and breathable option‚ providing a classic swaddling experience. Halo SleepSack Swaddles are known for their ease of use and secure fit‚ featuring a Velcro closure system.
SwaddleMe Original Swaddles utilize adjustable Velcro closures to mimic the feeling of being held‚ promoting a sense of security. For babies who prefer more leg movement‚ the Nested Bean Zen Sack incorporates gently weighted areas to calm and soothe. Aden + Anais swaddles are also a popular choice‚ known for their soft‚ breathable fabric and versatile designs. Ultimately‚ the best swaddle depends on your baby’s individual temperament and your comfort level as a parent. Consider trying a few options to find the perfect fit.
Where to Buy Love to Dream Swaddles
Love to Dream swaddles are widely available‚ offering convenient purchasing options for parents; Major retailers like Amazon consistently stock a comprehensive range of sizes and styles‚ often with competitive pricing and fast shipping. Target and Walmart also carry Love to Dream products‚ both in-store and online‚ providing accessibility for everyday shopping.
BuyBuy Baby specializes in baby gear and typically features a dedicated section for Love to Dream swaddles‚ alongside expert advice. Directly from the Love to Dream website offers the most complete selection‚ including exclusive designs and bundles. Additionally‚ specialty baby boutiques often carry the brand‚ providing a personalized shopping experience. Checking for sales and promotions across these retailers can help you secure the best deal for this essential baby item. Availability may vary‚ so checking online stock is recommended.