Welcome to the Nord Stage 4 Manual, your comprehensive guide to mastering this powerful keyboard workstation. Designed for professional musicians, it offers detailed insights into its advanced features, including the Triple Sensor keybed, intuitive panel design, and enhanced sound sections. This manual ensures you unlock the full potential of the Nord Stage 4, exploring its piano, organ, and synth capabilities, as well as its robust effects and MIDI connectivity options.
1.1 Overview of the Nord Stage 4 and Its Manual
The Nord Stage 4 is a powerful keyboard workstation designed for professional musicians, offering a comprehensive collection of sounds and features. Its 72-page manual provides detailed guidance on operation, including piano, organ, and synth sections, MIDI control, and advanced effects. The document ensures users can fully utilize the instrument’s capabilities, from basic setup to intricate sound design and performance techniques.
1.2 Key Features of the Nord Stage 4
The Nord Stage 4 boasts a premium Triple Sensor keybed for exceptional playability, an intuitive panel design for easy navigation, and enhanced effect sections for each layer. It features advanced sound engines for piano, organ, and synth, along with robust MIDI connectivity and flexible audio output options, making it a versatile tool for live performance and studio production.
New Features in the Nord Stage 4
The Nord Stage 4 introduces a Triple Sensor keybed, intuitive panel design, and enhanced effect sections, offering advanced functionality and improved performance for professional musicians and live use.
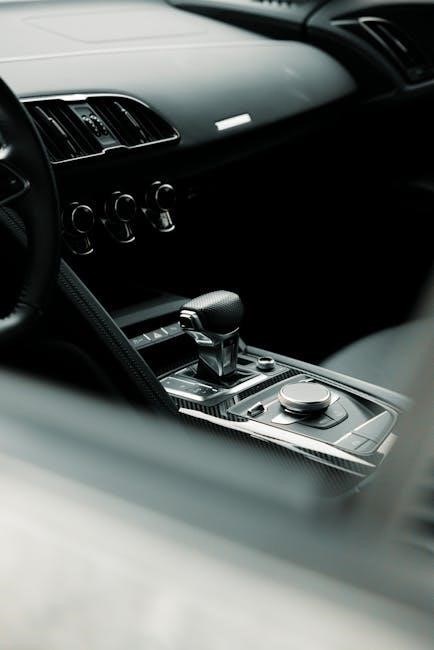
2.1 Triple Sensor Keybed
The Nord Stage 4 features a premium Triple Sensor Keybed, designed for exceptional playability and responsiveness. This advanced keybed captures every nuance of performance, from delicate pianissimos to powerful fortissimos, ensuring precise control over acoustic, electric, and synth sounds. Its natural feel and dynamic response make it ideal for both studio and live performances, catering to the demands of professional musicians.
2.2 Intuitive Panel Design
The Nord Stage 4 boasts an intuitive panel design, streamlining workflow for live performance and studio use. LED-lit faders and clearly organized controls provide instant access to key functions, while the user-friendly layout minimizes complexity. This design ensures seamless navigation, allowing musicians to focus on creativity and performance without unnecessary distractions, making it a powerful tool for professional musicians seeking efficiency and precision.
2.3 Enhanced Effect Sections
The Nord Stage 4 features enhanced effect sections, offering advanced processing for each sound layer. With improved algorithms and intuitive controls, users can customize reverb, delay, chorus, and amp simulations with precision. The effects are now more versatile, allowing for deeper sound shaping and a richer tonal palette, making it ideal for both live performances and studio productions, ensuring a professional-grade sound experience.
Sound Sections in the Nord Stage 4
The Nord Stage 4 boasts three distinct sound sections: Piano, Organ, and Synth. Each section delivers exceptional quality and versatility, catering to diverse musical needs and styles.
3.1 Piano Section
The Piano Section of the Nord Stage 4 offers an extensive library of premium acoustic and electric pianos. With advanced sampling and realistic response, it delivers authentic grand piano feels. The Triple Sensor keybed captures every nuance, while the Virtual Hammer Action Technology ensures a natural playing experience. Customizable settings allow tailoring the sound to suit any musical style or preference.
3.2 Organ Section
The Organ Section of the Nord Stage 4 features the renowned Nord C2D tone wheel engine, delivering authentic simulations of classic B3, Vox, and Farfisa organs. It also includes a stunning baroque pipe organ and a 122 Rotary Speaker simulation for immersive sound. With physical drawbars and realistic organ behavior, this section provides endless versatility for organ enthusiasts, ensuring a true-to-life playing experience.
3.3 Synth Section
The Synth Section of the Nord Stage 4 is powered by the Nord Lead A1 Synth Engine, offering rich, dynamic sounds with extensive customization options. It supports sample playback and features a wide range of modulation capabilities, allowing for deep sound design. With intuitive controls and seamless integration with other sections, the synth section delivers everything from classic analog tones to modern, experimental textures, perfect for both live performance and studio work.
Effects and Processing
The Nord Stage 4 offers a wide range of effects, including ENS, VIBE, CHORUS, and AMP SIM/EQ, providing versatile sound-shaping tools for each layer, enhancing your musical creativity.
4.1 Types of Effects Available
The Nord Stage 4 offers an extensive array of effects, including reverb, delay, chorus, and ensemble, each designed to enhance your sound. With the AMP SIM/EQ unit, you can shape your tone using a three-band equalizer. Additionally, effects like VIBE and CHORUS add depth and richness to your performances. These tools provide flexibility and creativity for any musical style, ensuring your sound stands out.
4.2 Layer-Specific Effects Routing
The Nord Stage 4 allows for precise control over effects routing, enabling you to assign different effects to each layer. This feature enhances flexibility, letting you tailor sounds for specific parts of your performance. With independent effect chains, you can create complex, layered sounds while maintaining clarity and depth, making it ideal for dynamic live performances and intricate sound design.

MIDI Control and Connectivity
The Nord Stage 4 offers advanced MIDI control and connectivity, enabling seamless integration with external gear. With MIDI channels and synchronization options, it enhances live performance and studio workflows.
5.1 MIDI Implementation
The Nord Stage 4 features robust MIDI implementation, allowing precise control over external devices and seamless integration into your setup; With dedicated MIDI channels for each sound section, you can independently control piano, organ, and synth layers. This flexibility enhances your ability to create complex performances and studio recordings, ensuring each part of your sound is perfectly synchronized and managed.
5.2 Audio Output Configuration
The Nord Stage 4 offers flexible audio output configuration with four available outputs. Each sound section can be independently routed to outputs 1&2 (default) or 3&4 in stereo, or to output 3 or 4 in mono. This setup allows for professional-grade sound management, enabling you to tailor your audio output to suit live performances, studio recordings, or complex routing scenarios with precision and clarity.
Downloading and Updating the Nord Stage 4 Manual
Access the Nord Stage 4 Manual as a free PDF download from the Nord Keyboards website. Regularly check for OS updates to ensure optimal performance and new features.
6.1 Where to Find the Manual
The Nord Stage 4 Manual is available as a digital PDF file on the Nord Keyboards official website. Visit the downloads section, select the Nord Stage 4 product, and access the manual along with OS updates and other resources; This ensures you have the latest guide for optimal use of your instrument.
6.2 OS Update Instructions
The Nord Stage 4 Manual includes detailed OS update instructions. Download the latest OS from the Nord Keyboards website by selecting your model in the downloads section. Follow the on-screen instructions to install the update. Use the Nord Sound Manager to transfer the OS to your keyboard. Always restart your instrument after completing the update to ensure proper installation.

Navigating the Manual
The Nord Stage 4 Manual is a 72-page digital guide structured with a clear table of contents. It covers features, MIDI control, and troubleshooting, ensuring easy navigation.
7.1 Table of Contents and Structure
7.2 Reading the Manual in PDF Format
The Nord Stage 4 Manual is available as a digital PDF file, accessible from the Nord website. This format allows for easy navigation, with features like search, bookmarks, and zoom. The PDF is optimized for readability on both desktop and mobile devices, ensuring convenient access to all sections. Regular updates ensure the manual stays current with the latest software and features.

Maintenance and Troubleshooting
Regularly clean the keybed and check for firmware updates. Troubleshoot common issues like connectivity problems or sound glitches by consulting the manual or resetting the device.
8.1 Common Issues and Solutions
Addressing common issues with the Nord Stage 4 often involves checking MIDI connections and ensuring firmware is up-to-date. Sound glitches may require resetting the instrument or reassigning audio outputs. Cleaning the Triple Sensor keybed regularly prevents mechanical issues. For persistent problems, refer to troubleshooting guides or contact Nord’s customer support for assistance.
8.2 Resetting the Nord Stage 4
Resetting the Nord Stage 4 restores factory settings, resolving software-related issues. Press and hold the Global and OK buttons while powering on. This performs a full system reset, clearing all custom settings. Note that this operation erases user data, so ensure all important sounds are saved externally before proceeding. Always back up your work prior to resetting.

Accessories and Compatible Gear
The Nord Stage 4 supports a variety of accessories, including the Nord Triple Pedal, music stands, and durable flight cases. These enhance performance and portability.
9.1 Recommended Accessories
The Nord Stage 4 is complemented by a range of accessories, including the Nord Triple Pedal for authentic organ control, a sturdy music stand for convenience, and a high-quality flight case for safe transportation. Additional options like MIDI interfaces and premium audio cables ensure seamless connectivity, enhancing your overall performance experience with the Nord Stage 4.
9.2 Compatible Nord Products
The Nord Stage 4 seamlessly integrates with other Nord products, such as the Nord Piano Library and Nord Sample Library, expanding your sound options. It’s also compatible with Nord MIDI controllers and the Nord Drum series, allowing for a cohesive setup. Additionally, the Nord Stage 4 works with the Nord Sound Manager software, simplifying sound management and enhancing your creative workflow.

Comparing the Nord Stage 4 to Previous Models
The Nord Stage 4 offers significant upgrades, including a Triple Sensor Keybed, enhanced effects, and improved MIDI control, setting a new standard compared to previous models.
10.1 Upgrades from the Nord Stage 3
The Nord Stage 4 introduces a premium Triple Sensor Keybed, an intuitive panel design, and enhanced effect sections for each layer. These upgrades improve playability, sound customization, and performance flexibility compared to the Nord Stage 3, ensuring a more dynamic and expressive musical experience for professional musicians.
10.2 Key Differences from Earlier Versions
The Nord Stage 4 distinguishes itself with a premium Triple Sensor Keybed, offering improved playability and responsiveness. It also features a more intuitive panel design, enhanced effect sections for each layer, and advanced sound customization options. Compared to earlier models, the Stage 4 delivers superior polyphony, expanded sound libraries, and refined MIDI connectivity, making it a significant upgrade for professional musicians seeking enhanced performance capabilities.
User Testimonials and Reviews
Professional musicians praise the Nord Stage 4 for its exceptional sound quality and intuitive design. Community discussions highlight its versatility and enhanced performance capabilities.
11.1 Professional Musicians’ Feedback
Professional musicians praise the Nord Stage 4 for its exceptional sound quality and intuitive design. Artists highlight its versatility, stating it seamlessly integrates into live performances and studio recordings. The Triple Sensor keybed and enhanced effects sections are frequently commended for their responsiveness and depth, making it a top choice for demanding musical productions and creative expression.
11.2 Community Discussions
The Nord Stage 4 manual has sparked vibrant discussions within music communities, with users praising its clarity and depth. Enthusiasts highlight the manual’s ability to demystify advanced features, while some suggest additional tutorials for complex effect routing. Overall, the community appreciates the guide’s thoroughness, emphasizing how it enhances their creative workflow with the Nord Stage 4.

Future Updates and Support
Nord regularly releases OS updates, ensuring the Stage 4 stays cutting-edge. Their dedicated customer support team provides assistance, and the manual is frequently updated to reflect new features.
12.1 Expected Software Enhancements
Future OS updates for the Nord Stage 4 are expected to enhance sound libraries, effects, and MIDI functionality. Improvements may include expanded synth capabilities, new effect variations, and better layer control. Nord consistently delivers updates to refine user experience, ensuring the Stage 4 remains a cutting-edge instrument for live performance and studio use.
12.2 Nord’s Customer Support
Nord provides exceptional customer support through their official website, offering downloadable manuals, OS updates, and restore files. Users can access detailed troubleshooting guides, software instructions, and technical assistance. Nord’s commitment to customer satisfaction ensures that Stage 4 owners receive comprehensive support, maintaining the instrument’s optimal performance and functionality.
The Nord Stage 4 Manual is a comprehensive guide to unlocking the full potential of this powerful keyboard workstation. With detailed insights into its features, sounds, and connectivity, it equips musicians to create exceptional performances. Nord’s customer support and resources ensure continued learning and troubleshooting, making this manual an invaluable tool for mastering the Stage 4.
13.1 Final Thoughts on the Nord Stage 4 Manual
The Nord Stage 4 Manual is a comprehensive guide designed to help musicians maximize their creative potential. It covers everything from the instrument’s advanced features to troubleshooting and maintenance. With detailed instructions and clear explanations, this manual serves as an essential resource for both professionals and enthusiasts. It ensures a seamless experience, unlocking the full potential of the Nord Stage 4.
13.2 Resources for Further Learning
For deeper exploration, visit the official Nord website for downloadable PDF manuals, OS updates, and restore files. Explore video tutorials on Nord’s YouTube channel and engage with the Nord community forums for tips and discussions. Additional resources include user-generated guides and workshops, ensuring continuous learning and mastery of the Nord Stage 4.