
The Nortel T7208 is a reliable digital deskphone from the Norstar series, offering advanced features and compatibility with IP Office systems, ideal for business communication needs.
1.1 Overview of the Nortel T7208 Phone
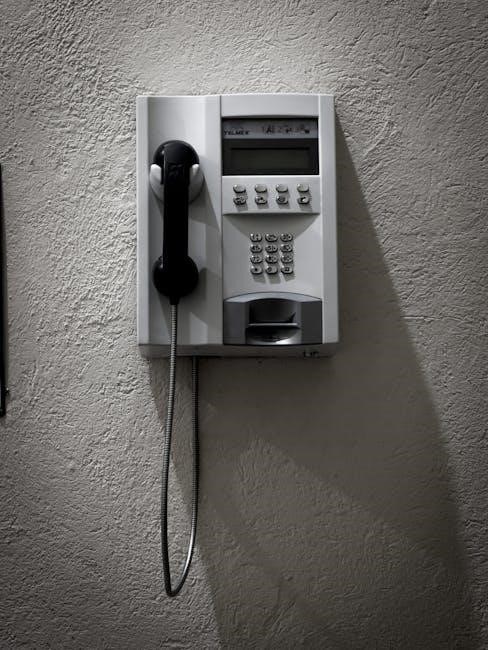
The Nortel T7208 is a versatile digital deskphone designed for business environments, offering a user-friendly interface and essential features for efficient communication. Part of the Norstar series, it is known for its ergonomic design, clear LCD display, and intuitive navigation. The phone supports advanced call management, volume control, and handsfree speaker functionality, making it ideal for daily office use. Compatible with IP Office systems, the T7208 is a reliable choice for businesses seeking a balance between simplicity and functionality in their telephony solutions.
1.2 Key Features of the T7208 Model
The Nortel T7208 features a handsfree speakerphone, adjustable volume control, and a mute button for privacy during calls. It also includes programmable buttons for custom functions and overlays, enabling users to tailor their communication experience. The phone supports voicemail integration and call management features like hold, transfer, and conference calling. Its compatibility with IP Office systems ensures seamless integration into business environments, making it a versatile and efficient communication tool for office settings.

Installation and Setup
The Nortel T7208 installation involves physical setup and initial configuration. Follow guidelines for connecting cables, ensuring proper power supply, and registering the phone with the system.
2.1 Physical Installation of the T7208
Physically installing the Nortel T7208 involves placing the phone on a flat surface and connecting the necessary cables. Ensure the power supply is correctly linked and the handset is properly seated in its cradle. Connect the Ethernet cable to the appropriate port for network integration. Mounting the phone on a wall is optional, using the provided hardware. Always refer to the manual for precise cable management and safety guidelines to avoid damage or connectivity issues.
2.2 Initial Configuration and Settings
After physical installation, configure the T7208 by setting the date, time, and ring type. Use the menu to adjust volume levels and enable features like voicemail. Ensure the phone is registered with the IP Office system. Refer to the user manual for step-by-step guidance on activating advanced features and customizing settings to meet individual preferences. Proper configuration ensures seamless functionality and optimal performance of the telephone.

Basic Operations
The T7208 supports making and answering calls, volume adjustment, and speakerphone use. It also offers call management features like hold, transfer, and conference capabilities for efficient communication.
3.1 Making and Answering Calls
To make a call on the Nortel T7208, simply lift the handset and dial the desired number using the keypad. For hands-free calling, press the speakerphone button. To answer an incoming call, lift the handset or press the speakerphone button. If multiple lines are active, use the navigation buttons to select the desired line before answering. The T7208 also supports call management features, allowing you to place calls on hold or transfer them to other extensions seamlessly. This ensures efficient communication and multitasking during calls.
3.2 Volume Control and Speakerphone Usage
Adjust the volume on your Nortel T7208 by using the volume control buttons, typically marked with plus and minus signs or a speaker icon. These buttons regulate the volume for the handset, speakerphone, and ringer. To use the speakerphone, press the dedicated “Handsfree” or speaker icon button. This allows hands-free conversations. During a call, you can switch between the handset and speakerphone by pressing the speakerphone button again. The mute button, often located near the volume controls, deactivates the microphone for privacy during calls.
3.3 Call Management (Hold, Transfer, Conference)
To manage calls on the Nortel T7208, press the Hold button to place the current call on hold; the LED will flash, indicating the call is on hold. For transfers, press Feature followed by the Transfer button, dial the extension or number, and announce the call before completing the transfer. To initiate a conference, press Feature and the Conference button, then dial the participant’s number or extension to add them to the call, allowing multiple parties to communicate simultaneously.

Advanced Features
The T7208 offers advanced features such as programmable buttons, voicemail integration, call forwarding, and overlay programming for enhanced productivity and customization in business communication settings.
4.1 Programming Buttons and Overlays
Programmable buttons on the T7208 allow customization for features like voicemail, call forwarding, and speed dial. Users can assign functions to buttons using the phone’s menu or an overlay. Overlays enable labeling buttons for clarity, ensuring easy access to frequently used features. The process involves removing the button lens, writing labels, and reapplying the strip. This feature enhances productivity by personalizing the phone to meet individual or team needs, streamlining communication workflows efficiently.
4.2 Using Voicemail on the T7208
The T7208 supports advanced voicemail features, allowing users to manage messages efficiently. Access voicemail by dialing the designated code or using a programmed button. Follow voice prompts to retrieve, save, or delete messages; Ensure your mailbox is set up with a password for security. Customize greetings and notification settings as needed. Voicemail enhances communication by enabling callers to leave messages when you’re unavailable, ensuring no important calls are missed.
4.3 Call Forwarding and Redirection
Call forwarding on the T7208 allows users to redirect incoming calls to another extension or external number, ensuring calls are never missed. To set up, press the feature button and enter the forwarding code, followed by the target number. Types include unconditional forwarding or forwarding when the line is busy or unanswered. Activate and deactivate using specific codes or menu options. This feature enhances flexibility, enabling calls to reach you or your team regardless of location, while maintaining seamless communication flow.
Phone Layout and Labeling
The T7208 features a user-friendly layout with a telephone light, volume control, mute button, and programmable buttons. Labeling buttons involves removing the plastic lens and writing names on the label strip for easy identification.
5.1 Understanding the T7208 Button Layout
The T7208 features a logical button layout designed for efficiency. Key components include the telephone light, volume control, mute button, and headset button. Programmable buttons allow customization for lines, intercom, or features. The layout is intuitive, with buttons grouped by function, making it easy to navigate during calls. Understanding the button layout enhances productivity and simplifies operation for users.
5.2 How to Label Your Buttons
To label your T7208 buttons, remove the plastic lens and button label strip. Write the name of each button on the strip, ensuring clarity. Replace the strip and lens securely. This customization helps users quickly identify button functions, enhancing efficiency. Proper labeling is essential for streamlined operation and easy access to features like lines, intercom, or programmed settings.
Maintenance and Troubleshooting
Regularly clean the handset and buttons to maintain functionality. Check for firmware updates and ensure all connections are secure. Troubleshoot common issues like call quality problems or button malfunctions by consulting the user manual or contacting support.
6.1 Regular Maintenance Tips
Regular maintenance ensures optimal performance of the Nortel T7208. Clean the handset and buttons with a soft cloth to prevent dust buildup. Check for firmware updates periodically to stay current with features and security patches. Inspect all cables and connections for damage or loose links, ensuring they are securely plugged in. Additionally, review the user manual for specific maintenance routines tailored to your phone system. This proactive approach will help prevent unexpected issues and extend the lifespan of your device.
6.2 Troubleshooting Common Issues
Common issues with the Nortel T7208 can often be resolved with simple troubleshooting steps. If there is no dial tone, check the handset and line connections. For static or poor sound quality, clean the handset or replace it if damaged. If buttons are unresponsive, restart the phone or reprogram the buttons. For feature-related issues, refer to the user manual or contact support. Regularly updating firmware and ensuring all cables are securely connected can prevent many problems. Addressing issues promptly ensures uninterrupted communication.

Additional Resources
Access the official Nortel T7208 manuals, including the Quick Programming Manual and User Guide, via the Nortel Networks website or authorized support platforms for free download.
7.1 Accessing Online Manuals and Guides
Various Nortel T7208 manuals are available for free download from the official Nortel Networks website. These include the Quick Programming Manual, User Manual, and Installation Instructions. Additionally, resources like the Norstar T7208 Telephone User Card provide quick reference guides for features and programming. Visit support.avaya.com to access these materials, ensuring you have comprehensive guidance for your phone’s operation and maintenance.

7.2 Contacting Support for Assistance
For technical support, visit the official Avaya support website. Heritage Nortel Products can be accessed under the specific license information section. Additionally, Nortel Networks provides extensive resources and contact options through their official website. Users can also reach out via phone or email for personalized assistance with troubleshooting or advanced feature setups. Ensure to have your phone model and serial number ready for efficient support service.
Leave a Reply
You must be logged in to post a comment.