Welcome to the Farberware Deep Fryer Manual‚ your guide to safe and effective deep frying. This manual provides essential instructions for optimal performance and safety.
1.1 Overview of the Farberware Deep Fryer Models
The Farberware Deep Fryer models‚ such as the 4L Dual Deep Fryer (model 103736) and the 2;5L Single Deep Fryer (model 103737)‚ are designed for home cooking. These fryers feature easy temperature control‚ a viewing window‚ and a robust design for frying various foods like French fries‚ chicken‚ and fish. They offer convenient cooking solutions with safety features and user-friendly interfaces.
1.2 Importance of Reading the Manual Before Use
Reading the Farberware Deep Fryer manual is crucial for safe and effective operation. It outlines essential safety precautions‚ such as avoiding hot surfaces and proper electric shock prevention. Understanding the manual ensures you maximize the fryer’s features‚ avoid damage‚ and troubleshoot common issues. It also guides you on maintenance and optimal frying techniques for delicious results.
Safety Precautions and Guidelines
Always follow safety guidelines to prevent accidents. Avoid touching hot surfaces‚ use handles‚ and keep children away. Ensure proper electrical connections and never immerse cords in water.
2.1 General Safety Tips for Deep Fryer Usage
Always prioritize safety when using your Farberware Deep Fryer. Read the manual thoroughly before first use. Never touch hot surfaces or let children operate the fryer. Keep the appliance away from water to avoid electrical shock. Use the provided handles to avoid burns. Ensure the fryer is placed on a stable‚ heat-resistant surface. Regularly inspect cords and plugs for damage. Follow all guidelines to ensure safe and effective frying.
2.2 Specific Safety Warnings for Farberware Models
Adhere to model-specific safety warnings for your Farberware Deep Fryer. Never operate the fryer without the basket‚ as this can cause oil splatter. For models with oil filtration systems‚ ensure the oil is cool before filtering. Avoid immersing electrical components in water. For models like the 103736 and 563865679‚ keep the lid closed during frying to prevent splashes. Always use the provided handles to lift or move the fryer.
Key Features and Parts of the Farberware Deep Fryer
Farberware Deep Fryers feature a 4L capacity‚ adjustable temperature control‚ and a viewing window. Essential parts include the frying basket‚ lid‚ and handles for safe operation.
3.1 Understanding the Control Panel and Settings
The Farberware Deep Fryer’s control panel features easy-to-use temperature settings‚ allowing precise control for various foods. A viewing window lets you monitor frying progress without opening the lid. Safety features include a reset button and automatic shut-off. Adjust the thermostat to achieve ideal frying temperatures‚ ensuring crispy results. Proper use of these settings enhances cooking efficiency and safety‚ making the fryer user-friendly for all skill levels.
3.2 Identifying Key Components Like the Basket and Lid
The Farberware Deep Fryer includes a durable basket with a handle for easy food removal and a secure lid to prevent splatters. The lid features a viewing window‚ allowing you to monitor frying progress without opening it. Additional components like the reset button and safety switch ensure safe operation. These parts are designed for convenience‚ safety‚ and efficient frying‚ making the fryer both functional and user-friendly.

Operating the Farberware Deep Fryer
Plug in the fryer‚ set the desired temperature‚ and prepare food as instructed. Use the basket for safe frying and monitor progress through the viewing window.
4.1 Assembly and Initial Setup Instructions
Unpack the Farberware Deep Fryer and ensure all components‚ including the basket and lid‚ are included. Wash the basket and fryer with warm soapy water before first use. Attach the basket securely to the handle and ensure the lid is properly aligned. Place the fryer on a stable‚ heat-resistant surface. Plug in the unit and allow it to preheat to the desired temperature. Always use the handles to avoid burns and ensure the cord is kept away from hot surfaces.
4.2 Step-by-Step Guide to Frying Food Safely
Preheat the Farberware Deep Fryer to the desired temperature using the control panel. Prepare food by patting it dry to prevent splattering. Carefully place food in the basket‚ ensuring it is not overcrowded. Lower the basket gently and fry for the recommended time. Avoid touching hot surfaces or splashing oil. Once cooked‚ lift the basket and drain excess oil on paper towels. Always keep children away during operation.

Maintenance and Cleaning Tips
Regularly clean the Farberware Deep Fryer after use by washing the basket and lid with mild detergent. Dry thoroughly to prevent rust and maintain performance.
5.1 How to Clean the Deep Fryer After Use
After each use‚ unplug the Farberware Deep Fryer and let it cool. Wash the basket and lid with mild detergent and warm water. Avoid using abrasive cleaners. Wipe the exterior with a damp cloth. Dry all parts thoroughly to prevent rust. Regular cleaning ensures optimal performance and longevity of your deep fryer; Some parts may be dishwasher-safe‚ depending on the model.
5.2 Tips for Maintaining the Fryer’s Performance
To maintain your Farberware Deep Fryer’s performance‚ ensure it is clean after each use. Avoid food residue buildup‚ as it can affect frying efficiency. Store the fryer in a dry place and regularly inspect the heating element and thermostat. Replace worn-out parts promptly and avoid using abrasive cleaners that might damage the surfaces. Follow the manual’s guidelines for optimal maintenance and longevity.

Troubleshooting Common Issues
Identify and resolve issues like the fryer not heating or uneven cooking. Check power supply‚ reset button‚ and ensure proper oil levels. Refer to error codes for solutions.
6.1 Diagnosing and Solving Operational Problems
Common issues include the fryer not heating or oil not draining properly. Check the power cord connection and ensure the reset button is functioning. If the fryer overheats‚ allow it to cool before restarting. For uneven frying‚ ensure the basket is not overloaded. Refer to the manual for specific error codes and solutions. Regular cleaning and maintenance can prevent many operational issues. Always unplug the fryer before troubleshooting. Ensure all parts are securely in place‚ as loose components can disrupt performance. If problems persist‚ consult the warranty or contact customer support for assistance. Proper diagnosis and timely fixes will extend the fryer’s lifespan and ensure safe operation. Always follow the manufacturer’s guidelines for troubleshooting to avoid further complications. Keep the user manual handy for quick reference.
6.2 Resetting the Deep Fryer and Error Codes
To reset the Farberware Deep Fryer‚ unplug it‚ wait 30 seconds‚ and plug it back in. If an error code appears‚ refer to the manual for specific meanings. Common codes like E1 or E2 indicate issues like overheating or sensor malfunctions. Resetting may resolve these‚ but persistent errors require professional attention; Always follow the manual’s guidance for resetting and addressing error codes to ensure safety and proper function. Regular maintenance can help prevent such issues.
Recipes and Cooking Ideas
Discover delicious recipes for French fries‚ chicken‚ and fish using your Farberware Deep Fryer. Explore crispy snacks and meals with easy-to-follow cooking ideas for perfect results.
7.1 Popular Foods to Fry Using the Farberware Deep Fryer
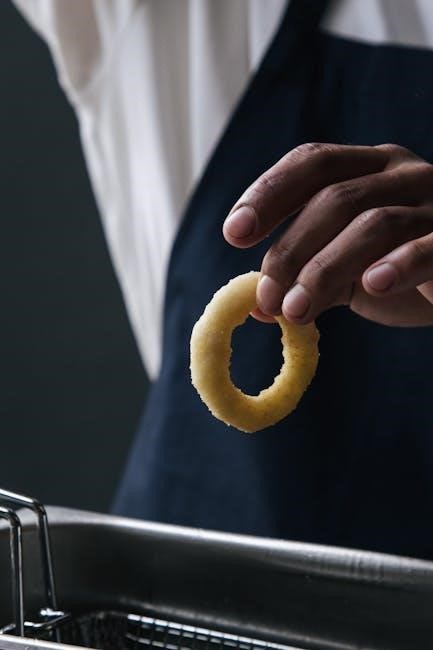
French fries‚ chicken pieces‚ and fish are popular choices for frying. Try crispy doughnuts‚ onion rings‚ or vegetables like zucchini and pickles for a delicious twist. The Farberware Deep Fryer ensures golden‚ evenly cooked results every time‚ making it perfect for snacks‚ meals‚ or desserts. Experiment with different seasonings and batters for varied flavors and textures‚ achieving restaurant-quality dishes at home effortlessly.
7.2 Tips for Achieving Perfect Frying Results
For perfect frying‚ ensure the oil reaches the ideal temperature (usually 350°F). Avoid overcrowding the basket for even cooking. Pat food dry before frying to prevent oil splatters. Use the right type of oil‚ like vegetable or peanut oil‚ for optimal flavor. Don’t open the lid too soon‚ as this can lower the temperature. Adjust cooking times based on food thickness for crispy‚ golden results every time.

Warranty and Customer Support Information
Your Farberware Deep Fryer is backed by a comprehensive warranty. For details‚ refer to the manual or contact customer support at 1-855-451-2897 for assistance.
8.1 Understanding the Warranty Coverage
The Farberware Deep Fryer is covered by a limited warranty that protects against defects in materials and workmanship. The warranty period varies by model‚ typically covering parts and labor for one year from purchase. For full details‚ including warranty exclusions and terms‚ refer to the manual or contact customer support. Proper registration and maintenance may be required to uphold warranty coverage.
8.2 Contacting Farberware Customer Service
For inquiries‚ troubleshooting‚ or warranty claims‚ contact Farberware Customer Service at 1-855-451-2897 (US). Visit their official website or refer to the manual for additional support options. Representatives are available to assist with product-related questions‚ ensuring a smooth experience with your deep fryer. Customer service is committed to resolving issues promptly and efficiently.
Where to Find the Farberware Deep Fryer Manual Online
The Farberware Deep Fryer manual can be found on official sources like ManualsLib or Farberware’s website‚ offering downloads for models such as the 4L Dual Deep Fryer.
9.1 Official Sources for Downloading the Manual
The Farberware Deep Fryer manual is available for download on official sources like ManualsLib and Farberware’s official website. These platforms provide free access to PDF versions of the manual‚ including models like the 4L Dual Deep Fryer. Simply search for your specific model number to find and download the manual easily.
9.2 Alternative Websites and Resources
Besides official sources‚ alternative websites like ManualsDir.com and ApplianceFactoryParts offer downloadable versions of the Farberware Deep Fryer manual. These platforms provide easy access to user manuals for various models‚ including the 4L Dual Deep Fryer. They are reliable options if the official website is unavailable or if you prefer additional resources for troubleshooting or maintenance.
Common Mistakes to Avoid When Using the Farberware Deep Fryer
- Overloading the basket reduces frying efficiency and can lead to undercooked food.
- Ignoring safety guidelines‚ such as not using handles when the fryer is hot‚ can cause accidents.
10.1 Overloading the Basket and Other Missteps
Overloading the basket is a common mistake that can lead to uneven cooking and food sticking together. Always follow the recommended capacity guidelines. Additionally‚ failing to preheat the fryer properly or using wet batter can result in greasy or undercooked food. Avoid these missteps to ensure crispy‚ perfectly fried results every time and maintain your fryer’s performance.
10.2 Ignoring Safety Guidelines and Maintenance
Neglecting safety guidelines and maintenance can lead to accidents and reduce the fryer’s lifespan. Always read the manual before use and avoid touching hot surfaces. Regular cleaning prevents oil buildup and bacteria growth. Ignoring these steps can result in malfunction or fire hazards. Proper upkeep ensures safe operation and optimal performance of your Farberware Deep Fryer.